layui框架是一款采用自身模块规范编写的前端UI框架,门槛极低,拿来即用。这篇文章主要为大家详细介绍了layui标签输入框inputTags,文中示例代码介绍的非常详细,具有一定的参考价值,感兴趣的小伙伴们可以参考一下。

layui标签输入框inputTags样式:

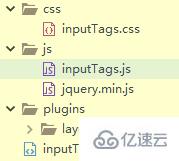
目录结构:
页面代码:
<!DOCTYPE html>
<html>

	<head>
		<meta charset="UTF-8">
		<title>inputTags</title>
		<link rel="stylesheet" href="plugins/layui/css/layui.css" />

	</head>

	<body>
		<div class="tags" id="tags">
			<input type="text" name="" id="inputTags" placeholder="回车生成标签" autocomplete="off">
		</div>
	</body>

</html>
<script type="text/javascript" src="plugins/layui/layui.js"></script>
<script>
	layui.config({
		base: 'js/',
	}).use(['inputTags'], function() {
		var inputTags = layui.inputTags;
		inputTags.render({
			elem: '#inputTags', //定义输入框input对象
			content: [], //默认标签
			aldaBtn: true, //是否开启获取所有数据的按钮
			done: function(value) { //回车后的回调
				console.log("刚刚输入标签===="+value)
			}
		})
	})
</script>**inputTags.js**
/*
* @Author: layui-2
* @Date:   2018-08-31 11:40:42
* @Last Modified by:   layui-2
* @Last Modified time: 2018-09-04 14:44:38
*/
layui.define(['jquery','layer'],function(exports){
  "use strict";
  var $ = layui.jquery,layer = layui.layer


  //外部接口
  ,inputTags = {
    config: {}

    //设置全局项
    ,set: function(options){
      var that = this;
      that.config = $.extend({}, that.config, options);
      return that;
    }

    // 事件监听
    ,on: function(events, callback){
      return layui.onevent.call(this, MOD_NAME, events, callback)
    }

  }

   //操作当前实例
  ,thisinputTags = function(){
    var that = this
    ,options = that.config;

    return {
      config: options
    }
  }

  //字符常量
  ,MOD_NAME = 'inputTags'


  // 构造器
  ,Class = function(options){
    var that = this;
    that.config = $.extend({}, that.config, inputTags.config, options);
    that.render();
  };

   //默认配置
  Class.prototype.config = {
    close: false  //默认:不开启关闭按钮
    ,theme: ''   //背景:颜色
    ,content: [] //默认标签
    ,aldaBtn: false //默认配置
  };

  // 初始化
  Class.prototype.init = function(){
    var that = this
    ,spans = ''
    ,options = that.config
    ,span = document.createElement("span"),
    spantext = $(span).text("获取全部数据").addClass('albtn');
    if(options.aldaBtn){
      $('body').append(spantext)
    }

    $.each(options.content,function(index,item){
      spans +='<span><em>'+item+'</em><button type="button" class="close">×</button></span>';
      // $('<div class="layui-flow-more"><a href="javascript:;">'+ ELEM_TEXT +'</a></div>');
    })
    options.elem.before(spans)
    that.events()
  }

  Class.prototype.render = function(){
    var that = this
    ,options = that.config
    options.elem = $(options.elem);
    that.enter()
  };

  // 回车生成标签
  Class.prototype.enter = function(){
    var that = this
    ,spans = ''
    ,options = that.config;
    options.elem.focus();
    options.elem.keypress(function(event){
      var keynum = (event.keyCode ? event.keyCode : event.which);
      if(keynum == '13'){
        var $val = options.elem.val().trim();
        if(!$val) return false;
        if(options.content.indexOf($val) == -1){
          options.content.push($val)
          that.render()
          spans ='<span><em>'+$val+'</em><button type="button" class="close">×</button></span>';
          options.elem.before(spans)
        }
        options.done && typeof options.done === 'function' && options.done($val);
        options.elem.val('');
      }
    })
  };

  //事件处理
  Class.prototype.events = function(){
     var that = this
    ,options = that.config;
    $('.albtn').on('click',function(){
      console.log(options.content)
    })
    $('#tags').on('click','.close',function(){
      var Thisremov = $(this).parent('span').remove(),
      ThisText = $(Thisremov).find('em').text();
      options.content.splice($.inArray(ThisText,options.content),1)
    })
  };

  //核心入口
  inputTags.render = function(options){
    var inst = new Class(options);
    inst.init();
    return thisinputTags.call(inst);
  };
  exports('inputTags',inputTags);
}).link('css/inputTags.css')关于关于layui标签输入框inputTags的相关介绍就分享到这里了,当然并不止以上和大家分析的办法,不过小编可以保证其准确性是绝对没问题的。希望以上内容可以对大家有一定的参考价值,可以学以致用。如果喜欢本篇文章,不妨把它分享出去让更多的人看到。
亿速云「云服务器」,即开即用、新一代英特尔至强铂金CPU、三副本存储NVMe SSD云盘,价格低至29元/月。点击查看>>
免责声明:本站发布的内容(图片、视频和文字)以原创、转载和分享为主,文章观点不代表本网站立场,如果涉及侵权请联系站长邮箱:is@yisu.com进行举报,并提供相关证据,一经查实,将立刻删除涉嫌侵权内容。


 计算
计算 安全
安全 数据库
数据库 网络和加速
网络和加速 企业服务
企业服务


