本文实例讲述了Android编程自定义搜索框实现方法。分享给大家供大家参考,具体如下:
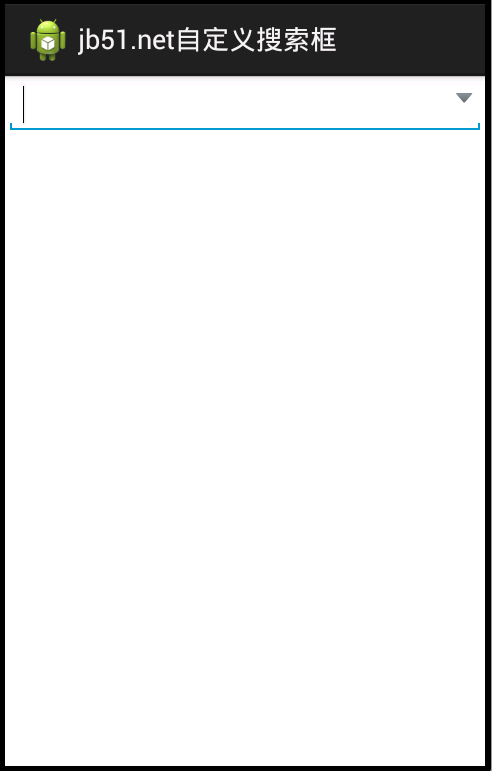
先来看效果图吧~
分析:这只是模拟了一个静态数据的删除与显示
用EditText+PopupWindow+listView实现的
步骤:
1.先写出搜索框来-activity_mian布局:
<RelativeLayout xmlns:android="http://schemas.android.com/apk/res/android"
  xmlns:tools="http://schemas.android.com/tools"
  android:layout_width="match_parent"
  android:layout_height="match_parent"
  >
  <EditText
    android:id="@+id/et"
    android:layout_width="match_parent"
    android:layout_height="wrap_content"
    />
   <ImageView
     android:layout_width="wrap_content"
     android:layout_height="wrap_content"
     android:id="@+id/click"
     android:layout_alignParentRight="true"
     android:src="@drawable/down_arrow"/>
</RelativeLayout>
效果:
2.数据的加载,把数据写在ArrayList数组中,然后用适配器加载出来~
data=new ArrayList<String>();
for(int i=0;i<20;i++){
  data.add("1000"+i);
}
list.setAdapter(new MyAdapter());
3.点击箭头出现数据,在EditText搜索框下面出现,用PopupWindow实现~
@Override
public void onClick(View v) {
  // TODO Auto-generated method stub
  switch (v.getId()) {
  case R.id.click:
    //if(popup==null){
    /*TextView tv=new TextView(this);
    tv.setText("123243");*/
      list.setAdapter(new MyAdapter());
      popup=new PopupWindow(list, et.getWidth(), 500);
      popup.setFocusable(true);
      //点击屏幕以外的区域会关掉
      popup.setOutsideTouchable(true);
      popup.setBackgroundDrawable(new ColorDrawable());
     //显示在哪个控件的下面
      popup.showAsDropDown(et);
    // }else{
    //  popup=null;
     //}
     break;
  default:
    break;
  }
}
4.listview适配器加载数据并且点击清除数据的图片,数据会消失:
class MyAdapter extends BaseAdapter{
@Override
public int getCount() {
  // TODO Auto-generated method stub
  if(data!=null){
  return data.size();
  }else {
    return 0;
  }
}
@Override
public Object getItem(int position) {
  // TODO Auto-generated method stub
  return null;
}
@Override
public long getItemId(int position) {
  // TODO Auto-generated method stub
  return 0;
}
@Override
public View getView(int position, View convertView, ViewGroup parent) {
  // TODO Auto-generated method stub
  View view=View.inflate(MainActivity.this, R.layout.listview, null);
  TextView tv=(TextView) view.findViewById(R.id.tv);
  ImageView iv=(ImageView) view.findViewById(R.id.iv);
  text=data.get(position);
  tv.setText(text);
  iv.setOnClickListener(new OnClickListener() {
    @Override
    public void onClick(View v) {
      // TODO Auto-generated method stub
      data.remove(text);
      notifyDataSetChanged();
    }
  });
  return view;
}
}
5.listview的点击,PopupWindow的消失,EditText数据的显示:
list.setOnItemClickListener(new OnItemClickListener() {
  @Override
  public void onItemClick(AdapterView<?> parent, View view, int position, long id) {
    // TODO Auto-generated method stub
    et.setText(text);
    et.setSelection(text.length());//光标在text的后面
    //PopupWindow消失
    popup.dismiss();
  }
});
这样就实现了自定义搜索框~
完整MainActivity:
public class MainActivity extends Activity implements OnClickListener{
  private ImageView click;
  private EditText et;
  private PopupWindow popup;
  ListView list;
  List<String>data;
  String text;
  @Override
  protected void onCreate(Bundle savedInstanceState) {
    super.onCreate(savedInstanceState);
    setContentView(R.layout.activity_main);
    et=(EditText) findViewById(R.id.et);
    click=(ImageView) findViewById(R.id.click);
    click.setOnClickListener(this);
    list=new ListView(this);
    list.setOnItemClickListener(new OnItemClickListener() {
      @Override
      public void onItemClick(AdapterView<?> parent, View view, int position, long id) {
        // TODO Auto-generated method stub
        et.setText(text);
        et.setSelection(text.length());//光标在text的后面
        //PopupWindow消失
        popup.dismiss();
      }
    });
    data=new ArrayList<String>();
    for(int i=0;i<20;i++){
      data.add("1000"+i);
    }
  }
  @Override
  public void onClick(View v) {
    // TODO Auto-generated method stub
    switch (v.getId()) {
    case R.id.click:
      //if(popup==null){
      /*TextView tv=new TextView(this);
      tv.setText("123243");*/
        list.setAdapter(new MyAdapter());
        popup=new PopupWindow(list, et.getWidth(), 500);
        popup.setFocusable(true);
        //点击屏幕以外的区域会关掉
        popup.setOutsideTouchable(true);
        popup.setBackgroundDrawable(new ColorDrawable());
       //显示在哪个控件的下面
        popup.showAsDropDown(et);
      // }else{
      //  popup=null;
       //}
       break;
    default:
      break;
    }
  }
  class MyAdapter extends BaseAdapter{
    @Override
    public int getCount() {
      // TODO Auto-generated method stub
      if(data!=null){
      return data.size();
      }else {
        return 0;
      }
    }
    @Override
    public Object getItem(int position) {
      // TODO Auto-generated method stub
      return null;
    }
    @Override
    public long getItemId(int position) {
      // TODO Auto-generated method stub
      return 0;
    }
    @Override
    public View getView(int position, View convertView, ViewGroup parent) {
      // TODO Auto-generated method stub
      View view=View.inflate(MainActivity.this, R.layout.listview, null);
      TextView tv=(TextView) view.findViewById(R.id.tv);
      ImageView iv=(ImageView) view.findViewById(R.id.iv);
      text=data.get(position);
      tv.setText(text);
      iv.setOnClickListener(new OnClickListener() {
        @Override
        public void onClick(View v) {
          // TODO Auto-generated method stub
          data.remove(text);
          notifyDataSetChanged();
        }
      });
      return view;
    }
 }
}
listview布局:
<?xml version="1.0" encoding="utf-8"?>
<RelativeLayout xmlns:android="http://schemas.android.com/apk/res/android"
  android:layout_width="match_parent"
  android:layout_height="match_parent"
  >
  <ImageView
    android:layout_width="wrap_content"
    android:layout_height="wrap_content"
    android:src="@drawable/user"/>
  <TextView
    android:id="@+id/tv"
    android:layout_width="wrap_content"
    android:layout_height="wrap_content"
    android:layout_marginLeft="100dp"/>
  <ImageView
    android:id="@+id/iv"
    android:layout_width="wrap_content"
    android:layout_height="wrap_content"
    android:layout_alignParentRight="true"
    android:src="@drawable/delete"/>
</RelativeLayout>
附:完整实例代码点击此处本站下载。
更多关于Android相关内容感兴趣的读者可查看本站专题:《Android开发入门与进阶教程》、《Android调试技巧与常见问题解决方法汇总》、《Android基本组件用法总结》、《Android视图View技巧总结》、《Android布局layout技巧总结》及《Android控件用法总结》
希望本文所述对大家Android程序设计有所帮助。
亿速云「云服务器」,即开即用、新一代英特尔至强铂金CPU、三副本存储NVMe SSD云盘,价格低至29元/月。点击查看>>
免责声明:本站发布的内容(图片、视频和文字)以原创、转载和分享为主,文章观点不代表本网站立场,如果涉及侵权请联系站长邮箱:is@yisu.com进行举报,并提供相关证据,一经查实,将立刻删除涉嫌侵权内容。


 计算
计算 安全
安全 数据库
数据库 网络和加速
网络和加速 企业服务
企业服务


