这篇文章主要讲解了“jQuery的事件处理实例分析”,文中的讲解内容简单清晰,易于学习与理解,下面请大家跟着小编的思路慢慢深入,一起来研究和学习“jQuery的事件处理实例分析”吧!
$(document).ready() --- onload
bind(type,[data],fn)
type:表示事件类型(click、mouseover、mouseout...)
[data]:可选参数,表示传递给事件对象的额外数据
fn:是一个函数(事件处理函数),当事件发生时执行的程序
为每一个匹配元素的特定事件(像click)绑定一个事件处理器函数
<!DOCTYPE html>
<html lang="en">
<head>
<meta charset="UTF-8">
<meta http-equiv="X-UA-Compatible" content="IE=edge">
<meta name="viewport" content="width=device-width, initial-scale=1.0">
<title>Document</title>
<script src="../jq/jquery.js"></script>
</head>
<body>
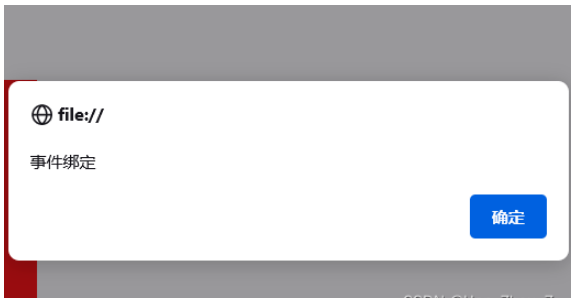
<button id="btn">确定</button>
<script>
$(function(){
$('#btn').bind('click',function(){//可以给按钮绑定其他事件
alert('事件绑定')
})
})
</script>
</body>
</html>显示效果:点击确定按钮之后,出现弹窗
<!DOCTYPE html>
<html lang="en">
<head>
    <meta charset="UTF-8">
    <meta http-equiv="X-UA-Compatible" content="IE=edge">
    <meta name="viewport" content="width=device-width, initial-scale=1.0">
    <title>Document</title>
    <script src="../jq/jquery.js"></script>
</head>
<body>
    <img src="../img/1.jpg" alt="" width="150" height="200">
    <script>
        $(function(){
            //通过鼠标的悬停、离开事件来改变img的图像
            $('img').bind('mouseover',function(){
                $(this).attr({src:'../img/2.jpg'})//this表示的是img这个元素
            })
            $('img').bind('mouseout',function(){
                $(this).attr({src:'../img/1.jpg'})
            })
        })
    </script>
</body>
</html>
显示效果:当鼠标悬停在图片上时,显示的是一个图片。当鼠标离开这个图片时,显示的是另一张图片。反复交替,没有限制。
unbind([type],[data]):删除绑定的事件
(1)不带参数:删除元素上绑定的所有事件
(2)带参数:[type]表示事件类型
<!DOCTYPE html>
<html lang="en">
<head>
    <meta charset="UTF-8">
    <meta http-equiv="X-UA-Compatible" content="IE=edge">
    <meta name="viewport" content="width=device-width, initial-scale=1.0">
    <title>Document</title>
    <script src="../jq/jquery.js"></script>
</head>
<body>
    <img src="../img/1.jpg" alt="" width="150" height="200">
    <script>
        $(function(){
            //通过鼠标的悬停、离开事件来改变img的图像
            $('img').bind('mouseover',function(){
                $(this).attr({src:'../img/2.jpg'})//this表示的是img这个元素
            })
            $('img').bind('mouseout',function(){
                $(this).attr({src:'../img/1.jpg'})
            })
            $('img').unbind('mouseout')//解绑
        })
    </script>
</body>
</html>显示效果:鼠标离开图片之后,图片不会变成1.jpg
绑定的事件只能执行一次
<!DOCTYPE html>
<html lang="en">
<head>
    <meta charset="UTF-8">
    <meta http-equiv="X-UA-Compatible" content="IE=edge">
    <meta name="viewport" content="width=device-width, initial-scale=1.0">
    <title>Document</title>
    <script src="../jq/jquery.js"></script>
</head>
<body>
    <img src="../img/1.jpg" alt="" width="150" height="200">
    <script>
        $(function(){
            //通过鼠标的悬停、离开事件来改变img的图像
            $('img').bind('mouseover',function(){
                $(this).attr({src:'../img/2.jpg'})//this表示的是img这个元素
            })
            //一次性事件绑定
            $('img').one('mouseout',function(){
                $(this).attr({src:'../img/1.jpg'})
            })
        })
    </script>
</body>
</html>显示效果:鼠标离开图片后,图片会变成1.jpg,但是这种变化只会执行一次。第二次离开图片时,就不会变成1.jpg。
<!DOCTYPE html><html lang="en"><head>    <meta charset="UTF-8">    <meta http-equiv="X-UA-Compatible" content="IE=edge">    <meta name="viewport" content="width=device-width, initial-scale=1.0">    <title>Document</title>    <script src="../jq/jquery.js"></script></head><body>    <div ></div>    <script>        $(function(){            $('div').hover(function(){                $(this).css('backgroundColor','pink')            })        })    </script></body></html><!DOCTYPE html>
<html lang="en">
<head>
    <meta charset="UTF-8">
    <meta http-equiv="X-UA-Compatible" content="IE=edge">
    <meta name="viewport" content="width=device-width, initial-scale=1.0">
    <title>Document</title>
    <script src="../jq/jquery.js"></script>
</head>
<body>
    <div ></div>
    <script>
        $(function(){
            $('div').hover(function(){
                $(this).css('backgroundColor','pink')
            })
        })
    </script>
</body>
</html>显示效果:鼠标悬停在图片上时,图片由红色变为粉色。离开图片时并不会变回原来的红色。
感谢各位的阅读,以上就是“jQuery的事件处理实例分析”的内容了,经过本文的学习后,相信大家对jQuery的事件处理实例分析这一问题有了更深刻的体会,具体使用情况还需要大家实践验证。这里是亿速云,小编将为大家推送更多相关知识点的文章,欢迎关注!
亿速云「云服务器」,即开即用、新一代英特尔至强铂金CPU、三副本存储NVMe SSD云盘,价格低至29元/月。点击查看>>
免责声明:本站发布的内容(图片、视频和文字)以原创、转载和分享为主,文章观点不代表本网站立场,如果涉及侵权请联系站长邮箱:is@yisu.com进行举报,并提供相关证据,一经查实,将立刻删除涉嫌侵权内容。


 计算
计算 安全
安全 数据库
数据库 网络和加速
网络和加速 企业服务
企业服务


