vscode 如何搭建c/c++开发环境?相信很多没有经验的人对此束手无策,为此本文总结了问题出现的原因和解决方法,通过这篇文章希望你能解决这个问题。
vs code 配置c/c++环境
虽然平时比赛要求用的是code blocks,但是很尴尬的是我不喜欢code blocks的那个界面,平时编程感觉太白很伤眼睛。再加上最近一直在折腾个人博客,对于前端,虽然没基础,但是还是知道用vs code还不错。因此,我又开始了瞎折腾的精神。希望平时编程也能通过vs code编译c++,但是正常情况下vs code对c++编译是很不友好的。所以想要成功编译c++程序,要通过自己配置。但是我在网上搜到的教程很少有能一次解决我的问题的。所以参考了几篇博客后,总结了一下。
2019.8.6 更新文章(更改生成文件位置)
不需要更改,或者只是为了编译运行C/C++的可以直接往下看。
这个是Linux的,如果需要windows,可以自己试一试,具体应该不会差太多
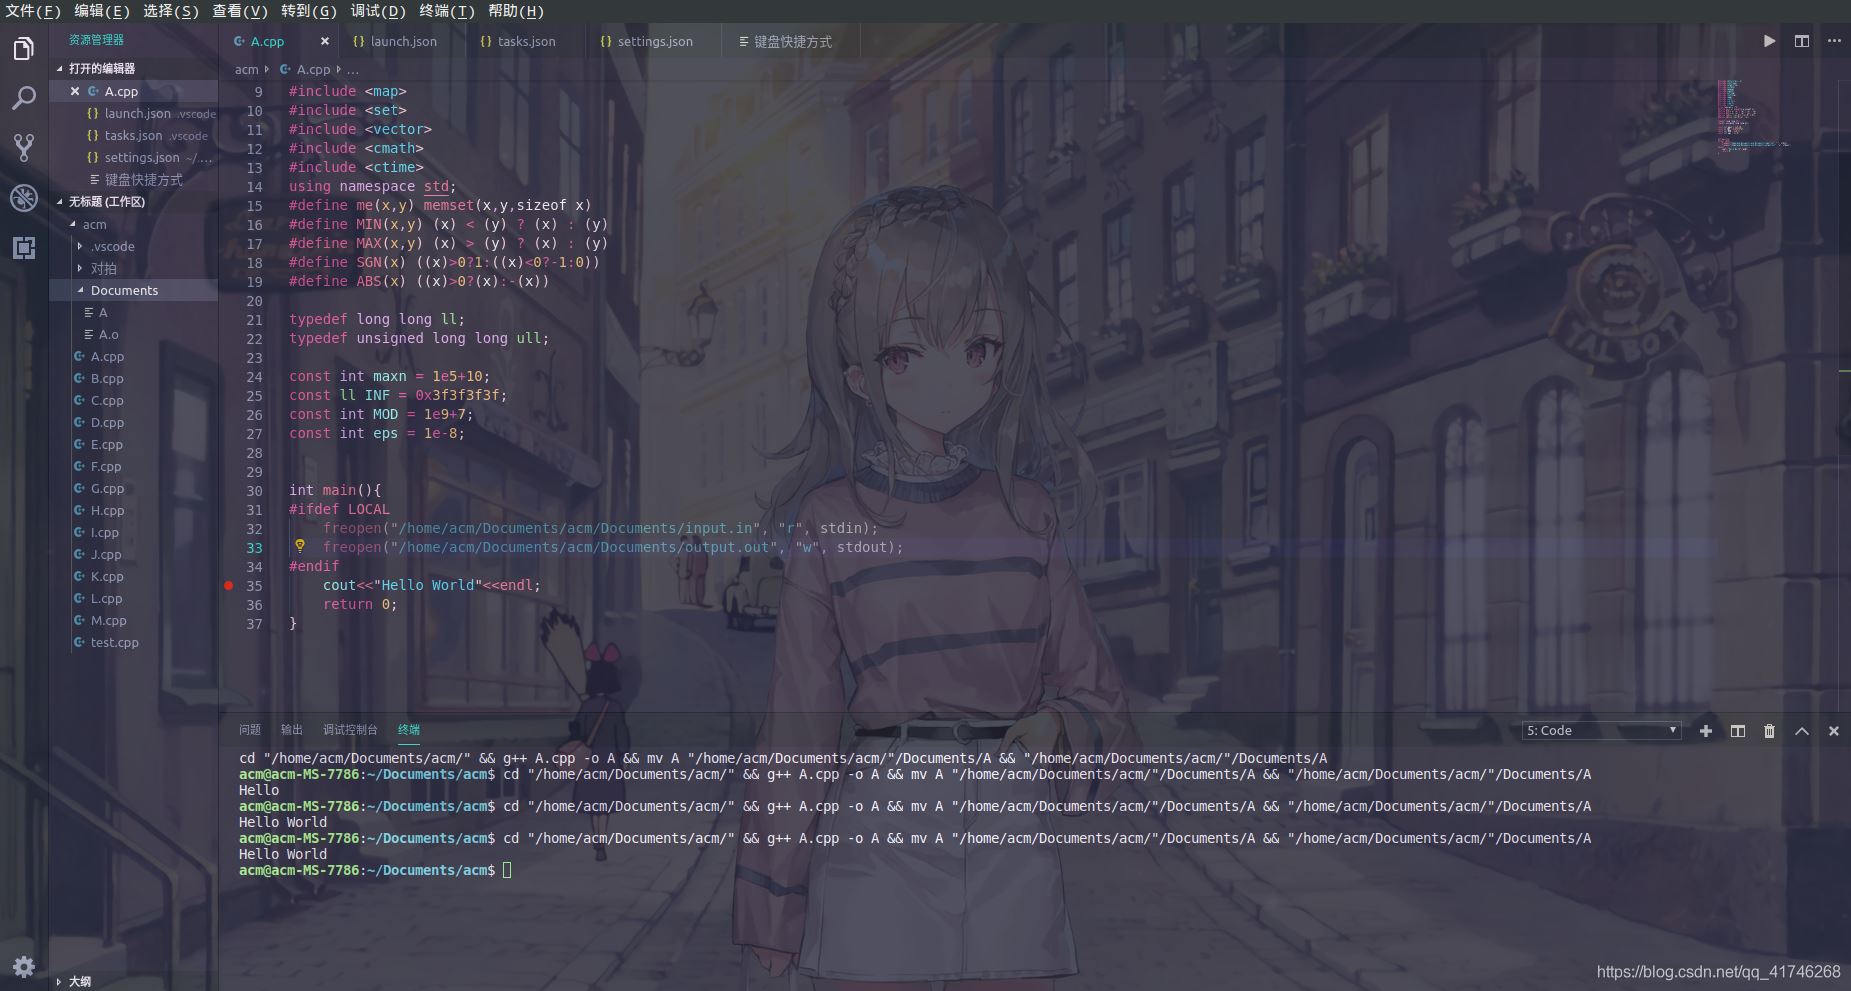
因为文件分配不够美观(我用的文件比较多,导致生成的.o文件都堆叠在一起,很丑),所以我动了在编译文件时将生成的a/a.o文件更换位置再运行,一开始打算通过命令行命令直接在其他位置生成生成文件,但是我并没有找到此类命令,然后发现编译时运行的命令是这样的cd "/home/acm/Documents/acm/" && g++ A.cpp -o A && "/home/acm/Documents/acm/"A。所以我决定在编译后的命令间加上移动文件命令mv A /home/acm/Documents/acm/Documents/这样的话就将生成文件放在了acm目录下的Documents文件夹下,不会导致多个a/a.o文件堆积在acm目录下。而task.json文件我没有找的修改方法,应该可以修改"command"实现,它可以运行脚本,但是我写不来。。。所以我是通过修改了code-runner的命令来实现的。下图为我修改后的vs code
实现方法
安装code-runner后在settings.json中找到code-runner.executorMap,将其中的cpp修改为"cpp": "cd $dir && g++ $fileName -o $fileNameWithoutExt && mv $fileNameWithoutExt $dir/Documents/$fileNameWithoutExt && $dir/Documents/$fileNameWithoutExt",其中的Documents是我自己的目录,请自己修改,其他编译命令也可以修改
我整个文件的结构如图

上面是正常的编译运行,还要一处就是调试的生成文件,这里修改launch.json即可
更改位置的task.json
{
 // See https://go.microsoft.com/fwlink/?LinkId=733558
 // for the documentation about the tasks.json format
 "version": "2.0.0",
 "command": "g++",
 "args": [
 "-g",
 "-std=c++11",
 // "${workspaceFolder}/${file}",
 // "${file}",
 "${workspaceFolder}/${fileBasenameNoExtension}.cpp",
 "-o",
 "${workspaceFolder}/Documents/${fileBasenameNoExtension}.o",
 ],// 编译命令参数
 "problemMatcher":{
 "owner": "cpp",
 "fileLocation":[
 "relative",
 "${workspaceFolder}/Documents"
 ],
 "pattern":[
 {
 "regexp": "^([^\\\\s].*)\\\\((\\\\d+,\\\\d+)\\\\):\\\\s*(.*)$",
 "file": 1,
 "location": 2,
 //"message": 3
 }
 ]
 },
 "group": {
 "kind": "build",
 "isDefault": true
 }
}
//"command": "g++",launch.json
{
 // Use IntelliSense to learn about possible attributes.
 // Hover to view descriptions of existing attributes.
 // For more information, visit: https://go.microsoft.com/fwlink/?linkid=830387
 "version": "0.2.0",
 "configurations": [
 {
 "name": "(gdb) Launch",
 "type": "cppdbg",
 "request": "launch",
 "program": "${workspaceFolder}/Documents/${fileBasenameNoExtension}.o",
 "args": [],
 "stopAtEntry": false,
 "cwd": "${workspaceFolder}/Documents",
 "environment": [],
 "externalConsole": false,
 "MIMode": "gdb",
 "miDebuggerPath": "/usr/bin/gdb",
 "preLaunchTask": "g++",
 "setupCommands": [
 {
 "description": "Enable pretty-printing for gdb",
 "text": "-enable-pretty-printing",
 "ignoreFailures": true
 }
 ]
 },
 ]
}
//"program": "${workspaceFolder}/${fileBasenameNoExtension}.o",
//"cwd": "${workspaceFolder}",2019.4.3 更新文章
因为最近有人问我三个文件里的c_cpp_properties.json会报错,我也不知道报错的具体原因,可能是因为版本更新?几个月前vscode就可以配置时不需要在加c_cpp_properties.json这个文件了。对其余两个文件单独更新一下。也因为最近重装过电脑,自己重新找教程配置了一遍。
tasks.json
 {
 "version": "2.0.0",
 "tasks": [
 {
 "label": "Build",
 "command": "g++",
 "args": [
 "-g",
 "-Wall",
 "-std=c++11",
 "-lm",
 "${file}",
 "-o",
 "${fileDirname}/${fileBasenameNoExtension}.exe"
 ],
 "presentation": {
 "reveal": "always",
 "echo": false,
 "focus": true
 },
 "problemMatcher": {
 "owner": "cpp",
 "fileLocation": "absolute",
 "pattern": {
 "regexp": "^(.*):(\\d+):(\\d+):\\s+(error):\\s+(.*)$",
 "file": 1,
 "line": 2,
 "column": 3,
 "severity": 4,
 "message": 5
 }
 }
 },

 {
 "label": "Run",
 "type": "shell",
 "dependsOn": "Build",
 "command": "${fileDirname}/${fileBasenameNoExtension}.exe",
 "args": [],
 "presentation": {
 "reveal": "always",
 "focus": true
 },
 "problemMatcher": [],
 "group": {
 "kind": "test",
 "isDefault": true
 }
 }
 ]
}launch.json
{
 // Use IntelliSense to learn about possible attributes.
 // Hover to view descriptions of existing attributes.
 // For more information, visit: https://go.microsoft.com/fwlink/?linkid=830387
 "version": "0.2.0",
 "configurations": [
 {
 "name": "(gdb) Launch",
 "type": "cppdbg",
 "request": "launch",
 "program": "${fileDirname}/${fileBasenameNoExtension}.exe",
 "args": [],
 "stopAtEntry": false,
 "cwd": "${workspaceFolder}",
 "externalConsole": false, //强调一下,我习惯用vscode自带的终端,所以你不习惯可以改为true
 "MIMode": "gdb",
 "miDebuggerPath": "E:\\vs code\\MinGW\\mingw64\\bin\\gdb.exe",
 "setupCommands": [
 {
 "description": "Enable pretty-printing for gdb",
 "text": "-enable-pretty-printing",
 "ignoreFailures": true
 }
 ],
 "preLaunchTask": "Build"
 }
 ]

}参考博客
Visual Studio Code (vscode)编译C++
整理:Visual Studio Code (vscode) 配置C、C++环境/编写运行C、C++(Windows)
下载Visual Studio Code
下载地址
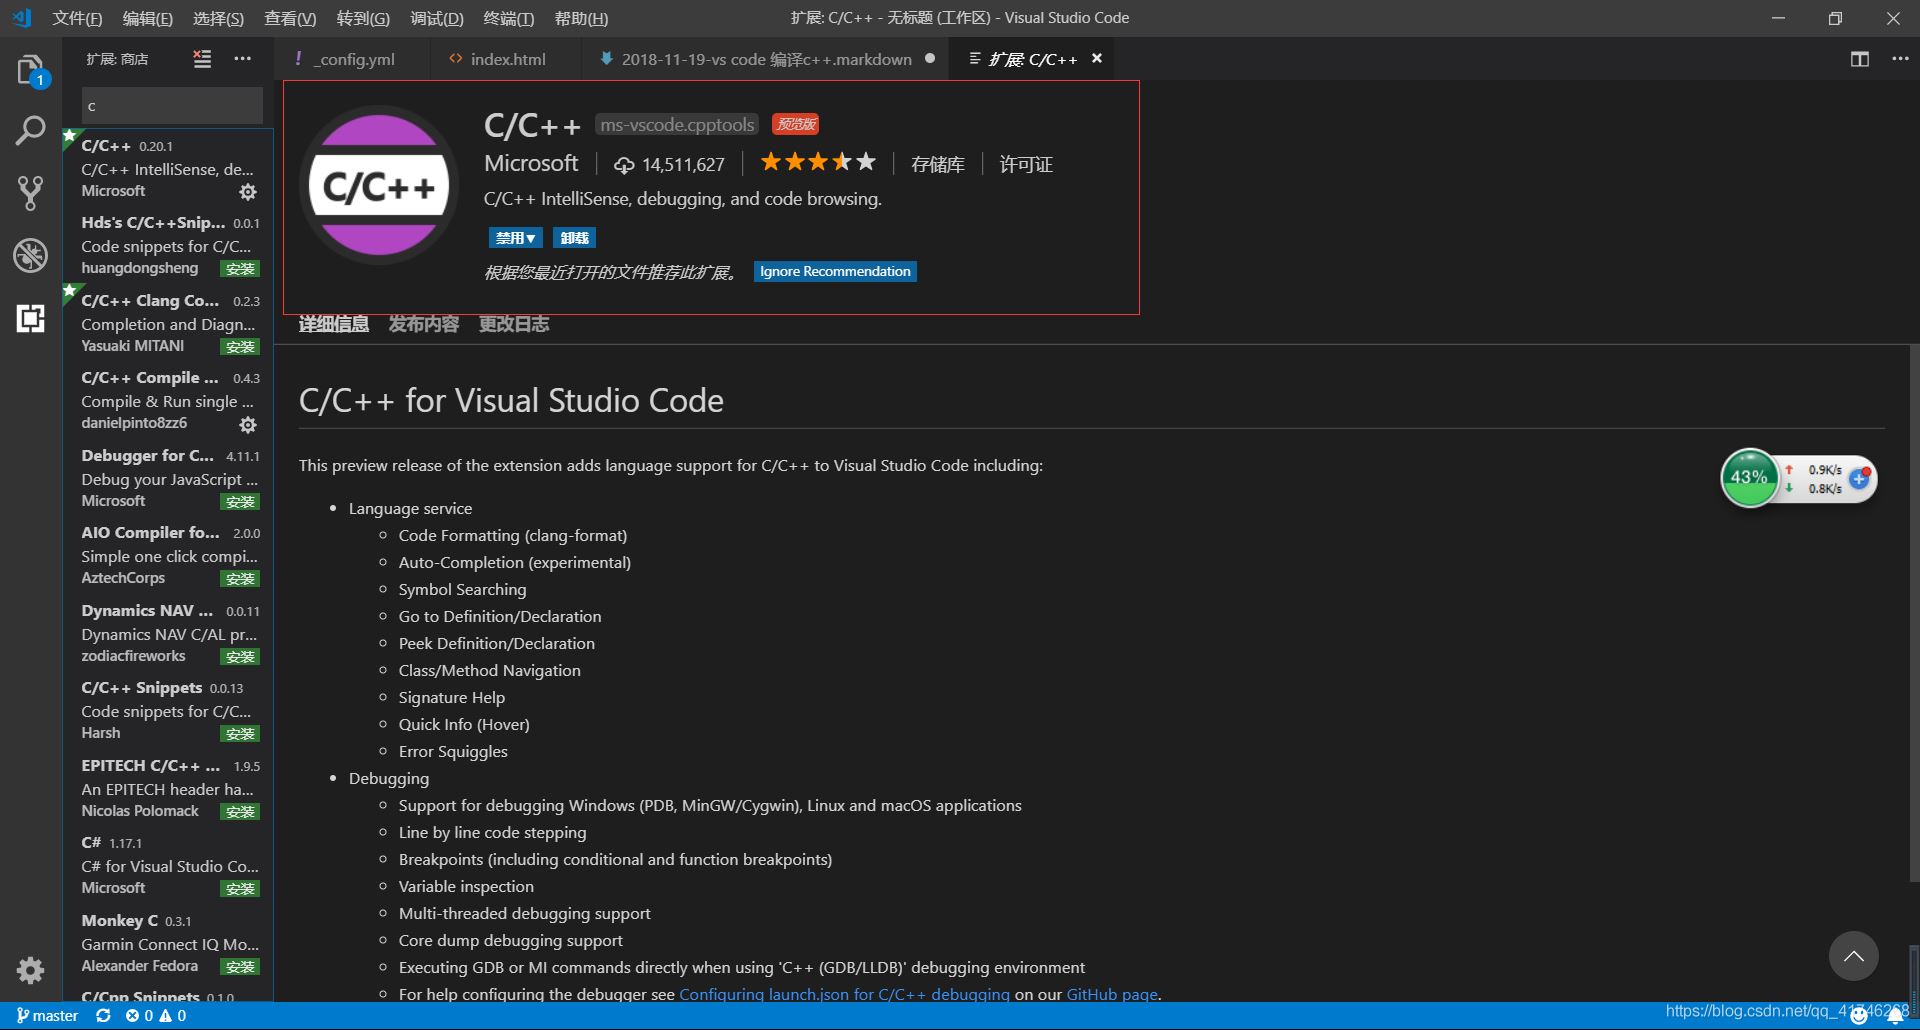
安装插件
可以选择ctrl+shift+x在商店里搜索或者选择ctrl+shift+p打开命令框输入
ext install cpptools
安装该插件
安装MinGW-W64,配置环境
据说MinGW已经不更新了?=.=所以安装MinGW-W64
Windows MinGW DOWNLOAD
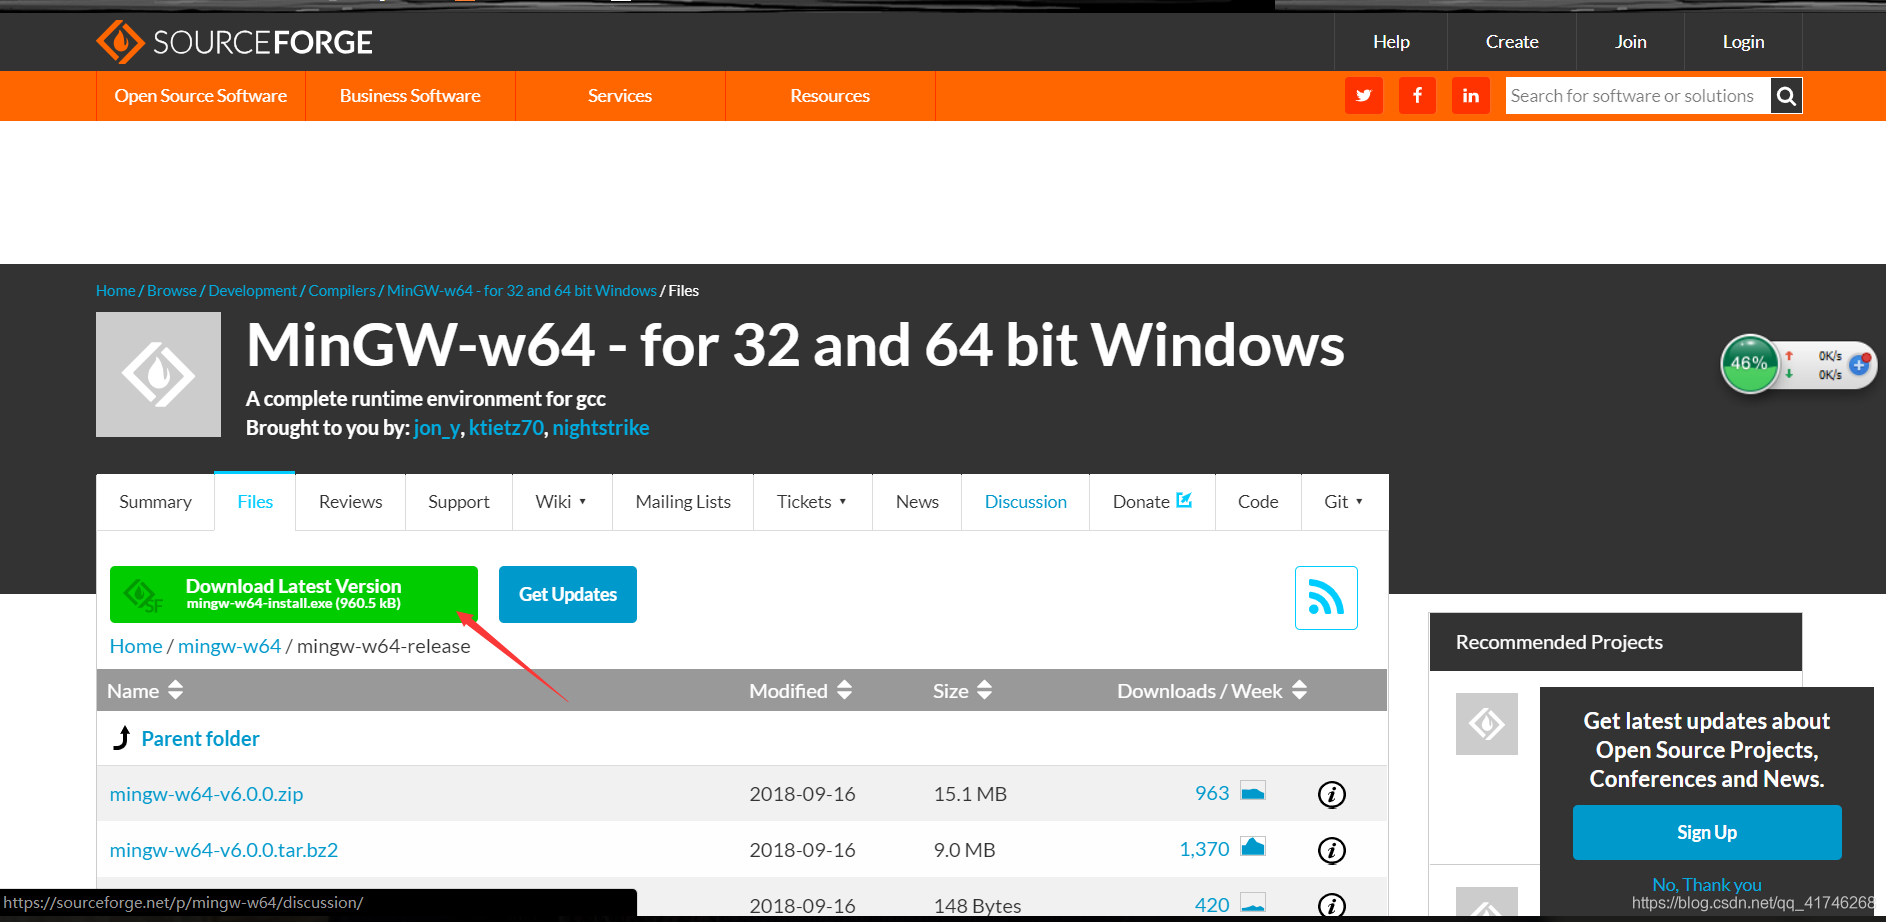
安装过程请注意自己的电脑是32还是64位的,其他的默认就可以了。还要额外注意下自己的下载地址后面要用。
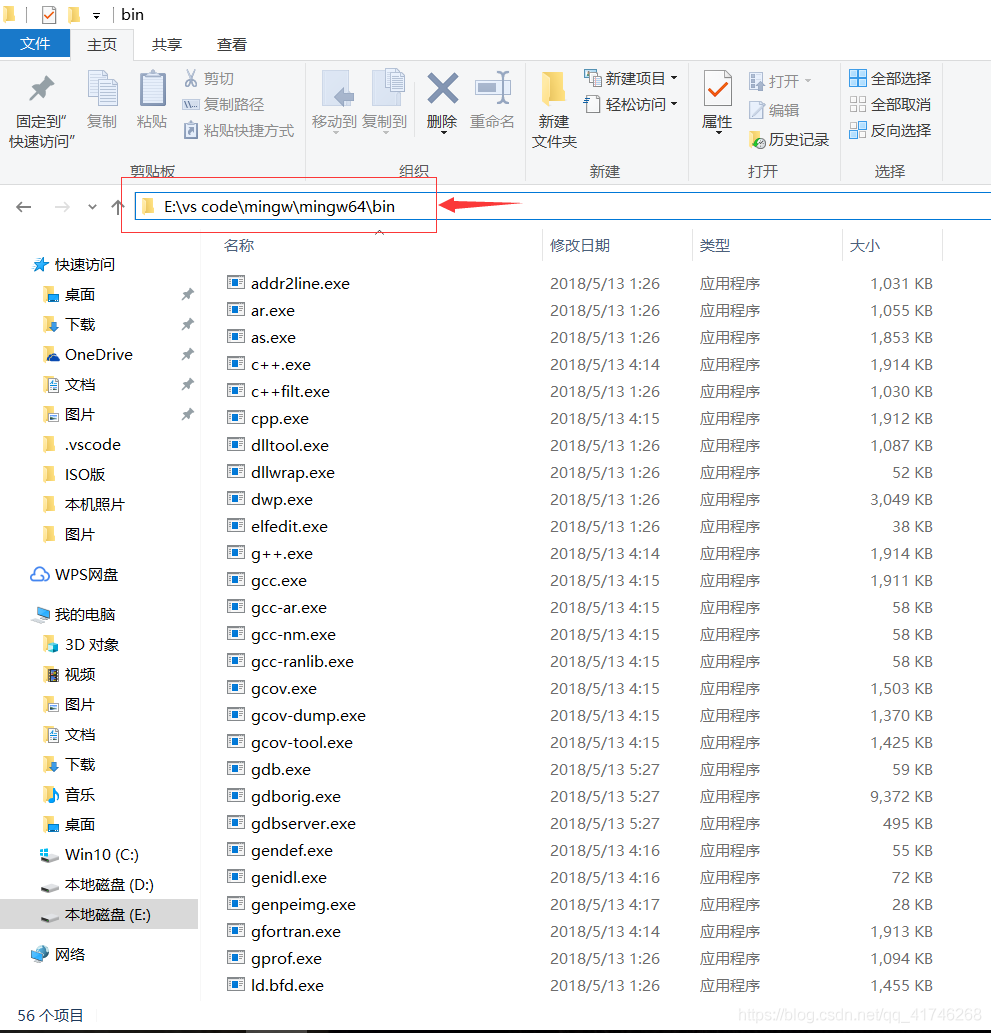
然后打开我的电脑->属性->高级系统设置->环境变量
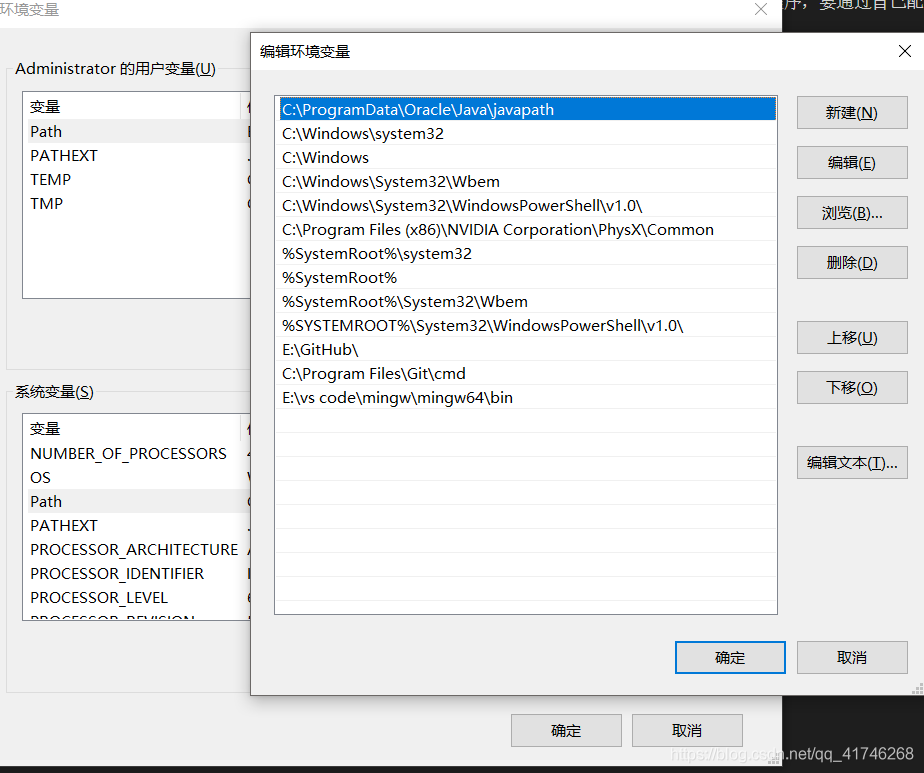
选择新建,添加刚刚记住的E:\vs code\mingw\mingw64\bin确定后退出,注意这个应该是你自己的安装地址
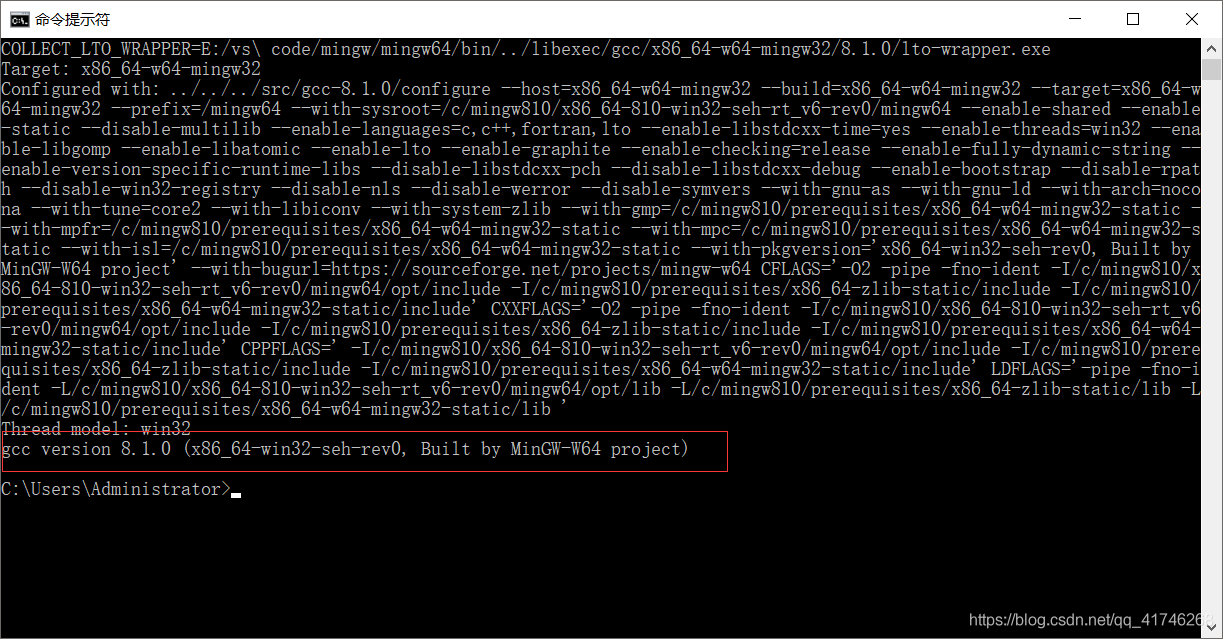
检查一下自己是否安装配置完成
打开命令提示符输入
gcc -v
配置vs code
找一个文件夹作为你的工作区,然后在这个工作区下建立一个新的文件夹,命名为.vscode,注意点是不能缺少的。然后在你建立的.vscode文件夹下建立三个.json文件,分别为tasks.json,launch.json,c_cpp_properties.json。
配置内容如下:
tasks.json
{
 "version": "2.0.0",
 "command": "g++",
 "args": ["-g","-std=c++11","${file}","-o","${workspaceRoot}\\${fileBasename}.exe"],
 "problemMatcher": {
 "owner": "cpp",
 "fileLocation": ["relative", "${workspaceRoot}"],
 "pattern": {
 "regexp": "^(.*):(\\d+):(\\d+):\\s+(warning|error):\\s+(.*)$",
 "file": 1,
 "line": 2,
 "column": 3,
 "severity": 4,
 "message": 5
 }
 }
}launch.json
{
 "version": "0.2.0",
 "configurations": [
 {
 "name": "C++ Launch (GDB)",
 "type": "cppdbg",
 "request": "launch",
 "targetArchitecture": "x86",
 "program": "${workspaceRoot}\\${fileBasename}.exe",
 "miDebuggerPath":"E:/vs code/mingw/mingw64/bin/gdb.exe",
 "args": [],
 "stopAtEntry": false,
 "cwd": "${workspaceRoot}",
 "externalConsole": true,
 "preLaunchTask": "g++"
 }
 ]
}c_cpp_properties.json
{
 "configurations": [
 {
 "name": "Win32",
 "includePath": [
 "${workspaceRoot}",
 "E:/vs code/mingw/mingw64/lib/gcc/x86_64-w64-mingw32/8.1.0/include/c++",
 "E:/vs code/mingw/mingw64/lib/gcc/x86_64-w64-mingw32/8.1.0/include/c++/x86_64-w64-mingw32",
 "E:/vs code/mingw/mingw64/lib/gcc/x86_64-w64-mingw32/8.1.0/include/c++/backward",
 "E:/vs code/mingw/mingw64/lib/gcc/x86_64-w64-mingw32/8.1.0/include",
 "E:/vs code/mingw/mingw64/lib/gcc/x86_64-w64-mingw32/8.1.0/include/c++/tr1",
 "E:/vs code/mingw/mingw64/x86_64-w64-mingw32/include"
 ],
 "defines": [
 "_DEBUG",
 "UNICODE",
 "__GNUC__=6",
 "__cdecl=__attribute__((__cdecl__))"
 ],
 "intelliSenseMode": "msvc-x64",
 "browse": {
 "path": [
 "${workspaceRoot}",
 "E:/vs code/mingw/mingw64/lib/gcc/x86_64-w64-mingw32/8.1.0/include/c++",
 "E:/vs code/mingw/mingw64/lib/gcc/x86_64-w64-mingw32/8.1.0/include/c++/x86_64-w64-mingw32",
 "E:/vs code/mingw/mingw64/lib/gcc/x86_64-w64-mingw32/8.1.0/include/c++/backward",
 "E:/vs code/mingw/mingw64/lib/gcc/x86_64-w64-mingw32/8.1.0/include",
 "E:/vs code/mingw/mingw64/lib/gcc/x86_64-w64-mingw32/8.1.0/include/c++/tr1",
 "E:/vs code/mingw/mingw64/x86_64-w64-mingw32/include"
 ]
 },
 "limitSymbolsToIncludedHeaders": true,
 "databaseFilename": "",
 "compilerPath": "E:\\vs code\\mingw\\mingw64\\bin\\gcc.exe",
 "cStandard": "c11",
 "cppStandard": "c++17"
 }
 ],
 "version": 4
}其中尤为需要注意的就是那些安装位置,配置的时候请参考我的来找到你自己安装的位置。
还有就是在一些地址输入不能用\分割要用/或者\\
例如:E:/vs code/mingw/mingw64/lib/gcc/x86_64-w64-mingw32/8.1.0/include/c++
E:/vs code/mingw是我安装时自己选的文件夹,从mingw64开始均为安装时自己出现的文件,所以请不要直接复制粘贴,注意自己的安装位置。
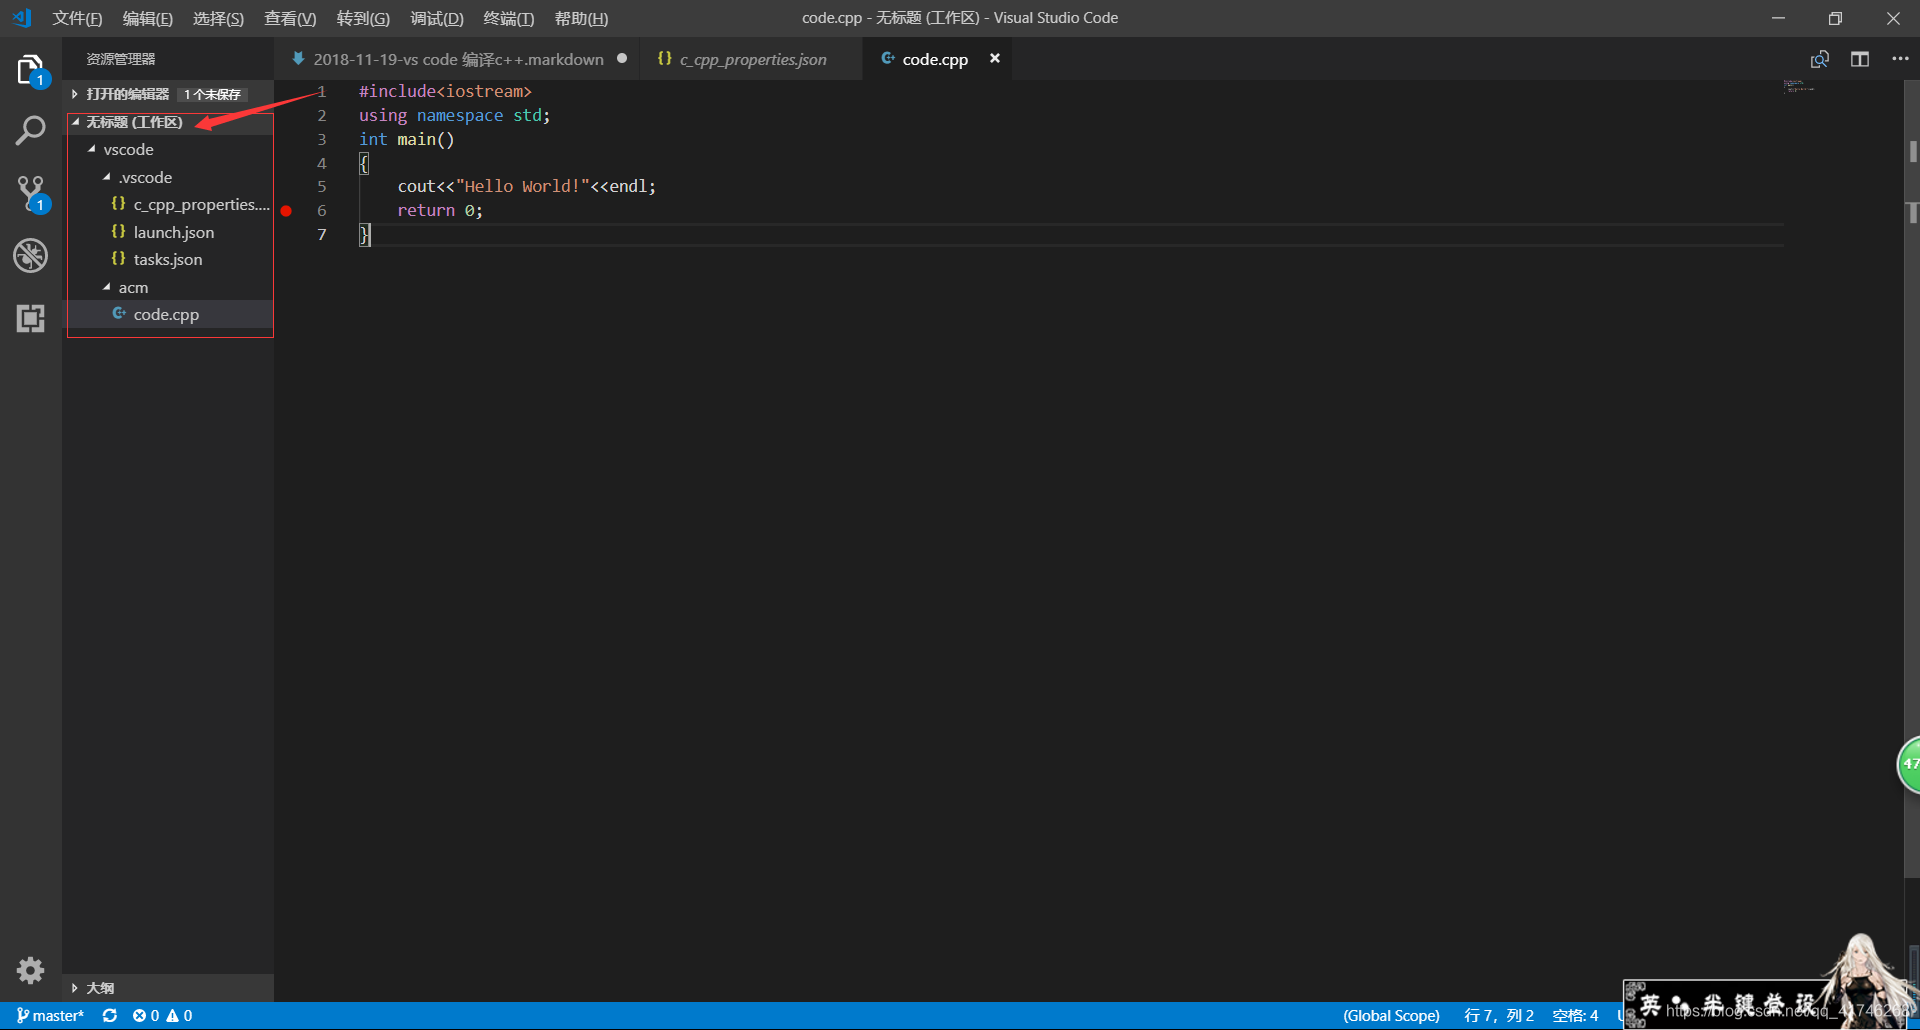
这样基本就配置完了,测试一下经典的Hello World
#include<iostream>
using namespace std;
int main()
{
 cout<<"Hello World!"<<endl;
 return 0;
}直接F6运行,或者选择在return 0处加个断点再F5,都能成功测试是否配置完成。不过加断点输出的那个会比较好看=.=
当然估计在配置过程中问题是少不了的。如果有我未提到的问题,你可以发给我邮件tanjinxiao25@gmail.com,我推荐你直接在GitHub的仓库里添加issue。因为我不能保证自己能够彻底的解决,但是在issues里总有大佬会回答问题的。
看完上述内容,你们掌握vscode 如何搭建c/c++开发环境的方法了吗?如果还想学到更多技能或想了解更多相关内容,欢迎关注亿速云行业资讯频道,感谢各位的阅读!
亿速云「云服务器」,即开即用、新一代英特尔至强铂金CPU、三副本存储NVMe SSD云盘,价格低至29元/月。点击查看>>
免责声明:本站发布的内容(图片、视频和文字)以原创、转载和分享为主,文章观点不代表本网站立场,如果涉及侵权请联系站长邮箱:is@yisu.com进行举报,并提供相关证据,一经查实,将立刻删除涉嫌侵权内容。


 计算
计算 安全
安全 数据库
数据库 网络和加速
网络和加速 企业服务
企业服务


