熟悉java web开发的同学都清楚,tomcat作为一款非常流行的servlet容器,开源,流行,配置简单,不需要赘述。个人认为,web.xml作为webapp的入口,弄清楚该文件的底层解析过程,进而可以窥探tomcat的底层工作机制,搞明白tomcat对servlert规范的实现机理。
通过本文,可以知道以下部分内容
webapp部署3种部署方式
webapp web.xml解析流程
webapp Context对象信息的生成(不包括对象的生成)
总体来说,webapp部署有三种方式:XML文件描述符、WAR包、文件目录。三种方式部署的总体流程很相似,都是一个web应用分配一个线程来处理,这里统一放到与Host内部的线程池对象中(startStopExecutor),所以有时会看到在默认配置下Tomcat启动后可能有一个叫“-startStop-”的线程还会运行一段时间才结束。但浏览这三种部署方式的实现代码,里面都是构建一个Context对象,并将构建好的Context对象与Host组件关联起来。
1.三种部署方式
    /**
     * 部署应用,该方法被org.apache.catalina.startup.HostConfig.start()调用
     * 包含3种部署方式,每个部署方式分别使用内部类,分配一个线程处理
     */
    protected void deployApps() {

        File appBase = appBase();
        File configBase = configBase();
        String[] filteredAppPaths = filterAppPaths(appBase.list());
        // Deploy XML descriptors from configBase
        deployDescriptors(configBase, configBase.list());
        // Deploy WARs
        deployWARs(appBase, filteredAppPaths);
        // Deploy expanded folders
        deployDirectories(appBase, filteredAppPaths);

}3个部署的内部类
org.apache.catalina.startup.HostConfig.DeployWar
org.apache.catalina.startup.HostConfig.DeployDescriptor
2.从部署webapp到解析web.xml序列图

找了很多网上资料,对从部署webapp开始,到开始解析web.xml这一段处理过程,没找到相关资料。个人就花时间整理出这个序列图,填补下这方面的空缺。通过该图,可以很清楚的知道,这部分主要完成了2件事:
(1)启动StandardContext,并将context对象添加到StandardHost对象中。
(2)通过触发事件机制,开始Context的解析过程。
3.web.xml解析过程
接第二步骤中序列图,开始分析web.xml的解析过程。从ContextConfig开始。
3.1 org.apache.catalina.startup.ContextConfig.configureStart()
   /**
     * Process a "contextConfig" event for this Context.
     */
    protected synchronized void configureStart() {
        // Called from StandardContext.start()

        webConfig();

        if (ok) {
            validateSecurityRoles();
        }
        // Configure an authenticator if we need one
        if (ok)
            authenticatorConfig();
        // Make our application available if no problems were encountered
        if (ok)
            context.setConfigured(true);
        else {
            log.error(sm.getString("contextConfig.unavailable"));
            context.setConfigured(false);
        }
}该方法通过调用webConfig(),具体完成解析工作,此外完成了安全验证相关内容。
3.2 org.apache.catalina.startup.ContextConfig.webConfig()方法
   /**
     * Scan the web.xml files that apply to the web application and merge them
     * using the rules defined in the spec. For the global web.xml files,
     * where there is duplicate configuration, the most specific level wins. ie
     * an application's web.xml takes precedence over the host level or global
     * web.xml file.
     */
    protected void webConfig() {

        Set<WebXml> defaults = new HashSet<WebXml>();
        defaults.add(getDefaultWebXmlFragment());
        WebXml webXml = createWebXml();

        // Parse context level web.xml
        InputSource contextWebXml = getContextWebXmlSource();
        parseWebXml(contextWebXml, webXml, false);//解析

        ServletContext sContext = context.getServletContext();

        // Ordering is important here
        // Step 1. Identify all the JARs packaged with the application
        // If the JARs have a web-fragment.xml it will be parsed at this
        // point.
        Map<String,WebXml> fragments = processJarsForWebFragments(webXml);

        // Step 2. Order the fragments.
        Set<WebXml> orderedFragments = null;
        orderedFragments =
                WebXml.orderWebFragments(webXml, fragments, sContext);

        // Step 3. Look for ServletContainerInitializer implementations
        if (ok) {
            processServletContainerInitializers();
        }


            // Step 5. Process JARs for annotations - only need to process
            // those fragments we are going to use
            if (ok) {
                processAnnotations(
                        orderedFragments, webXml.isMetadataComplete());
            }

            // Cache, if used, is no longer required so clear it
            javaClassCache.clear();
        }
                    // Step 6. Merge web-fragment.xml files into the main web.xml
                    // Step 7. Apply global defaults
              webXml.merge(defaults);
               // Step 8. Convert explicitly mentioned jsps to servlets
                    convertJsps(webXml);
                     // Step 9. Apply merged web.xml to Context
                    webXml.configureContext(context);

        // Step 9a. Make the merged web.xml available to other
        // components,

        // Always need to look for static resources
        // Step 10. Look for static resources packaged in JARs
                proce***esourceJARs(resourceJars);
                // See also StandardContext.resourcesStart() for
                // WEB-INF/classes/META-INF/resources configuration

        // Step 11. Apply the ServletContainerInitializer config to the
        // context
                    context.addServletContainerInitializer(
                            entry.getKey(), entry.getValue());
}通过源码中的注释,step1 到step11。主要工作包含:1.解析xml,2.合并xml,3.组装Context,4.编译JSP。具体步骤,参考说明
扫描应用打包的所有Jar来检索Jar包里面的web.xml配置并解析,放入内存。
对这些已经检索到的web配置进行排序。
基于SPI机制查找ServletContainerInitializer的实现,写web中间件的同学注意了,了解SPI以及 ServletContainerInitializer机制这对于你来说可能是一个很好的知识点。
处理/WEB-INF/classes下面的类的注解,某个版本Servlet支持注解方式的配置,可以猜测相关事宜就是在这里干的。
处理Jar包中的注解类。
将web配置按照一定规则合并到一起。
应用全局默认配置,还记得Tomcat包下面的conf文件夹下面有个web.xml配置文件吧。
将JSP转换为Servlet,这让我想起了若干年前对JSP的理解。
将web配置应用到Servlet上下文,也即Servlet容器。
将配置信息保存起来以供其他组件访问,使得其他组件不需要再次重复上面的步骤去获取配置信息了。
检索Jar包中的静态资源。
将ServletContainerInitializer配置到上下文。
3.3 org.apache.catalina.startup.ContextConfig.parseWebXml方法
    /**
     * Parses the given source and stores the parsed data in the given web.xml
     * representation. The byte stream will be closed at the end of the parse
     * operation.
     *
     * @param source Input source containing the XML data to be parsed
     * @param dest The object representation of common elements of web.xml and
     *             web-fragment.xml
     * @param fragment Specifies whether the source is web-fragment.xml or
     *                 web.xml
     */
    protected void parseWebXml(InputSource source, WebXml dest,
            boolean fragment) {
        XmlErrorHandler handler = new XmlErrorHandler();

        Digester digester;
        WebRuleSet ruleSet;
        if (fragment) {
            digester = webFragmentDigester;
            ruleSet = webFragmentRuleSet;
        } else {
            digester = webDigester;
            ruleSet = webRuleSet;
        }

        digester.push(dest);
        digester.setErrorHandler(handler);

        digester.parse(source);
}使用Digester 对象即系web.xml,并将结果保存到WebXml对象中。
3.4 Digester的解析规则
(1)构造Digester.createWebXmlDigester
    public void createWebXmlDigester(boolean namespaceAware,
            boolean validation) {

        boolean blockExternal = context.getXmlBlockExternal();

        webRuleSet = new WebRuleSet(false);
        webDigester = DigesterFactory.newDigester(validation,
                namespaceAware, webRuleSet, blockExternal);
        webDigester.getParser();

        webFragmentRuleSet = new WebRuleSet(true);
        webFragmentDigester = DigesterFactory.newDigester(validation,
                namespaceAware, webFragmentRuleSet, blockExternal);
        webFragmentDigester.getParser();
}(2)配置解析规则 WebRuleSet.addRuleInstances
  /**
     * <p>Add the set of Rule instances defined in this RuleSet to the
     * specified <code>Digester</code> instance, associating them with
     * our namespace URI (if any).  This method should only be called
     * by a Digester instance.</p>
     *
     * @param digester Digester instance to which the new Rule instances
     *  should be added.
     */
    @Override
    public void addRuleInstances(Digester digester) {
        digester.addRule(fullPrefix,
                         new SetPublicIdRule("setPublicId"));
        digester.addRule(fullPrefix,
                         new IgnoreAnnotationsRule());
        digester.addRule(fullPrefix,
                new VersionRule());

        // Required for both fragments and non-fragments
        digester.addRule(fullPrefix + "/absolute-ordering", absoluteOrdering);
        digester.addRule(fullPrefix + "/ordering", relativeOrdering);

        if (fragment) {
            // web-fragment.xml
            digester.addRule(fullPrefix + "/name", name);
            digester.addCallMethod(fullPrefix + "/ordering/after/name",
                                   "addAfterOrdering", 0);
            digester.addCallMethod(fullPrefix + "/ordering/after/others",
                                   "addAfterOrderingOthers");
            digester.addCallMethod(fullPrefix + "/ordering/before/name",
                                   "addBeforeOrdering", 0);
            digester.addCallMethod(fullPrefix + "/ordering/before/others",
                                   "addBeforeOrderingOthers");
        } else {
            // web.xml
            digester.addCallMethod(fullPrefix + "/absolute-ordering/name",
                                   "addAbsoluteOrdering", 0);
            digester.addCallMethod(fullPrefix + "/absolute-ordering/others",
                                   "addAbsoluteOrderingOthers");
        }

        digester.addCallMethod(fullPrefix + "/context-param",
                               "addContextParam", 2);
        digester.addCallParam(fullPrefix + "/context-param/param-name", 0);
        digester.addCallParam(fullPrefix + "/context-param/param-value", 1);

        digester.addObjectCreate(fullPrefix + "/filter",
                                 "org.apache.catalina.deploy.FilterDef");
        digester.addSetNext(fullPrefix + "/filter",
                            "addFilter",
                            "org.apache.catalina.deploy.FilterDef");

        digester.addCallMethod(fullPrefix + "/filter/description",
                               "setDescription", 0);
        digester.addCallMethod(fullPrefix + "/filter/display-name",
                               "setDisplayName", 0);
        digester.addCallMethod(fullPrefix + "/filter/filter-class",
                               "setFilterClass", 0);
        digester.addCallMethod(fullPrefix + "/filter/filter-name",
                               "setFilterName", 0);
        digester.addCallMethod(fullPrefix + "/filter/icon/large-icon",
                               "setLargeIcon", 0);
        digester.addCallMethod(fullPrefix + "/filter/icon/small-icon",
                               "setSmallIcon", 0);
        digester.addCallMethod(fullPrefix + "/filter/async-supported",
                "setAsyncSupported", 0);

        digester.addCallMethod(fullPrefix + "/filter/init-param",
                               "addInitParameter", 2);
        digester.addCallParam(fullPrefix + "/filter/init-param/param-name",
                              0);
        digester.addCallParam(fullPrefix + "/filter/init-param/param-value",
                              1);

        digester.addObjectCreate(fullPrefix + "/filter-mapping",
                                 "org.apache.catalina.deploy.FilterMap");
        digester.addSetNext(fullPrefix + "/filter-mapping",
                                 "addFilterMapping",
                                 "org.apache.catalina.deploy.FilterMap");

        digester.addCallMethod(fullPrefix + "/filter-mapping/filter-name",
                               "setFilterName", 0);
        digester.addCallMethod(fullPrefix + "/filter-mapping/servlet-name",
                               "addServletName", 0);
        digester.addCallMethod(fullPrefix + "/filter-mapping/url-pattern",
                               "addURLPattern", 0);

        digester.addCallMethod(fullPrefix + "/filter-mapping/dispatcher",
                               "setDispatcher", 0);

         digester.addCallMethod(fullPrefix + "/listener/listener-class",
                                "addListener", 0);

     ...
}在这个方法里,可以看到熟悉的“/servlet/servlet-name”,"/listener/listener-class"等等。稍微懂点Digester解析语法的基础的朋友,立刻可以知道这儿就是解析规则所在,Digester解析web.xml规则都是在此配置的。进一步梳理下,可以弄明白servlet,filter等重要对象的数据载体。
| 标签 | 数据载体类 |
| /filter | org.apache.catalina.deploy.FilterDef |
| /error-page | org.apache.catalina.deploy.ErrorPage |
| /servlet | org.apache.catalina.deploy.ServletDef |
| /filter-mapping | org.apache.catalina.deploy.FilterMap |
| /login-config | org.apache.catalina.deploy.LoginConfig |
| /session-config | org.apache.catalina.deploy.SessionConfig |
| ... | ... |
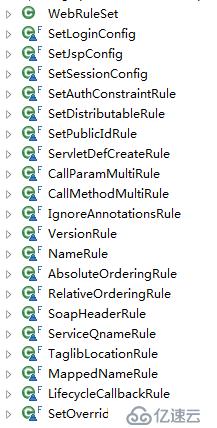
部分私有内部Rule列表
通过分析,可以知道web.xml通过解析之后,配置信息都保存在WebXml对象中了。
WebXml中持有FilterMap,ServletDef,FilterDef等等对象的聚集信息。接下来tomcat就可以按照servlet规范初始化里面的组件了,有空将进一步介绍。
亿速云「云服务器」,即开即用、新一代英特尔至强铂金CPU、三副本存储NVMe SSD云盘,价格低至29元/月。点击查看>>
免责声明:本站发布的内容(图片、视频和文字)以原创、转载和分享为主,文章观点不代表本网站立场,如果涉及侵权请联系站长邮箱:is@yisu.com进行举报,并提供相关证据,一经查实,将立刻删除涉嫌侵权内容。


 计算
计算 安全
安全 数据库
数据库 网络和加速
网络和加速 企业服务
企业服务


