这篇文章给大家分享的是有关使用纯CSS实现方块跳跃的动画的方法的内容。小编觉得挺实用的,因此分享给大家做个参考。一起跟随小编过来看看吧。
https://github.com/comehope/front-end-daily-challenges
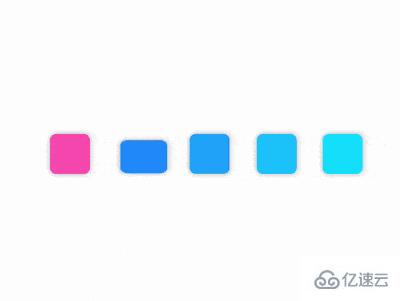
定义 dom,容器中包含 2 个子元素,分别代表 1 个女生和一群男生(4个),每个 span 元素代表 1 个人(1 个方块):
<figure class="container">
    <span class="girl"></span>
    <p class="boys">
        <span></span>
        <span></span>
        <span></span>
        <span></span>
    </p>
</figure>
居中显示:
body {
    margin: 0;
    height: 100vh;
    display: flex;
    align-items: center;
    justify-content: center;
}
定义容器尺寸和它的子元素布局:
.container {
    width: 8em;
    height: 1em;
    font-size: 35px;
    display: flex;
    justify-content: space-between;
}
画出 5 个方块,用边框作为辅助线帮助定位:
.container span {
    width: 1em;
    height: 1em;
    border: 1px dashed black; /* 辅助线 */
}

.boys {
    width: 6em;
    display: flex;
    justify-content: space-between;
}
用伪元素设置元素的样式,使它们变得柔和一些,为男生和男生填上不同的颜色,同时删掉上一步的辅助线:
.container span::before {
    content: '';
    position: absolute;
    width: inherit;
    height: inherit;
    border-radius: 15%;
    box-shadow: 0 0 0.2em rgba(0, 0, 0, 0.3);
}

.girl::before {
    background-color: hotpink;
}

.boys span::before {
    background-color: dodgerblue;
}
使 4 个男生色块的颜色逐渐变淡,增加一点层次感:
.boys span:nth-child(1)::before {
    filter: brightness(1);
}

.boys span:nth-child(2)::before {
    filter: brightness(1.15);
}

.boys span:nth-child(3)::before {
    filter: brightness(1.3);
}

.boys span:nth-child(4)::before {
    filter: brightness(1.45);
}
接下来制作动画效果。
先增加女生移动的效果,同时颜色也做渐淡处理,后面其他动画的时间要保持一致,所以把动画时长设置为变量:
.container span {
    width: 1em;
    height: 1em;
    --duration: 3s;
}

.girl {
    animation: slide var(--duration) ease-in-out infinite;
}

@keyframes slide {
    from {
        transform: translateX(0);
        filter: brightness(1);
    }

    to {
        transform: translatex(calc(8em - (1em * 1.25)));
        filter: brightness(1.45);
    }
}
然后增加第 1 个男生跳开的动画效果,注意从 15% 到 35% 旋转的原点是在元素的正上方:
.boys span {
    animation: var(--duration) ease-in-out infinite;
}

.boys span:nth-child(1) {
    animation-name: jump-off-1;
}

@keyframes jump-off-1 {
    0%, 15% {
        transform: rotate(0deg);
    }

    35%, 100% {
        transform-origin: -50% center;
        transform: rotate(-180deg);
    }
}
参考第 1 个男生的动画效果,再增加另外 3 个男生跳开的动画效果,区别只是调整了关键帧的时间,依次后延 15% 的时间:
.boys span:nth-child(2) {
    animation-name: jump-off-2;
}

.boys span:nth-child(3) {
    animation-name: jump-off-3;
}

.boys span:nth-child(4) {
    animation-name: jump-off-4;
}

@keyframes jump-off-2 {
    0%, 30% {
        transform: rotate(0deg);
    }

    50%, 100% {
        transform-origin: -50% center;
        transform: rotate(-180deg);
    }
}

@keyframes jump-off-3 {
    0%, 45% {
        transform: rotate(0deg);
    }

    65%, 100% {
        transform-origin: -50% center;
        transform: rotate(-180deg);
    }
}

@keyframes jump-off-4 {
    0%, 60% {
        transform: rotate(0deg);
    }

    80%, 100% {
        transform-origin: -50% center;
        transform: rotate(-180deg);
    }
}
为第 1 个男生增加拟人的动画效果,这个效果写在 ::before 伪元素中,动画的过程是从正常到压扁、然后抻长、再压扁、最后恢复正常,注意从 25% 到 40% 的压扁变形,因为此时主元素已经翻个儿,所以 transform-origin 的原点和 从 5% 到 15% 的压扁变形的原点不一样:
.boys span::before {
    animation: var(--duration) ease-in-out infinite;
}

.boys span:nth-child(1)::before {
    filter: brightness(1);
    animation-name: jump-down-1;
}

@keyframes jump-down-1 {
    5% {
        transform: scale(1, 1);
    }

    15% {
        transform-origin: center bottom;
        transform: scale(1.3, 0.7);
    }

    20%, 25% {
        transform-origin: center bottom;
        transform: scale(0.8, 1.4);
    }

    40% {
        transform-origin: center top;
        transform: scale(1.3, 0.7);
    }

    55%, 100% {
        transform: scale(1, 1);
    }
}
参考第 1 个男生 ::before 伪元素的动画效果,再增加另外 3 个男生拟人的动画效果,区别只是调整了关键帧的时间,依次后延 15% 的时间:
.boys span:nth-child(2)::before {
    animation-name: jump-down-2;
}

.boys span:nth-child(3)::before {
    animation-name: jump-down-3;
}

.boys span:nth-child(4)::before {
    animation-name: jump-down-4;
}

@keyframes jump-down-2 {
    20% {
        transform: scale(1, 1);
    }

    30% {
        transform-origin: center bottom;
        transform: scale(1.3, 0.7);
    }

    35%, 40% {
        transform-origin: center bottom;
        transform: scale(0.8, 1.4);
    }

    55% {
        transform-origin: center top;
        transform: scale(1.3, 0.7);
    }

    70%, 100% {
        transform: scale(1, 1);
    }
}

@keyframes jump-down-3 {
    35% {
        transform: scale(1, 1);
    }

    45% {
        transform-origin: center bottom;
        transform: scale(1.3, 0.7);
    }

    50%, 55% {
        transform-origin: center bottom;
        transform: scale(0.8, 1.4);
    }

    70% {
        transform-origin: center top;
        transform: scale(1.3, 0.7);
    }

    85%, 100% {
        transform: scale(1, 1);
    }
}

@keyframes jump-down-4 {
    50% {
        transform: scale(1, 1);
    }

    60% {
        transform-origin: center bottom;
        transform: scale(1.3, 0.7);
    }

    65%, 70% {
        transform-origin: center bottom;
        transform: scale(0.8, 1.4);
    }

    85% {
        transform-origin: center top;
        transform: scale(1.3, 0.7);
    }

    100%, 100% {
        transform: scale(1, 1);
    }
}
至此,女生从左侧移动到右侧的动画效果已经完成。
把所有动画属性都加上 alternate 参数,使所有动画都往复执行,就实现了从右侧再回到左侧的效果:
.girl {
    animation: slide var(--duration) ease-in-out infinite alternate;
}

.boys span {
    animation: var(--duration) ease-in-out infinite alternate;
}

.boys span::before {
    animation: var(--duration) ease-in-out infinite alternate;
}
感谢各位的阅读!关于使用纯CSS实现方块跳跃的动画的方法就分享到这里了,希望以上内容可以对大家有一定的帮助,让大家可以学到更多知识。如果觉得文章不错,可以把它分享出去让更多的人看到吧!
免责声明:本站发布的内容(图片、视频和文字)以原创、转载和分享为主,文章观点不代表本网站立场,如果涉及侵权请联系站长邮箱:is@yisu.com进行举报,并提供相关证据,一经查实,将立刻删除涉嫌侵权内容。


