这篇文章主要介绍springboot 2.0.8 跳转jsp页面的示例,文中介绍的非常详细,具有一定的参考价值,感兴趣的小伙伴们一定要看完!
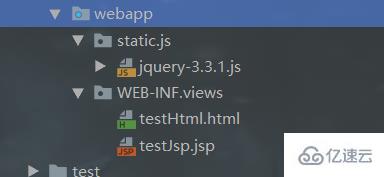
1创建目录结果和jsp文件
2配置return 返回模版 及代码
@RequestMapping(value = "/testJsp", produces = "application/json;charset=UTF-8", method = {RequestMethod.POST, RequestMethod.GET})
    public String testJsp(Model m, HttpServletRequest request, HttpServletResponse response){
        List<Map<String,Object>> list=userService.userQueryAll();
        request.setAttribute("list",list);
        log.info("进入了testJsp方法!");
        return "views/testJsp";
}3.application.yml 文件 配置 thymeleaf 模版参数
spring:
  dataSource:
    type: com.alibaba.druid.pool.DruidDataSource
    url: jdbc:mysql://localhost:3306/db-test?useUnicode=true&characterEncoding=utf8&tinyInt1isBit=false&usessl=false
    username: root
    password: 123456
    driverClassName: com.mysql.jdbc.Driver
  mvc:
    view: #新版本 1.3后可以使用
      suffix: .jsp
      prefix: /WEB-INF/
  view: #老版本 1.4后被抛弃
    suffix: .jsp
prefix: /WEB-INF/4. pom.xml 文件加入tomcat和jsp支持 ,如果是有thymeleaf架包的暂时注释掉,这里只写jsp跳转( 有thymeleaf架包的时候return模版会优先跳转html页面)
<!--tomcat支持-->
        <dependency>
            <groupId>org.springframework.boot</groupId>
            <artifactId>spring-boot-starter-tomcat</artifactId>
            <scope>provided</scope>
        </dependency>
        <dependency>
            <groupId>org.apache.tomcat.embed</groupId>
            <artifactId>tomcat-embed-jasper</artifactId>
            <scope>provided</scope>
        </dependency>
        <!--servlet依赖.-->
        <dependency>
            <groupId>javax.servlet</groupId>
            <artifactId>javax.servlet-api</artifactId>
            <version>4.0.1</version>
            <scope>provided</scope>
        </dependency>
        <!--jsp标签库-->
        <dependency>
            <groupId>javax.servlet</groupId>
            <artifactId>jstl</artifactId>
</dependency>5. jsp页面这里直接用了EL表达式
<%@ page contentType="text/html;charset=UTF-8" isELIgnored="false" pageEncoding="UTF-8" %>
<%@ taglib uri="http://java.sun.com/jstl/core_rt" prefix="c" %>
<%
    String path = request.getContextPath();
    String basePath = request.getScheme() + "://" + request.getServerName() + ":" + request.getServerPort() + path + "/";
%>
<!DOCTYPE html >
<html lang="zh-CN">
<head>
    <title>Title</title>
    <meta http-equiv="Content-Type" content="text/html; charset=utf-8"/>
    <script src="<%=basePath%>static/js/jquery-3.3.1.js" charset="utf-8"></script>
</head>
<body>
<table border="1">
    <thead>
    <tr>
        <th>序号</th>
        <th>名字</th>
        <th>号码</th>
        <th>创建时间</th>
    </tr>
    </thead>
    <tbody>
    <c:forEach items="${list}" var="listv" varStatus="status">
        <tr>
            <td>${listv.id}</td>
            <td>${listv.name}</td>
            <td>${listv.phone}</td>
            <td>${listv.create_time}</td>
        </tr>
    </c:forEach>
    </tbody>
</table>

</body>
<script type="text/javascript" charset="utf-8">

</script>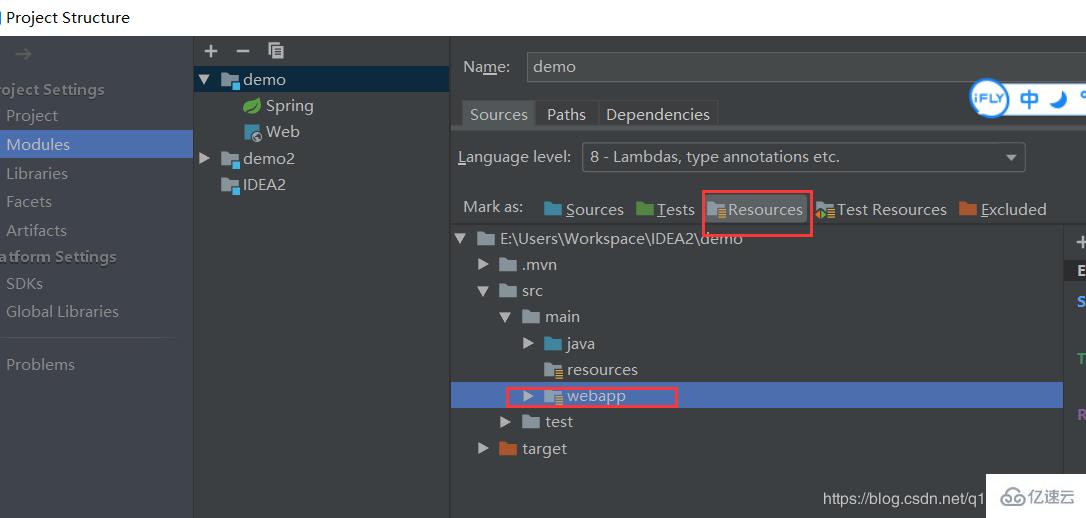
</html>6. Project Structure里面 这个一般是默认配置好了的,如果没有就要加上哦
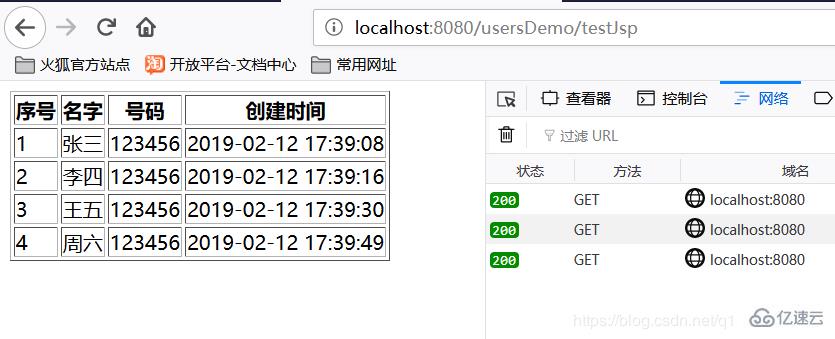
就这样启动就行了 效果图如下
以上是springboot 2.0.8 跳转jsp页面的示例的所有内容,感谢各位的阅读!希望分享的内容对大家有帮助,更多相关知识,欢迎关注亿速云行业资讯频道!
亿速云「云服务器」,即开即用、新一代英特尔至强铂金CPU、三副本存储NVMe SSD云盘,价格低至29元/月。点击查看>>
免责声明:本站发布的内容(图片、视频和文字)以原创、转载和分享为主,文章观点不代表本网站立场,如果涉及侵权请联系站长邮箱:is@yisu.com进行举报,并提供相关证据,一经查实,将立刻删除涉嫌侵权内容。


 计算
计算 安全
安全 数据库
数据库 网络和加速
网络和加速 企业服务
企业服务


