怎么配置弱网环境测试程序?针对这个问题,今天小编总结这篇有关配置弱网环境的文章,可供感兴趣的小伙伴们参考借鉴,希望对大家有所帮助。
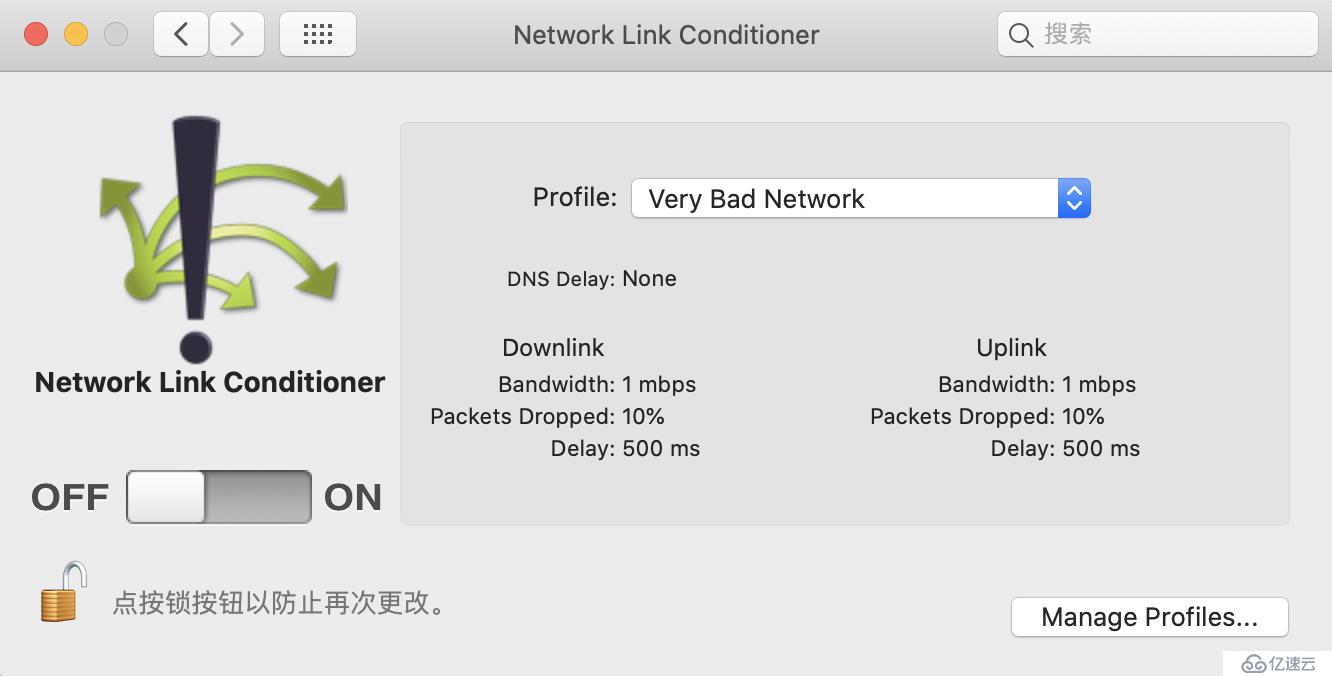
做音视频开发时经常需要模拟弱网环境,观察 app 在弱网下的表现,比如,丢包、延迟、抖动、限制带宽条件等,Mac 系统有一个弱网工具 APP,叫做 “Network Link Conditioner ” ,支持可视化地完成弱网的模拟和配置,很好用,非常推荐你使用这个工具来完成弱网的模拟。

但是如果你期望使用命令行或者使用脚本来实现弱网环境的配置,就不得不研究一下它背后的原理了,本文就是介绍 Network Link Conditioner 背后使用的系统相关的命令和服务,教大家如何使用命令行完成弱网环境的配置。
Mac OS X 10.10 以后,系统主要使用的是 `PF (Packet Filter, the BSD firewall)` 和 `dummynet(the BSD traffic shaper)` 这两个服务来模拟各种弱网环境。
dummynet
DUMMYNET(4)              BSD Kernel Interfaces Manual              DUMMYNET(4)

NAME
     dummynet -- traffic shaper, bandwidth manager and delay emulator

DESCRIPTION
     dummynet is a system facility that permits the control of traffic going
     through the various network interfaces, by applying bandwidth and queue
     size limitations, implementing different scheduling and queue management
     policies, and emulating delays and losses.

     The user interface for dummynet is implemented by the dnctl program, so
     the reader is referred to the dnctl(8) manpage for a complete description
     of the capabilities of dummynet and on how to use it.

SEE ALSO
     dnctl(8), setsockopt(2), bridge(4), ip(4), sysctl(8)

HISTORY
     dummynet was initially implemented as a testing tool for TCP congestion
     control by Luigi Rizzo <luigi@iet.unipi.it>, as described on ACM Computer
     Communication Review, Jan.97 issue.  Later it has been then modified to
     work at the ip and bridging level, integrated with the IPFW packet fil-
ter, and extended to support multiple queueing and scheduling policies.简单来说,`dummynet` 是一个流量/带宽/延时的控制工具,用户可以使用 `dnctl` 命令来配置和与之交互。
dnctl
在线文档:http://www.manpagez.com/man/8/dnctl/
DNCTL(8)                  BSD System Manager's Manual                 DNCTL(8)

NAME
     dnctl -- Traffic shaper control program

SYNOPSIS
     dnctl [-anqs] {list | show}
     dnctl [-f | -q] flush
     dnctl [-q] {delete} [number ...]
     dnctl {pipe | queue} number config config-options
     dnctl [-s [field]] {pipe | queue} {delete | list | show} [number ...]
     dnctl [-nq] [-p preproc [preproc-flags]] pathname

DESCRIPTION
     The dnctl utility is the user interface for controlling the dummynet(4)
     traffic shaper.

     dummynet operates by first using a packet filter to classify packets and
     divide them into flows, using any match pattern that can be used in dnctl
     rules.  Depending on local policies, a flow can contain packets for a
     single TCP connection, or from/to a given host, or entire subnet, or a
protocol type, etc.简单来说,`dnctl `是一个命令行工具,用于配制`dummynet`服务。
$ dnctl {pipe | queue} number config config-options`dnctl` 提供了 2 种流量控制机制,一个是 pipe,一个是 queue,前者主要用于固定带宽条件下的弱网模拟,后者则可以试验不同 pipe 使如何抢占和共享可用带宽的。通常我们选择前者来简单地模拟弱网。
`config-options` 的种类特别多,弱网条件的配置基本上都在这里了:
The following parameters can be configured for a pipe:

bw bandwidth
    Bandwidth, measured in [K|M]{bit/s|Byte/s}.
    A value of 0 (default) means unlimited bandwidth.

delay ms-delay
    Propagation delay, measured in milliseconds.

plr packet-loss-rate
    a floating-point number between 0 and 1, with 0 meaning no loss, 1 meaning 100% loss.

queue {slots | sizeKbytes}
    Queue size, in slots or KBytes.  Default value is 50 slots, which
is the typical queue size for Ethernet devices.综上所述,我们来定义一个 pipe number id 为 1,带宽限制 100Kbit/s,delay 100ms,loss:50% 的弱网环境:
// 创建配置并显示
$ sudo dnctl pipe 1 config bw 100Kbit/s delay 100 plr 0.5
$ sudo dnctl show

00001: 100.000 Kbit/s 100 ms 50 sl.plr 0.500000 0 queues (1 buckets) droptail
    mask: 0x00 0x00000000/0x0000 -> 0x00000000/0x0000

// 清空配置并显示
$ sudo dnctl -q flush
$ sudo dnctl showpf
我们再来看看另一个工具:`pf`,它是 Mac 系统的防火墙工具,我们利用它来把经过系统的流量转到我们的弱网环境进行 filter 处理。
`pf` 主要使用配置文件保存防火墙规则,语法规范上比较严谨,cat /etc/pf.conf,可看到以下已有内容:
# This file contains the main ruleset, which gets automatically loaded
# at startup.  PF will not be automatically enabled, however.  Instead,
# each component which utilizes PF is responsible for enabling and disabling
# PF via -E and -X as documented in pfctl(8).  That will ensure that PF
# is disabled only when the last enable reference is released.
#
# Care must be taken to ensure that the main ruleset does not get flushed,
# as the nested anchors rely on the anchor point defined here. In addition,
# to the anchors loaded by this file, some system services would dynamically
# insert anchors into the main ruleset. These anchors will be added only when
# the system service is used and would removed on termination of the service.
#
# See pf.conf(5) for syntax.
#
# com.apple anchor point
#
scrub-anchor "com.apple/*"
nat-anchor "com.apple/*"
rdr-anchor "com.apple/*"
dummynet-anchor "com.apple/*"
anchor "com.apple/*"
load anchor "com.apple" from "/etc/pf.anchors/com.apple"下面,我们需要来撰写属于我们自己的的规则。
1. 新建一个 pf.conf 文件
$ touch pf.conf2. 添加路由规则
规则文档:https://www.openbsd.org/faq/pf/filter.html
action [direction] [log] [quick] [on interface] [af] [proto protocol]
       [from src_addr [port src_port]] [to dst_addr [port dst_port]]
[flags tcp_flags] [state]详细参数含义可以参考文档,这里简单列出几个关键的配置:
[direction]: 流量的方向,上行:out,下行:in
[proto protocol]:协议,tcp/udp/icmp 等
[from src_addr [port src_port]]:源 ip 和 port,默认可以使用 any
[to dst_addr [port dst_port]]:目标 ip 和 port,默认可以使用 any这里我们主要示例一下如何添加规则到我们上面创建的 dummynet pipe 1
$ vi pf.conf

# 本示例的 “上行 + 下行” 都配置了弱网,也可以配置单向测测变化

# 测试 tcp,比如:curl www.baidu.com
dummynet in proto tcp from any to any pipe 1
dummynet out proto tcp from any to any pipe 1

# 测试 udp,比如:音视频通话
dummynet in proto udp from any to any pipe 1
dummynet out proto udp from any to any pipe 1

# 测试 ping,比如:ping baidu.com
dummynet in proto icmp from any to any pipe 1
dummynet out proto icmp from any to any pipe 13. 启动和加载 `PF` 配置
操作 `PF` 服务,需要借助 `pfctl ` 命令。
# Mac 系统默认把 `PF` 服务关闭了,启动 `PF` 服务
$ sudo pfctl -e

# 加载自定义防火墙规则
$ sudo pfctl -f pf.conf

# 恢复原始的防火墙规则
$ sudo pfctl -f /etc/pf.conf

# 注意:使用 pfctl 命令会经常出现下面的 warning,没有影响,忽略就好了。
"No ALTQ support in kernel"关于Mac配置弱网环境就分享到这里了,希望以上内容可以对大家有一定的帮助,可以学到更多知识。如果喜欢这篇文章,不如把它分享出去让更多的人看到。
亿速云「云服务器」,即开即用、新一代英特尔至强铂金CPU、三副本存储NVMe SSD云盘,价格低至29元/月。点击查看>>
免责声明:本站发布的内容(图片、视频和文字)以原创、转载和分享为主,文章观点不代表本网站立场,如果涉及侵权请联系站长邮箱:is@yisu.com进行举报,并提供相关证据,一经查实,将立刻删除涉嫌侵权内容。