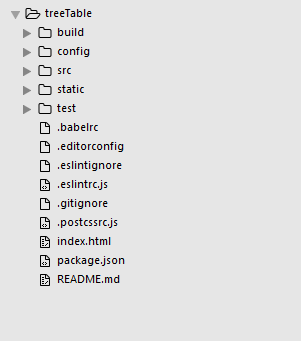
该组件基于技术栈,主要涉及vue-cli生成的webpack项目脚手架,在此脚手架项目基础上完成的,整合了element-ui开源vue的UI项目
1.vue-cli的安装使用
npm install -g vue-cli
全局安装vue-cli之后,使用该脚手架的相关命令,可快速生成一个比较规范的vue项目结构
vue init <template-name> <project-name>例子
vue init webpack treeTable这样一个快速的项目结构生成,如下所示,中间一路回车就可以了,主要是设置了是否支持eslint等等

2.整合element-ui
cd treeTable进入刚刚生成的项目目录中,安装element-ui
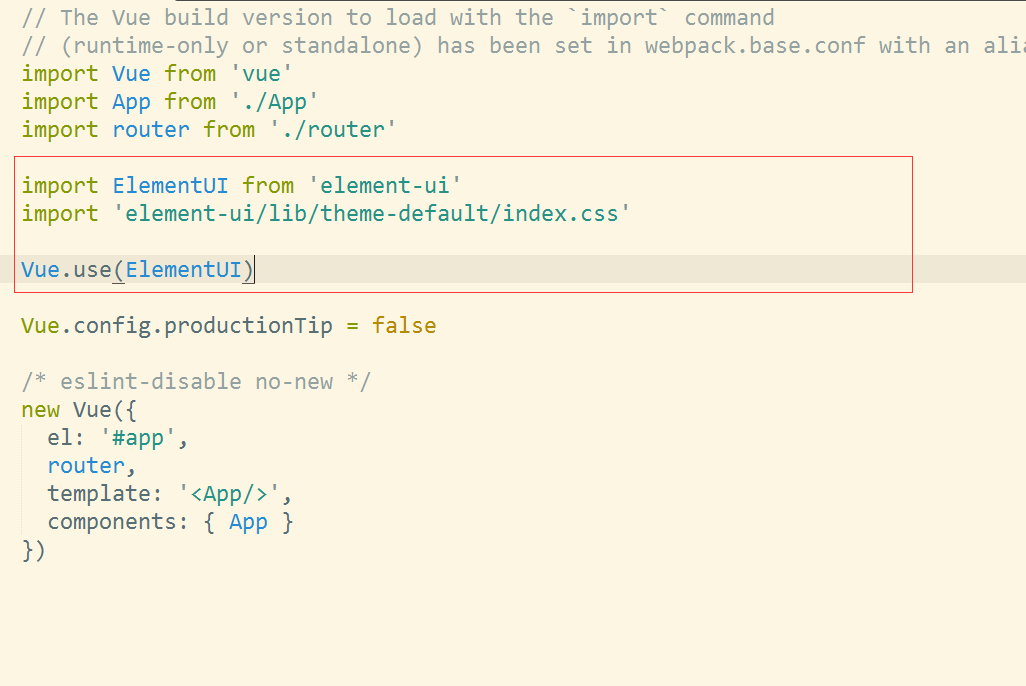
npm i element-ui -S在main.js中,
import ElementUI from 'element-ui'
import 'element-ui/lib/theme-default/index.css'

Vue.use(ElementUI)整合就可以了,具体element-ui更多的使用和操作,可以去官网查看 http://element.eleme.io/#/zh-CN/component/quickstart
我这里主要是利用他的table组件来制作一个树形结构的table。

3.树形table组件制作
在src目录的components目录中,

其中utils下面提供一些需要用的工具类
vue目录下面是组件的源码
index.js是外包入口
相关代码
dataTranslate.js主要是提供了把数组数据转换成树形结构的数据,并且进行相关属性的添加
/*
* @Author: sunlandong
* @Date:   2017-03-11 12:06:49
* @Last Modified by:   sunlandong
* @Last Modified time: 2017-03-11 16:30:03
*/


import Vue from 'vue'
function DataTransfer (data) {
  if (!(this instanceof DataTransfer)) {
    return new DataTransfer(data, null, null)
  }
}


DataTransfer.treeToArray = function (data, parent, level, expandedAll) {
  let tmp = []
  Array.from(data).forEach(function (record) {
    if (record._expanded === undefined) {
      Vue.set(record, '_expanded', expandedAll)
    }
    if (parent) {
      Vue.set(record, '_parent', parent)
    }
    let _level = 0
    if (level !== undefined && level !== null) {
      _level = level + 1
    }
    Vue.set(record, '_level', _level)
    tmp.push(record)
    if (record.children && record.children.length > 0) {
      let children = DataTransfer.treeToArray(record.children, record, _level, expandedAll)
      tmp = tmp.concat(children)
    }
  })
  return tmp
}


export default DataTransferutils/index.js
/*
* @Author: sunlandong
* @Date:   2017-03-11 12:06:55
* @Last Modified by:   sunlandong
* @Last Modified time: 2017-03-11 16:36:56
*/
import MSDataTransfer from './dataTranslate.js'
export default {
	MSDataTransfer
}TreeGrid.vue是树形table组件的源码
<template>
 <el-table
  :data="data"
  border

  :row->
  <el-table-column v-for="(column, index) in columns" :key="column.dataIndex"
   :label="column.text">
   <template scope="scope">
    <span v-if="spaceIconShow(index)" v-for="(space, levelIndex) in scope.row._level" class="ms-tree-space"></span>
    <button class="button is-outlined is-primary is-small" v-if="toggleIconShow(index,scope.row)" @click="toggle(scope.$index)">
     <i v-if="!scope.row._expanded" class="el-icon-caret-right" aria-hidden="true"></i>
     <i v-if="scope.row._expanded" class="el-icon-caret-bottom" aria-hidden="true"></i>
    </button>
    <span v-else-if="index===0" class="ms-tree-space"></span>
    {{scope.row[column.dataIndex]}}
   </template>
  </el-table-column>
  <el-table-column label="操作" v-if="treeType === 'normal'" width="260">
   <template scope="scope">
    <button type="button" class="el-button el-button--default el-button--small">
     <router-link
      :to="{ path: requestUrl + 'edit', query: {id: scope.row.Oid} }"
      tag="span">
      编辑
     </router-link>
    </button>
    <el-button
     size="small"
     type="danger"
     @click="handleDelete()">
     删除
    </el-button>
    <button type="button" class="el-button el-button--success el-button--small">
     <router-link :to="{ path: requestUrl, query: {parentId: scope.row.parentOId} }"
            tag="span">
      添加下级树结构
     </router-link>
    </button>
   </template>
  </el-table-column>
 </el-table>
</template>
<script>
 import Utils from '../utils/index.js'
// import Vue from 'vue'
 export default {
  name: 'tree-grid',
  props: {
// 该属性是确认父组件传过来的数据是否已经是树形结构了,如果是,则不需要进行树形格式化
   treeStructure: {
    type: Boolean,
    default: function () {
     return false
    }
   },
// 这是相应的字段展示
   columns: {
    type: Array,
    default: function () {
     return []
    }
   },
// 这是数据源
   dataSource: {
    type: Array,
    default: function () {
     return []
    }
   },
// 这个作用是根据自己需求来的,比如在操作中涉及相关按钮编辑,删除等,需要向服务端发送请求,则可以把url传过来
   requestUrl: {
    type: String,
    default: function () {
     return ''
    }
   },
// 这个是是否展示操作列
   treeType: {
    type: String,
    default: function () {
     return 'normal'
    }
   },
// 是否默认展开所有树
   defaultExpandAll: {
    type: Boolean,
    default: function () {
     return false
    }
   }
  },
  data () {
   return {}
  },
  computed: {
  // 格式化数据源
   data: function () {
    let me = this
    if (me.treeStructure) {
     let data = Utils.MSDataTransfer.treeToArray(me.dataSource, null, null, me.defaultExpandAll)
     console.log(data)
     return data
    }
    return me.dataSource
   }
  },
  methods: {
  // 显示行
   showTr: function (row, index) {
    let show = (row._parent ? (row._parent._expanded && row._parent._show) : true)
    row._show = show
    return show ? '' : 'display:none;'
   },
  // 展开下级
   toggle: function (trIndex) {
    let me = this
    let record = me.data[trIndex]
    record._expanded = !record._expanded
   },
  // 显示层级关系的空格和图标
   spaceIconShow (index) {
    let me = this
    if (me.treeStructure && index === 0) {
     return true
    }
    return false
   },
  // 点击展开和关闭的时候,图标的切换
   toggleIconShow (index, record) {
    let me = this
    if (me.treeStructure && index === 0 && record.children && record.children.length > 0) {
     return true
    }
    return false
   },
   handleDelete () {
    this.$confirm('此操作将永久删除该记录, 是否继续?', '提示', {
     confirmButtonText: '确定',
     cancelButtonText: '取消',
     type: 'error'
    }).then(() => {
     this.$message({
      type: 'success',
      message: '删除成功!'
     })
    }).catch(() => {
     this.$message({
      type: 'info',
      message: '已取消删除'
     })
    })
   }
  }
 }
</script>
<style scoped>
 .ms-tree-space{position: relative;
  top: 1px;
  display: inline-block;
  font-family: 'Glyphicons Halflings';
  font-style: normal;
  font-weight: 400;
  line-height: 1;
  width: 18px;
  height: 14px;}
 .ms-tree-space::before{content: ""}
 table td{
  line-height: 26px;
 }
</style>index.js
import TreeGrid from './vue/TreeGrid.vue'
 module.exports = {
 TreeGrid
}
使用
<template>
 <div class="hello">
  <tree-grid :columns="columns" :tree-structure="true" :data-source="dataSource"></tree-grid>
 </div>
</template>

<script>
import {TreeGrid} from './treeTable'
export default {
 name: 'hello',
 data () {
  return {
   columns: [
     {
      text: '姓名',
      dataIndex: 'name'
     },
     {
      text: '年龄',
      dataIndex: 'age'
     },
     {
      text: '性别',
      dataIndex: 'sex'
     }
    ],
   dataSource: [
    {
     id: 1,
     parentId: 0,
     name: '测试1',
     age: 18,
     sex: '男',
     children: [
      {
       id: 2,
       parentId: 1,
       name: '测试2',
       age: 22,
       sex: '男'
      }
     ]
    },
    {
     id: 3,
     parentId: 0,
     name: '测试3',
     age: 23,
     sex: '女',
     children: [
      {
       id: 4,
       parentId: 3,
       name: '测试4',
       age: 22,
       sex: '男'
      },
      {
       id: 5,
       parentId: 3,
       name: '测试5',
       age: 25,
       sex: '男'
      },
      {
       id: 6,
       parentId: 3,
       name: '测试6',
       age: 26,
       sex: '女',
       children: [
        {
         id: 7,
         parentId: 6,
         name: '测试7',
         age: 27,
         sex: '男'
        }
       ]
      }
     ]
    },
    {
     id: 18,
     parentId: 0,
     name: '测试8',
     age: 18,
     sex: '男'
    }
   ]
  }
 },
 components: {
  TreeGrid
 }
}
</script>

<!-- Add "scoped" attribute to limit CSS to this component only -->
<style scoped>
</style>效果图

https://github.com/sunlandong/treeTable github上下载源码
以上就是本文的全部内容,希望对大家的学习有所帮助,也希望大家多多支持亿速云。
亿速云「云服务器」,即开即用、新一代英特尔至强铂金CPU、三副本存储NVMe SSD云盘,价格低至29元/月。点击查看>>
免责声明:本站发布的内容(图片、视频和文字)以原创、转载和分享为主,文章观点不代表本网站立场,如果涉及侵权请联系站长邮箱:is@yisu.com进行举报,并提供相关证据,一经查实,将立刻删除涉嫌侵权内容。