本文实例讲述了vue组件之间通信。分享给大家供大家参考,具体如下:
总结:
父组件--》子组件
①通过属性
步骤1:
<son myName="michael" myPhone='123'></son>
<son :myName="userList[0]"></son>
步骤2:
Vue.component('son',{
  props:['myName','myPhone']
})
②通过$parent
直接在子组件中通过this.$parent得到调用子组件的父组件
子组件--》父组件
①events up
步骤1:在父组件中 调用子组件的时候 绑定一个自定义事件 和 对应的处理函数
methods:{
  recvMsg:function(msg){
  //msg就是传递来的数据
  }
},
template:'
<son @customEvent="recvMsg"></son>
'
步骤2:在子组件中 把要发送的数据通过触发自定义事件传递给父组件
this.$emit('customEvent',123)
②$refs
reference 引用
步骤1:在调用子组件的时候 可以指定ref属性
<son ref='zhangsan'></son>
步骤2:通过$refs得到指定引用名称对应的组件实例
this.$refs.zhangsan
兄弟组件通信
步骤1:创建一个Vue的实例 作为事件绑定触发的公共的对象
var bus = new Vue();
步骤2:在接收方的组件 绑定 自定义的事件
bus.$on('customEvent',function(msg){
  //msg是通过事件传递来的数据 (传递来的123)
});
步骤3:在发送方的组件 触发 自定义的事件
bus.$emit('customEvent',123);
每日一练:
创建2个组件,main-component,son-component
视图:
main-component 显示一个按钮
son-component 显示一个p标签
功能:
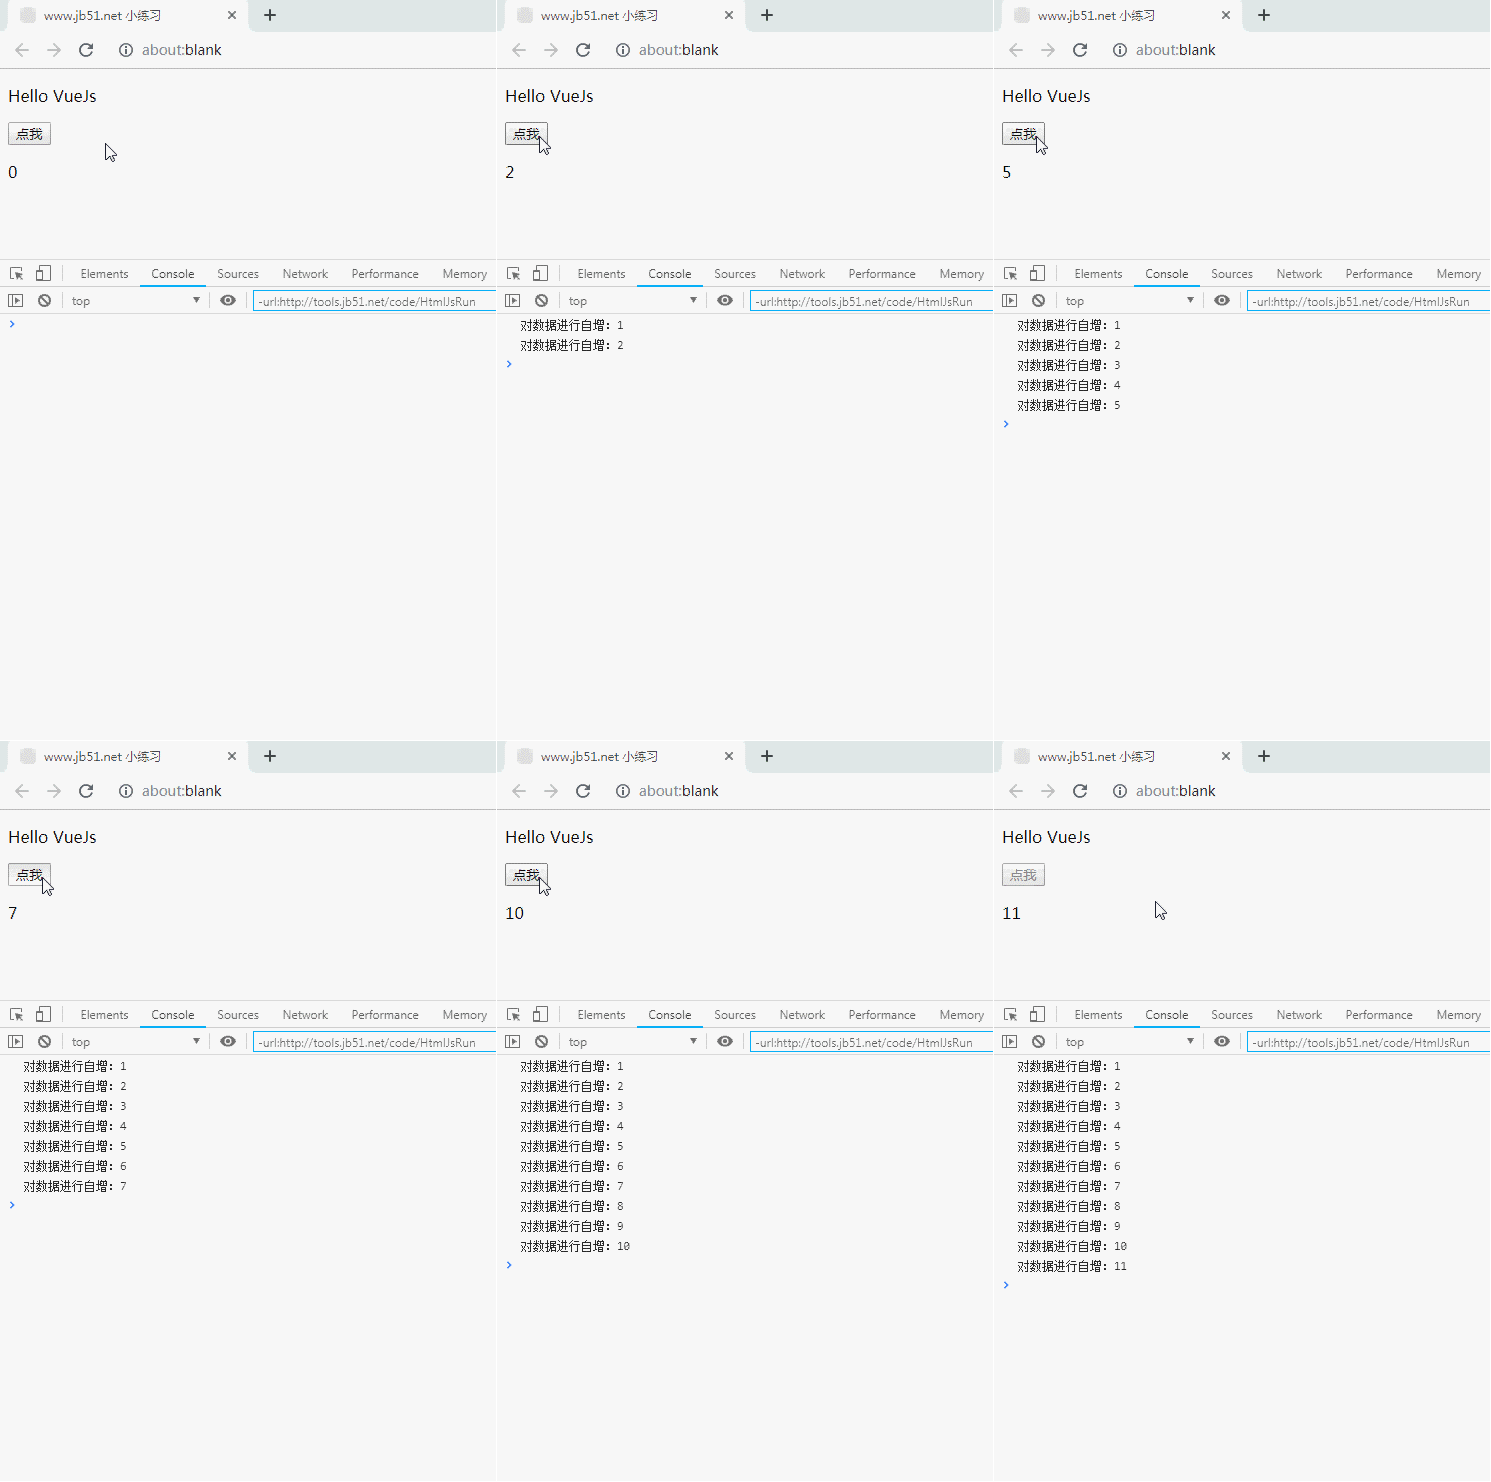
main-component 定义一个变量count,初始化为0,将count传递给son-component,son-component接收到数据显示在p标签中
main-component 在点击按钮时,实现对count的自增操作,要求son-component能够实时显示count对应的数据
son-component在接收到count之后,在count大于10的时候,将main-component的按钮禁用掉
(参考:<button v-bind:disabled="!isValid">clickMe</button>)
<!doctype html>
<html>
 <head>
 <meta charset="UTF-8">
 <title>www.jb51.net 小练习</title>
  <script src="https://cdn.bootcss.com/vue/2.0.1/vue.min.js"></script>
 </head>
 <body>
 <div id="container">
    <p>{{msg}}</p>
    <main-component></main-component>
  </div>
  <script>
  /*
    每日一练:
创建2个组件,main-component,son-component
视图:
 main-component 显示一个按钮
 son-component 显示一个p标签
功能:
  main-component 定义一个变量count,初始化为0,将count传递给son-component,son-component接收到数据显示在p标签中
  main-component 在点击按钮时,实现对count的自增操作,要求son-component能够实时显示count对应的数据
  son-component在接收到count之后,在count大于10的时候,将main-component的按钮禁用掉
  (参考:<button v-bind:disabled="!isValid">clickMe</button>)
  */
//创建父组件
    Vue.component("main-component",{
      data:function(){
        return {
          count:0,
          isDisabled:true
        }
      },
      methods:{
        //点击按钮对count进行自增
        //并通过$emit触发countAdd,并把count的值传递给子组件
        //判断count==10的时候让按钮禁用
        countAdd:function(){
          this.count++;
          console.log("对数据进行自增:"+this.count);
          this.$emit("countAdd",this.count);
        }
      },
      template:`
        <div>
          <button @click="countAdd" v-bind:disabled="!isDisabled">点我</button>
          <son-component v-bind:myCount="count"></son-component>
        </div>
      `
    })
//创建子组件
    Vue.component("son-component",{
      //通过props接收父组件传递过来的值
      props:["myCount"],
      template:`
        <div>
          <p>{{myCount}}</p>
        </div>
      `,
      //数据更新完成后判断从父组件拿到的值
      updated:function(){
        if(this.myCount>10){
          //子组件通过$parent直接获取父组件的数据
            this.$parent.isDisabled = false;
          }
      }
    })
    new Vue({
      el:"#container",
      data:{
        msg:"Hello VueJs"
      }
    })
  </script>
 </body>
</html>
使用在线HTML/CSS/JavaScript代码运行工具:http://tools.jb51.net/code/HtmlJsRun测试,可得到如下运行效果:

感兴趣的朋友还可以使用上述在线工具测试一下代码的运行效果。
希望本文所述对大家vue.js程序设计有所帮助。
亿速云「云服务器」,即开即用、新一代英特尔至强铂金CPU、三副本存储NVMe SSD云盘,价格低至29元/月。点击查看>>
免责声明:本站发布的内容(图片、视频和文字)以原创、转载和分享为主,文章观点不代表本网站立场,如果涉及侵权请联系站长邮箱:is@yisu.com进行举报,并提供相关证据,一经查实,将立刻删除涉嫌侵权内容。