本篇文章给大家分享的是有关使用tensorflow怎么加载mnist数据集,小编觉得挺实用的,因此分享给大家学习,希望大家阅读完这篇文章后可以有所收获,话不多说,跟着小编一起来看看吧。
mnist作为最基础的图片数据集,在以后的cnn,rnn任务中都会用到
import numpy as np
import tensorflow as tf
import matplotlib.pyplot as plt
from tensorflow.examples.tutorials.mnist import input_data

#数据集存放地址,采用0-1编码
mnist = input_data.read_data_sets('F:/mnist/data/',one_hot = True)
print(mnist.train.num_examples)
print(mnist.test.num_examples)

trainimg = mnist.train.images
trainlabel = mnist.train.labels
testimg = mnist.test.images
testlabel = mnist.test.labels

#打印相关信息
print(type(trainimg))
print(trainimg.shape,)
print(trainlabel.shape,)
print(testimg.shape,)
print(testlabel.shape,)

nsample = 5
randidx = np.random.randint(trainimg.shape[0],size = nsample)

#输出几张数字的图
for i in randidx:
  curr_img = np.reshape(trainimg[i,:],(28,28))
  curr_label = np.argmax(trainlabel[i,:])
  plt.matshow(curr_img,cmap=plt.get_cmap('gray'))
  plt.title(""+str(i)+"th Training Data"+"label is"+str(curr_label))
  print(""+str(i)+"th Training Data"+"label is"+str(curr_label))
  plt.show()
程序运行结果如下:
Extracting F:/mnist/data/train-images-idx3-ubyte.gz
Extracting F:/mnist/data/train-labels-idx1-ubyte.gz
Extracting F:/mnist/data/t10k-images-idx3-ubyte.gz
Extracting F:/mnist/data/t10k-labels-idx1-ubyte.gz
55000
10000
<class 'numpy.ndarray'>
(55000, 784)
(55000, 10)
(10000, 784)
(10000, 10)
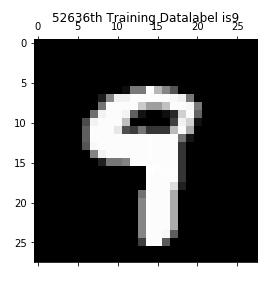
52636th
输出的图片如下:
Training Datalabel is9

以上就是使用tensorflow怎么加载mnist数据集,小编相信有部分知识点可能是我们日常工作会见到或用到的。希望你能通过这篇文章学到更多知识。更多详情敬请关注亿速云行业资讯频道。
免责声明:本站发布的内容(图片、视频和文字)以原创、转载和分享为主,文章观点不代表本网站立场,如果涉及侵权请联系站长邮箱:is@yisu.com进行举报,并提供相关证据,一经查实,将立刻删除涉嫌侵权内容。