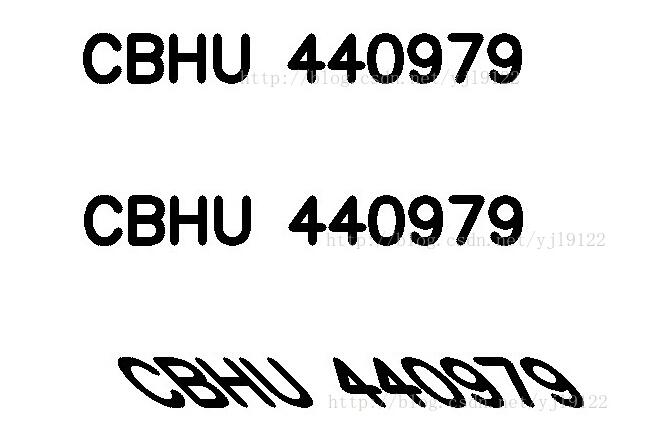
本文实例为大家分享了python opencv实现切变换的具体代码,供大家参考,具体内容如下
# -*- coding:gb2312 -*-
import cv2
from math import *
import numpy as np

img = cv2.imread("3-2.jpg")

height,width=img.shape[:2]

degreeAffine=45

#切变换最后结果
heightAffine=height
widthAffine=int(2*height*tan(radians(degreeAffine))+width)

# 随意两点得到仿射变换矩阵
# point1=np.float32([[50,50],[200,50],[50,200]])
# point2=np.float32([[50,50],[100,50],[50,200]])
# matAffine=cv2.getAffineTransform(point1,point2)


#如果结果是正的图片
tempY=(widthAffine+1)/2-width/2
tempX=(heightAffine+1)/2-height/2
temp=np.zeros((heightAffine,widthAffine,3),np.uint8)+255
temp[tempX:(tempX+height),tempY:(tempY+width)]=img
cv2.imshow("temp",temp)


#仿射变换矩阵
matAffine=np.zeros([2,3])
matAffine[0,0]=1
matAffine[0,1]=tan(radians(degreeAffine))
matAffine[0,2]=(widthAffine-width)/2
matAffine[1,0]=0
matAffine[1,1]=1
matAffine[1,2]=(heightAffine-height)/2


imgAfiine=cv2.warpAffine(img,matAffine,(widthAffine,heightAffine),borderValue=(255,255,255))

cv2.imwrite("temp.jpg",temp)
cv2.imwrite("imgAffine.jpg",imgAfiine)
cv2.imshow("imgAffine",imgAfiine)
效果图:

以上就是本文的全部内容,希望对大家的学习有所帮助,也希望大家多多支持亿速云。
免责声明:本站发布的内容(图片、视频和文字)以原创、转载和分享为主,文章观点不代表本网站立场,如果涉及侵权请联系站长邮箱:is@yisu.com进行举报,并提供相关证据,一经查实,将立刻删除涉嫌侵权内容。