本篇文章为大家展示了如何在Vue项目中使用render方法,内容简明扼要并且容易理解,绝对能使你眼前一亮,通过这篇文章的详细介绍希望你能有所收获。
<!DOCTYPE html>
<html>
<head>
  <title>Vue的render方法说明</title>
  <script src="vue.js"></script>
</head>
<body>
<div id="app">
  <child :level="1">
    hello world
  </child>
</div>

<script type="text/x-template" id="anchored-heading-template">
  <div>
    <h2 v-if="level === 1">
      <slot></slot>
    </h2>
    <h3 v-if="level === 2">
      <slot></slot>
    </h3>
    <h4 v-if="level === 3">
      <slot></slot>
    </h4>
    <h5 v-if="level === 4">
      <slot></slot>
    </h5>
    <h6 v-if="level === 5">
      <slot></slot>
    </h6>
    <h7 v-if="level === 6">
      <slot></slot>
    </h7>
  </div>
</script>

<script type="text/javascript">
Vue.component('child', {
  template: '#anchored-heading-template',
  props: {
    level: {
      type: Number,
      required: true
    }
  }
});
  new Vue({
    el: "#app"
  })
</script>
</body>
</html>
虽然使用template定义组件的方法非常的直观,但是这样会造成代码过长。可以使用render的方法
<!DOCTYPE html>
<html>
<head>
  <title>Vue的render方法说明</title>
  <script src="vue.js"></script>
</head>
<body>
<div id="app">
  <child :level="1">
    hello world
  </child>
</div>
<script type="text/javascript">
Vue.component('child', {
  render:function (createElement) {
    var body=this.$slots.default;
    //this.$slots返回了一个组件分发下来的元素和内容
    //this.$slots.default返回了具名的内容
    return createElement(
      'h'+this.level,
      //this.level是利用v-bind注入到组件中的level
      body
    )
  },
  //因为vue中组件父组件无法向子组件注入内容。所以我们需要通过
  //v-bind定义一个key,value向子组件注入内容。所要接收的值也需要在定义组件时的props属性中的定义一下
  props:{
    level:{

    }
  }
});
  new Vue({
    el: "#app"
  })
</script>
</body>
</html>
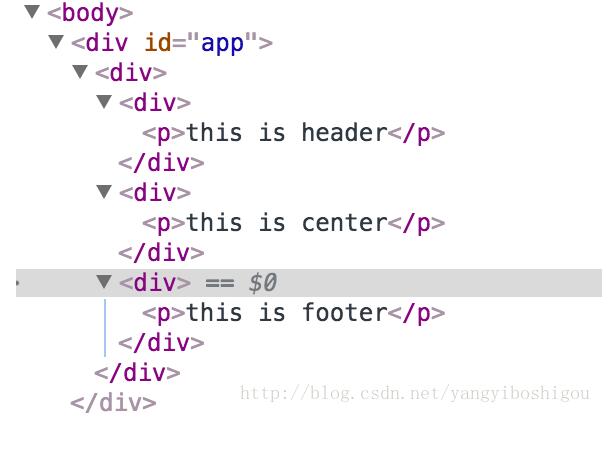
下面是一个slot具名分发的demo:介绍了creatElement的用法:
<!DOCTYPE html>
<html>
<head>
  <title>Vue的render方法说明</title>
  <script src="vue.js"></script>
</head>
<body>
<div id="app">
  <child>
    <p slot="header">this is header</p>
    <p slot="center">this is center</p>
    <p slot="footer">this is footer</p>
  </child>
</div>


<script type="text/javascript">
  Vue.component('child', {
    render: function (createElement) {
     var header=this.$slots.header;
     var center=this.$slots.center;
     var footer=this.$slots.footer;
//createElement第一个参数是标签名,第二个参数是值
     return createElement('div',[
       createElement('div', header),
       createElement('div', center),
       createElement('div', footer),
     ])
    }
  });
  new Vue({
    el: "#app"
  })
</script>
</body>
</html>
所创建的组件的demo结果如下:

上述内容就是如何在Vue项目中使用render方法,你们学到知识或技能了吗?如果还想学到更多技能或者丰富自己的知识储备,欢迎关注亿速云行业资讯频道。
免责声明:本站发布的内容(图片、视频和文字)以原创、转载和分享为主,文章观点不代表本网站立场,如果涉及侵权请联系站长邮箱:is@yisu.com进行举报,并提供相关证据,一经查实,将立刻删除涉嫌侵权内容。