这篇文章将为大家详细讲解有关c#如何实现一个超实用的证件照换底色小工具,小编觉得挺实用的,因此分享给大家做个参考,希望大家阅读完这篇文章后可以有所收获。
实现思路
(1)首先说一下像素的组成RGB
当前展示白色的RGB值是255,255,255,相反黑色的RGB就是0,0,0, 其他颜色就是0~255的RGB颜色组合。我们就是通过颜色的RGB值得范围来替换证件照底色的。

(2要过滤底色的RGB范围选择)
我们一般拍照的时候后面都有一块幕布做底色,但是由于曝光和幕布底色的稍微的不同,导致背景其实是一个颜色范围,而非单一的颜色,这就要求我们必须找出这个范围,我这里选择前五排的像素作为初始过滤的颜色范围。下面就是代码获取这个颜色范围。
/// <summary>
  /// 获取前五排像素,求出rgb范围
  /// </summary>
  /// <param name="path"></param>
  /// <returns></returns>
  private List<int> GetModeColor(string path)
  {
   List<int> colorrgb = new List<int>();
   List<int> rlist=new List<int>();
   List<int> glist = new List<int>();
   List<int> blist = new List<int>();
   using (Bitmap map = (Bitmap)Image.FromFile(path))
   {
    using (Bitmap editMap = new Bitmap(map, map.Width, map.Height))
    {
     // editMap.GetPixel()
     for (int i = 0; i < map.Width; i++)
     {
      for (int j = 0; j <5; j++)
      {
       Color color = editMap.GetPixel(i, j);
       if (!rlist.Contains(color.R))
       {
        rlist.Add(color.R);
       }
       if (!glist.Contains(color.G))
       {
        glist.Add(color.G);
       }
       if (!blist.Contains(color.B))
       {
        blist.Add(color.B);
       }
      }
     }
     //添加rgb像素范围
     colorrgb.Add(rlist.Max());
     colorrgb.Add(glist.Max());
     colorrgb.Add(blist.Max());
     colorrgb.Add(rlist.Min());
     colorrgb.Add(glist.Min());
     colorrgb.Add(blist.Min());
    }
   }
   return colorrgb;
}(3头部和身体进行分开处理)
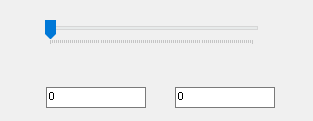
由于我们的头发偏黑色,若要达到很好的处理效果必须进行对头部做更大范围的颜色处理,这里我们加入了一个选择条,让用户进行分区域进行微调,在文本框中输入要调整颜色范围数值,达到最好的效果。
(4背景颜色移除与替换)
我们通过对证件照从左到右,从上到下一行一行的对颜色进行过滤,把与我们设置颜色范围内的像素移除并替换成我们的想要的背景色,经过微调,最大程度的实现颜色的替换而不失去本该保留部分。这也是本工具的最核心代码。
/// <summary>
  /// 预览结果
  /// </summary>
  /// <param name="sender"></param>
  /// <param name="e"></param>
  private void button3_Click(object sender, EventArgs e)
  {
   if (string.IsNullOrEmpty(label1.Text))
   {
    MessageBox.Show("请选择颜色");
    return;
   }
   if (string.IsNullOrEmpty(imagePath))
   {
    MessageBox.Show("请上传证件");
    return;
   }
   int upnum = Convert.ToInt32(textBox1.Text);
   int downnum = Convert.ToInt32(textBox2.Text);
   double trackvalue = Convert.ToDouble(trackBar1.Value);
   List<int> colorrgb = GetModeColor(imagePath);
   //上半部分去除颜色范围
   List<int> upcolorrgb = new List<int>();
   //下半部分去除颜色范围
   List<int> downcolorrgb = new List<int>();
   for (int i = 0; i < colorrgb.Count; i++)
   {
    if (i>2)
    {

     upcolorrgb.Add(colorrgb[i]-upnum<0?0: colorrgb[i] - upnum);
     downcolorrgb.Add(colorrgb[i] - downnum < 0 ? 0 : colorrgb[i] - downnum);
    }
    else
    {
     upcolorrgb.Add(colorrgb[i] + upnum >255 ? 255 : colorrgb[i] + upnum);
     downcolorrgb.Add(colorrgb[i] + downnum > 255 ? 255 : colorrgb[i] + downnum);
    }
   }
   //从左到右,从上到下读取像素点
   using (Bitmap map = (Bitmap)Image.FromFile(imagePath))
   {
    using (Bitmap editMap = new Bitmap(map, map.Width, map.Height))
    {
     // 上半部分
     for (int i = 0; i < map.Width; i++)
     {
      for (int j = 0; j < (int)(map.Height * (trackvalue/100)); j++)
      {
       Color color = editMap.GetPixel(i, j);
       //判断像素是否可以移除
       if (color.R >= upcolorrgb[3] && color.R <= upcolorrgb[0] &&
        color.G >= upcolorrgb[4] && color.G <= upcolorrgb[1] &&
        color.B >= upcolorrgb[5] && color.B <= upcolorrgb[2])
       {
        editMap.SetPixel(i, j, tempcolor);
       }
      }
     }
     //下半部分
     for (int i = 0; i < map.Width; i++)
     {
      for (int j = (int)(map.Height * (trackvalue / 100)); j <map.Height ; j++)
      {
       //判断像素是否可以移除
       Color color = editMap.GetPixel(i, j);
       if (color.R >= downcolorrgb[3] && color.R <= downcolorrgb[0] &&
        color.G >= downcolorrgb[4] && color.G <= downcolorrgb[1] &&
        color.B >= downcolorrgb[5] && color.B <= downcolorrgb[2])
       {
        editMap.SetPixel(i, j, tempcolor);

       }
      }
     }
     //保存
     string savepath = System.Environment.CurrentDirectory+@"\result\" + DateTime.Now.ToString("yyyyMMddHHmmssffff") + ".png";
     editMap.Save(savepath);
     resultPath = savepath;
     pictureBox2.Image = Image.FromFile(savepath);
    }
   }
}软件操作
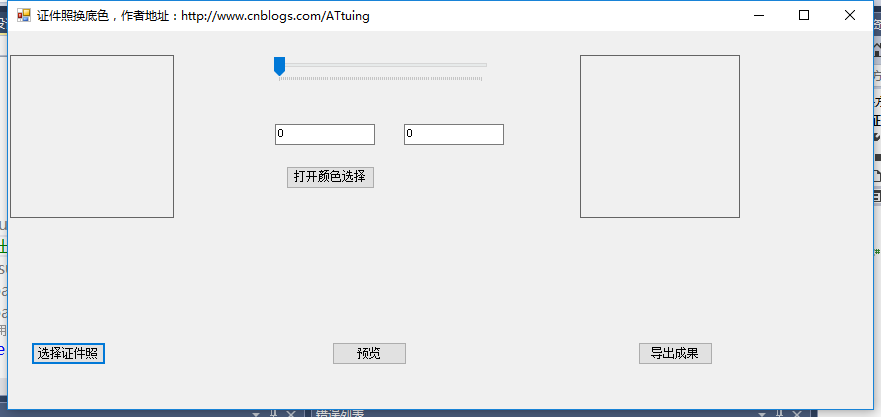
(0系统界面)
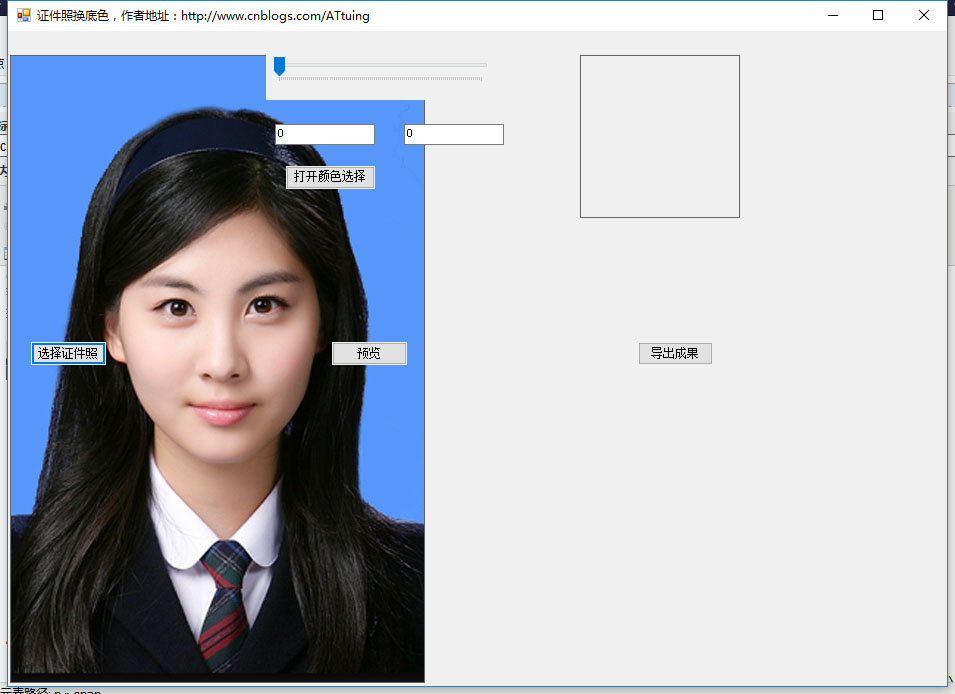
(1打开证件照)
由于本人太丑,这里在网上找了张美女的证件照,来做演示。
(2选择替换后的背景色)
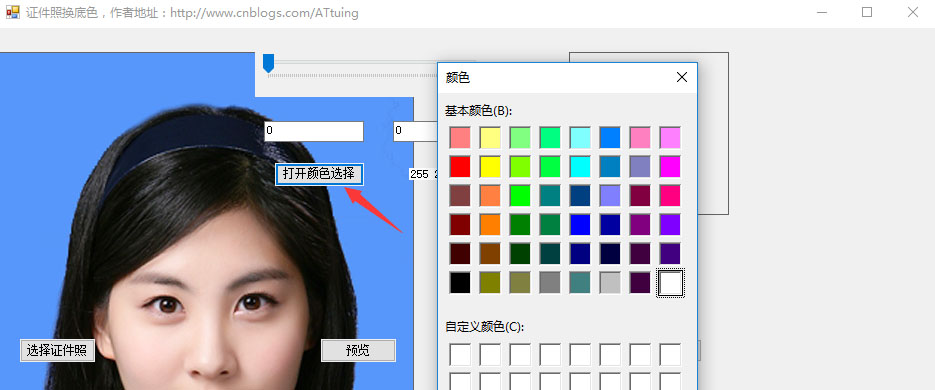
点击-打开选择颜色,选择想要的背景色,
(3预览初始效果)
点击预览,便可看到最初的处理效果。
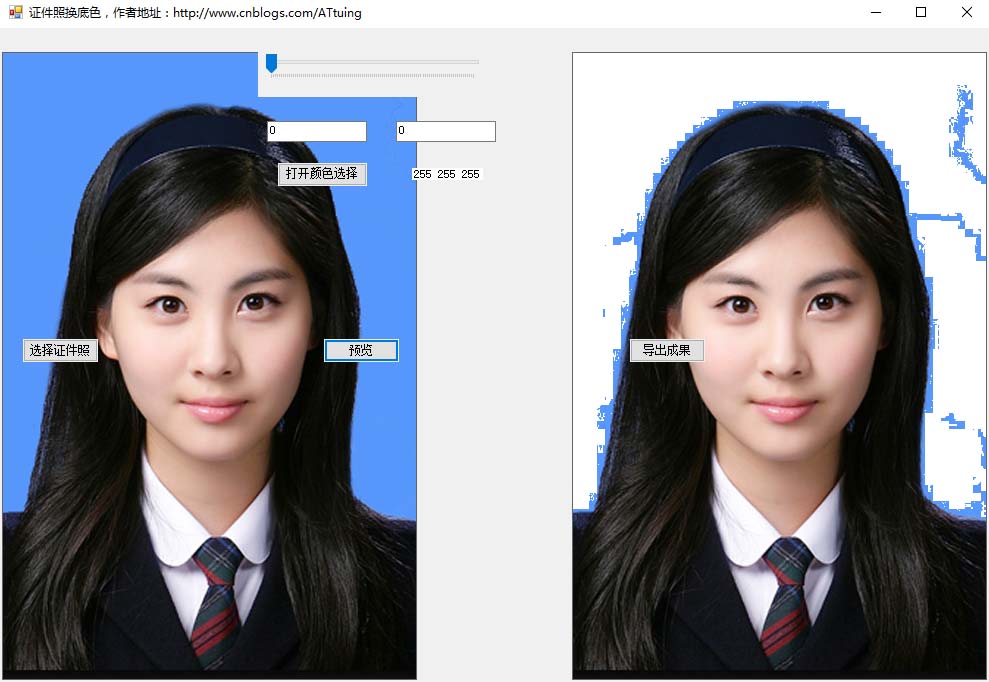
(4微调)
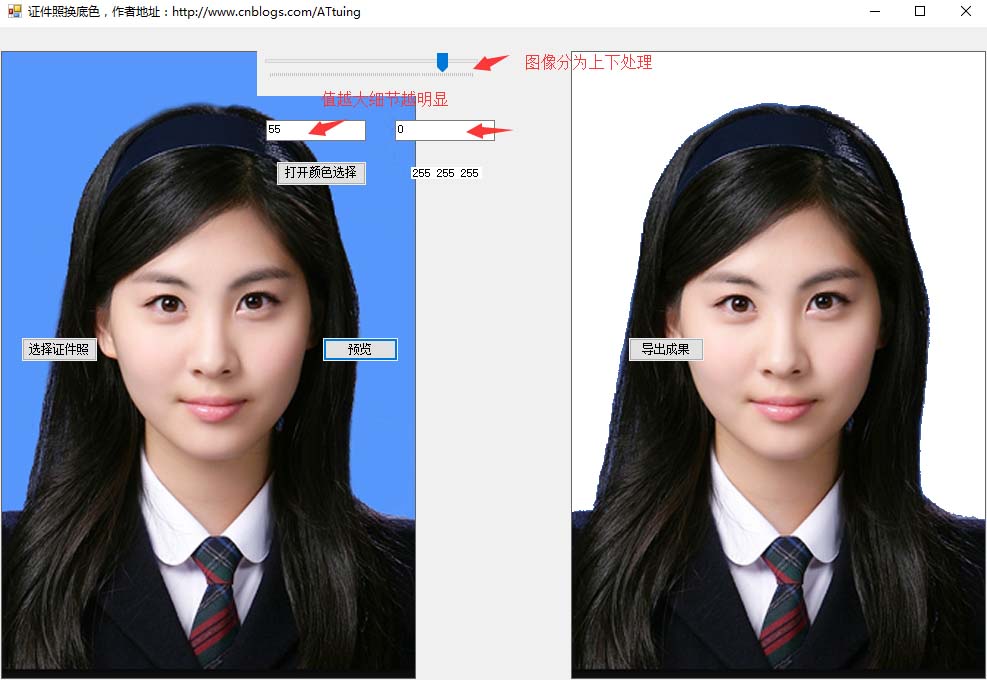
调节滑块,将图像分为上下两部分分开进行处理,调节参数(范围0-255都行),参数值越大移除的细节越多,仔细调参数可以把头部保留更多细节。
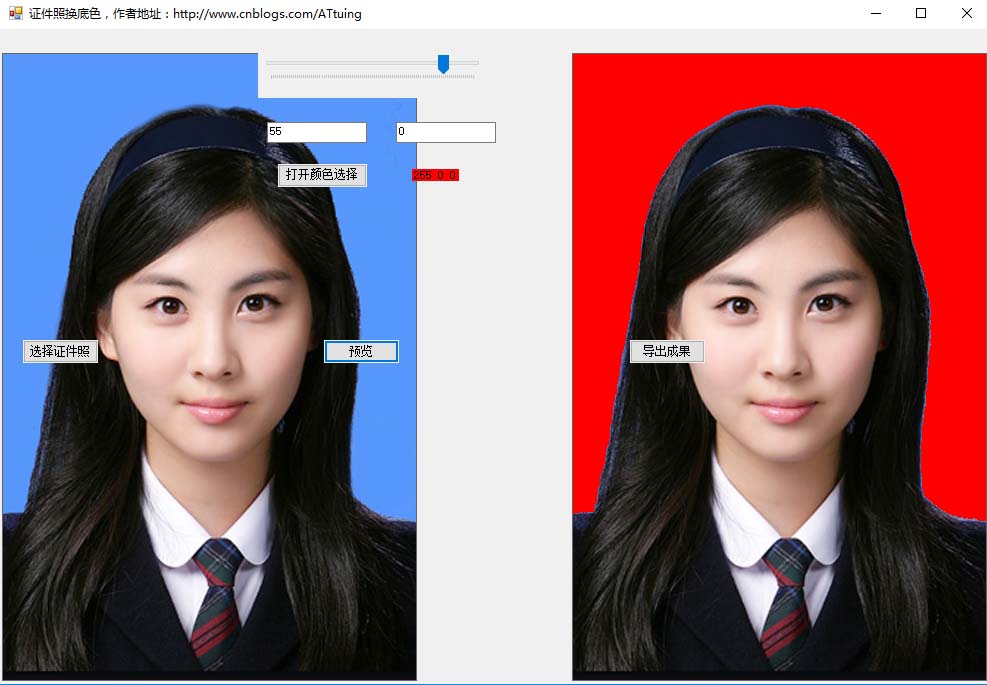
换个红色看看效果
(5导出)
点击导出成果就可以啦。这里就不放图了。完毕
关于“c#如何实现一个超实用的证件照换底色小工具”这篇文章就分享到这里了,希望以上内容可以对大家有一定的帮助,使各位可以学到更多知识,如果觉得文章不错,请把它分享出去让更多的人看到。
亿速云「云服务器」,即开即用、新一代英特尔至强铂金CPU、三副本存储NVMe SSD云盘,价格低至29元/月。点击查看>>
免责声明:本站发布的内容(图片、视频和文字)以原创、转载和分享为主,文章观点不代表本网站立场,如果涉及侵权请联系站长邮箱:is@yisu.com进行举报,并提供相关证据,一经查实,将立刻删除涉嫌侵权内容。