这篇文章主要介绍C#如何实现截图软件功能,文中介绍的非常详细,具有一定的参考价值,感兴趣的小伙伴们一定要看完!
思路:
截取屏幕图片。
获取要截取的范围,即左上角,右下角坐标
填充到PictureBox中。
笔触功能,荧光笔,矩形,橡皮擦,复制,保存功能
涉及的知识点:
MenuStrip:为窗体提供菜单系统。以ToolStripMenuItem为菜单子选项
ToolStrip:为 Windows 工具栏对象提供容器。以ToolStripButton【表示包含文本和图像的可选】为工具栏子元素
PictureBox:表示用于显示图像的 Windows 图片框控件。不过本文对此空间进行了重写
Screen:可用于获取工作屏幕区域
Graphics:封装一个 GDI+ 绘图图面。此类不能被继承。此类的CopyFromScreen方法用于获取屏幕图像
鼠标事件:包括MouseDown,MouseMove,MouseUp事件,通过MouseEventArgs中的Location获取鼠标的位置。
Clipboard: 提供将数据置于系统剪贴板中以及从中检索数据的方法。此类不能被继承。
Cursor:设置鼠标的显示的光标的样式。
OnPaint:重绘事件,当控件刷新时响应此事件。
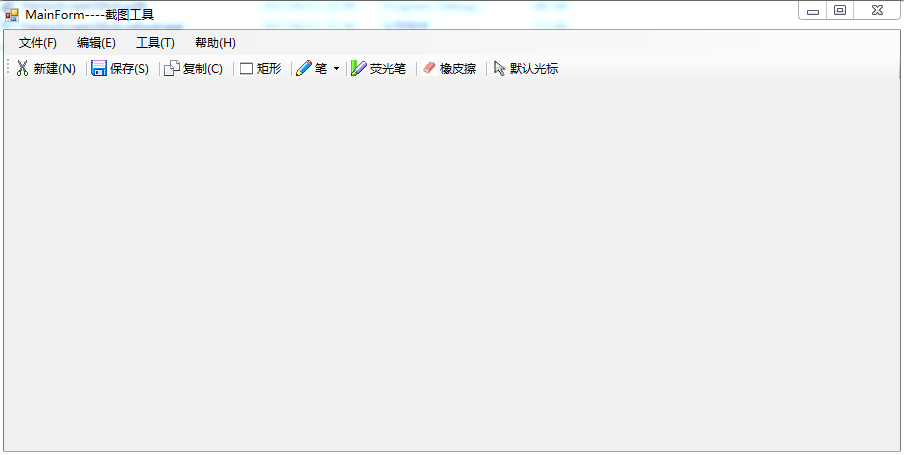
效果图如下【主要实现了截图,保存,复制,画矩形,笔触,荧光笔,橡皮擦等功能】:
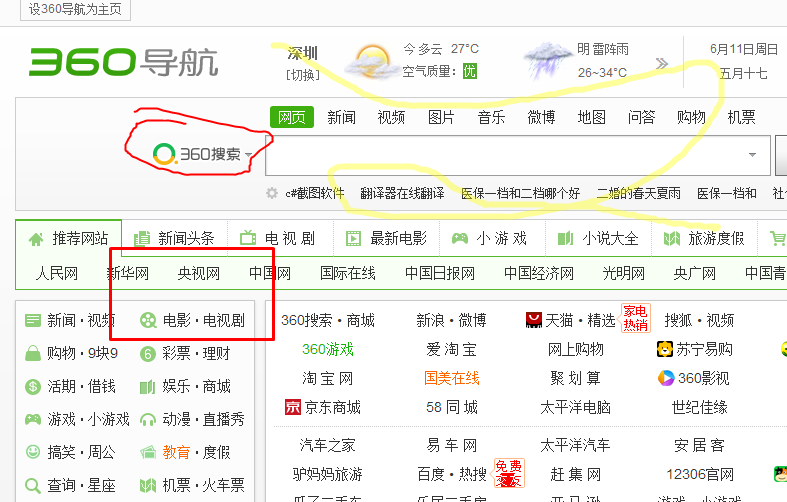
保存后图片如下:
-------------------------------------------------------------------------------------------------------------------------------
核心代码如下:
截取屏幕图像:
public Bitmap GetScreen()
 {
  //获取整个屏幕图像,不包括任务栏
  Rectangle ScreenArea = Screen.GetWorkingArea(this);
  Bitmap bmp = new Bitmap(ScreenArea.Width, ScreenArea.Height);
  using (Graphics g = Graphics.FromImage(bmp))
  {
  g.CopyFromScreen(0, 0, 0, 0, new Size(ScreenArea.Width,ScreenArea.Height));
  }
  return bmp;
}绘制图形功能:
#region 绘制功能
 protected override void OnPaint(PaintEventArgs pe)
 {
  base.OnPaint(pe);
  Graphics g = pe.Graphics;
  DrawHistory(g);
  //绘制当前线
  if (startDraw && this.curLine.PointList != null && this.curLine.PointList.Count > 0)
  {
  DrawLine(g,this.curLine);
  }
  if (startDraw && this.curRect.Start != null && this.curRect.End != null && this.curRect.Start != this.curRect.End) {
  DrawRectangle(g, this.curRect);
  }
 }
 public void DrawHistory(Graphics g) {
  //绘制线历史记录
  if (LineHistory != null)
  {
  foreach (HLine lh in LineHistory)
  {
   if (lh.PointList.Count > 10)
   {
   DrawLine(g, lh);
   }
  }
  }
  //绘制矩形历史记录
  if (RectHistory != null)
  {
  foreach (HRectangle lh in RectHistory)
  {
   if (lh.Start!=null&& lh.End!=null && lh.Start!=lh.End)
   {
   DrawRectangle(g, lh);
   }
  }
  }
 }
 /// <summary>
 /// 绘制线
 /// </summary>
 /// <param name="g"></param>
 /// <param name="line"></param>
 private void DrawLine(Graphics g,HLine line) {
  g.SmoothingMode = SmoothingMode.AntiAlias;
  using (Pen p = new Pen(line.LineColor, line.LineWidth))
  {
  //设置起止点线帽
  p.StartCap = LineCap.Round;
  p.EndCap = LineCap.Round;

  //设置连续两段的联接样式
  p.LineJoin = LineJoin.Round;
  g.DrawCurve(p, line.PointList.ToArray()); //画平滑曲线
  }
 }
 /// <summary>
 /// 绘制矩形
 /// </summary>
 /// <param name="g"></param>
 /// <param name="rect"></param>
 private void DrawRectangle(Graphics g, HRectangle rect)
 {
  g.SmoothingMode = SmoothingMode.AntiAlias;
  using (Pen p = new Pen(rect.LineColor, rect.LineWidth))
  {
  //设置起止点线帽
  p.StartCap = LineCap.Round;
  p.EndCap = LineCap.Round;

  //设置连续两段的联接样式
  p.LineJoin = LineJoin.Round;
  g.DrawRectangle(p, rect.Start.X, rect.Start.Y, rect.End.X - rect.Start.X, rect.End.Y - rect.Start.Y); //画平滑曲线
  }
 }
 public void Earser(Point p0)
 {
  for (int i = lineHistory.Count - 1; i >= 0; i--)
  {
  HLine line = lineHistory[i];
  bool flag = false;
  foreach (Point p1 in line.PointList)
  {
   double distance = GetDistance(p0, p1);
   if (Math.Abs(distance) < 6)
   {
   //需要删除
   flag = true;
   break;
   }

  }
  if (flag)
  {
   lineHistory.RemoveAt(i);
  }
  }
  //擦除矩形
  for (int i = rectHistory.Count - 1; i >= 0; i--)
  {
  HRectangle rect = rectHistory[i];

  if (p0.X>rect.Start.X && p0.X<rect.End.X && p0.Y > rect.Start.Y && p0.Y < rect.End.Y) {

   rectHistory.RemoveAt(i);
  }
  }
 }
 /// <summary>
 /// 获取两点之间的距离
 /// </summary>
 /// <param name="p0"></param>
 /// <param name="p1"></param>
 /// <returns></returns>
 private double GetDistance(Point p0, Point p1) {
  return Math.Sqrt(Math.Pow((p0.X - p1.X), 2) + Math.Pow((p0.Y - p1.Y), 2));
 }
#endregionC#是一个简单、通用、面向对象的编程语言,它由微软Microsoft开发,继承了C和C++强大功能,并且去掉了一些它们的复杂特性,C#综合了VB简单的可视化操作和C++的高运行效率,以其强大的操作能力、优雅的语法风格、创新的语言特性和便捷的面向组件编程从而成为.NET开发的首选语言,但它不适用于编写时间急迫或性能非常高的代码,因为C#缺乏性能极高的应用程序所需要的关键功能。
以上是“C#如何实现截图软件功能”这篇文章的所有内容,感谢各位的阅读!希望分享的内容对大家有帮助,更多相关知识,欢迎关注亿速云行业资讯频道!
亿速云「云服务器」,即开即用、新一代英特尔至强铂金CPU、三副本存储NVMe SSD云盘,价格低至29元/月。点击查看>>
免责声明:本站发布的内容(图片、视频和文字)以原创、转载和分享为主,文章观点不代表本网站立场,如果涉及侵权请联系站长邮箱:is@yisu.com进行举报,并提供相关证据,一经查实,将立刻删除涉嫌侵权内容。


 计算
计算 安全
安全 数据库
数据库 网络和加速
网络和加速 企业服务
企业服务


