这篇文章给大家分享的是有关vue-loader的使用方法的内容。小编觉得挺实用的,因此分享给大家做个参考,一起跟随小编过来看看吧。
.vue格式的文件使用类似HTML的语法描述vue组件。每个.vue文件包含三种最基本的语言块:,
<template>
 <div class="example">{{ msg }}</div>
</template>

<script>
export default {
 data () {
  return {
   msg: 'Hello world!'
  }
 }
}
</script>

<style>
.example {
 color: red;
}
</style>
vue-loader会解析这个文件中的每个语言块,然后传输到其它的loaders,最终输出到module.exports是vue组件的配置对象的CommonJS模块。
vue-loader通过指定语言块的lang属性支持css预编译、html编译模板等语言格式。如在组件的style块中使用sass
<style lang="sass">
 /* write SASS! */
</style>
语言块
默认语言:html
每个*.vue最多包含一个块
块中的内容作为字符串提取出来
src 引入
如果你习惯将*.vue组件分割成多个文件,可以使用语言块的src属性把扩展文件引入到组件中。
<template src="./template.html"></template>
<style src="./style.css"></style>
<script src="./script.js"></script>
语法高亮
在编辑器中可以将*.vue文件作为HTML处理,实现语法高亮
使用 vue-cli
推荐vue-cli和vue-loader组合使用搭建项目
npm install -g vue-cli
vue init webpack-simple hello-vue
cd hello-vue
npm install
npm run dev # ready to go!
ES2015
当vue-loader在同一个项目中检测到babel-loader或者buble-loader的存在时,会用他们来处理*.vue文件中
<script>
import ComponentA from './ComponentA.vue'
import ComponentB from './ComponentB.vue'

export default {
 components: {
  ComponentA,
  ComponentB
 }
}
</script>
我们可以使用ES2015对象的简写来定义子组件,{ ComponentA }是{ ComponentA: ComponentA }的简写。vue将会自动把键转换为component-a,是以我们可以在中引入组件。
ES2015
*.vue文件的的内容会被编译进js渲染函数,经过 Buble等支持ES2015特性的自定义生成工具处理。所以我们可以使用Object shorthand properties 和 computed properties等ES2015特性。
<div :class="[{ active: active }, isButton ? prefix + '-button' : null]">可以简写成:
<div :class="{ active, [`${prefix}-button`]: isButton }">可以用buble自定义模板的特性支持
处理普通js文件
由于vue-loader只处理*.vue文件,需要在webpack的配置文件中配置babel-loader或者buble-loader来处理普通的js文件。vue-cli在项目中可以做这些事情。
在.babelrc文件中配置babel
局部css
当一个style标签带有scoped属性,它的css只应用于当前组件的元素。
<style scoped>
.example {
 color: red;
}
</style>

<template>
 <div class="example">hi</div>
</template>
转换为:
<style>
.example[_v-f3f3eg9] {
 color: red;
}
</style>

<template>
 <div class="example" _v-f3f3eg9>hi</div>
</template>
注:
1 . 在同一个组件可以包含局部和全局样式
<style>
/* global styles */
</style>

<style scoped>
/* local styles */
</style>
子组件的根节点会受到父组件和本组件的局部css样式影响
Partials are not affected by scoped styles.
有了局部样式仍然需要类选择器
在包含迭代组件的组件中小心使用子孙选择器。一条关于.a .b的css规则,如果在类名为a的标签中使用了子组件,那么子组件中的类名为b的标签也会应用这条规则。
CSS 模块化
英文教程
CSS Modules便于实现css模块化,vue-loader通过模仿css的scope提供了module来实现css模块化集成。
使用在
<style module>
.red {
 color: red;
}
.bold {
 font-weight: bold;
}
</style>
这样打开CSS Module模式,class对象会作为$style的属性注入到组件中,进而在中进行动态的类绑定
<template>
 <p :class="$style.red">
  This should be red
 </p>
</template>
style中的类作为被计算的属性,也可以在:class中使用数组或者对象语法
<template>
 <div>
  <p :class="{ [$style.red]: isRed }">
   Am I red?
  </p>
  <p :class="[$style.red, $style.bold]">
   Red and bold
  </p>
 </div>
</template>
或者在js中获取使用它
<script>
export default {
 created () {
  console.log(this.$style.red)
  // -> "_1VyoJ-uZOjlOxP7jWUy19_0"
  // an identifier generated based on filename and className.
 }
}
</script>
自定义注入名
由于一个vue组件可以包含多个
<style module="a">
 /* identifiers injected as $a */
</style>

<style module="b">
 /* identifiers injected as $b */
</style>
配置css-loader
用css-loader来处理CSS Modules,以下是css-loader对
{
 modules: true,
 importLoaders: true,
 localIdentName: '[hash:base64]'
}
通过vue-loader的cssModules配置项定制css-loader
// wepback 1
vue: {
 cssModules: {
  // overwrite local ident name
  localIdentName: '[path][name]---[local]---[hash:base64:5]',
  // enable camelCase
  camelCase: true
 }
}

// webpack 2
module: {
 rules: [
  {
   test: '\.vue$',
   loader: 'vue',
   options: {
    cssModules: {
     localIdentName: '[path][name]---[local]---[hash:base64:5]',
     camelCase: true
    }
   }
  }
 ]
}
PostCSS
任何vue-loader处理输出的css都经过PostCSS进行局部css重写,我们也可以增加PostCSS插件进行这些处理,如autoprefixer和 CSSNext。
Webpack 1.x用法:
// webpack.config.js
module.exports = {
 // other configs...
 vue: {
  // use custom postcss plugins
  postcss: [require('postcss-cssnext')()]
 }
}
Webpack 2.x用法:
// webpack.config.js
module.exports = {
 // other configs...
 plugins: [
  new webpack.LoaderOptionsPlugin({
   vue: {
    // use custom postcss plugins
    postcss: [require('postcss-cssnext')()]
   }
  })
 ]
}
postcss也支持插件数组
postcss: {
 plugins: [...], // list of plugins
 options: {
  parser: sugarss // use sugarss parser
 }
}
热加载
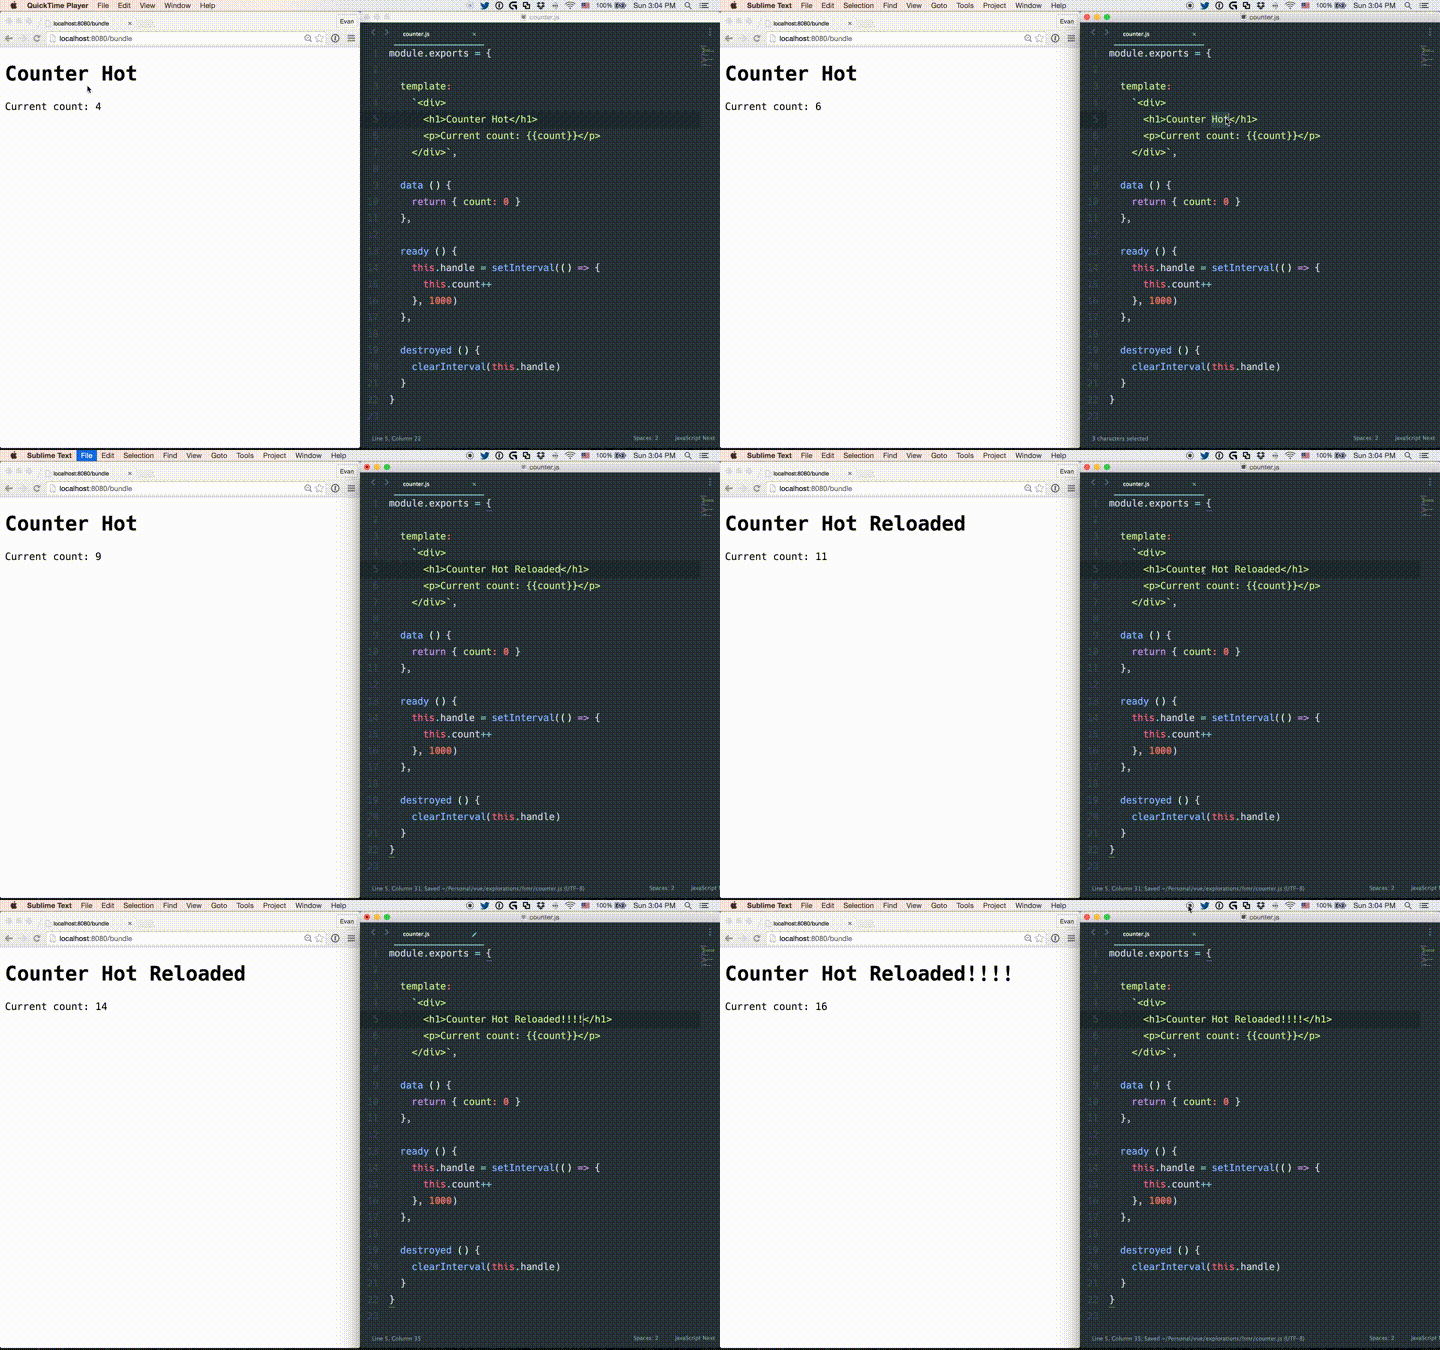
热加载不只是修改文件后页面的刷新。修改某个.vue组件后,页面中这个组件的所有实例都会被替换而不重载页面,它还保存了应用的当前状态以及被替换的组件。

感谢各位的阅读!关于“vue-loader的使用方法”这篇文章就分享到这里了,希望以上内容可以对大家有一定的帮助,让大家可以学到更多知识,如果觉得文章不错,可以把它分享出去让更多的人看到吧!
免责声明:本站发布的内容(图片、视频和文字)以原创、转载和分享为主,文章观点不代表本网站立场,如果涉及侵权请联系站长邮箱:is@yisu.com进行举报,并提供相关证据,一经查实,将立刻删除涉嫌侵权内容。