小编给大家分享一下spring使用xml装配bean的方法,相信大部分人都还不怎么了解,因此分享这篇文章给大家参考一下,希望大家阅读完这篇文章后大有收获,下面让我们一起去了解一下吧!
使用XML装配bean,在bean中调用另一个bean方法,首先建一个Dog类和一个Cat类
package soundsystem;
public class Dog {
private String Cry;//叫声
//用setter方法注入
public void setCry(String cry) {
  Cry = cry;
}
//定义一个狗叫方法
  public void DogCry(){
    System.out.println("狗叫:"+Cry);
    Cat.CatCry();
    catEat.CatEating();
  }
}
package soundsystem;
public class Cat {
private String Cry;//叫声
//用构造函数注入
public Cat(String cry){
this.Cry=cry;
}
//定义一个猫叫方法
public void CatCry(){
System.out.println("猫叫:"+Cry);
}
}一个配置类Bean_DogXML.xml
<?xml version="1.0" encoding="UTF-8"?>
<beans xmlns="http://www.springframework.org/schema/beans"
    xmlns:xsi="http://www.w3.org/2001/XMLSchema-instance"
    xsi:schemaLocation="http://www.springframework.org/schema/beans http://www.springframework.org/schema/beans/spring-beans.xsd">

  <bean id="Dog" class="soundsystem.Dog">
    <property name="Cry" value="汪汪汪~"></property>
    <property name="Cat" ref="Cat"></property>
  </bean>

  <bean id="Cat" class="soundsystem.Cat">
    <constructor-arg value="喵~"></constructor-arg>
  </bean>

</beans>
现在开始测试
package Test;
import org.junit.runner.RunWith;
import org.springframework.context.ApplicationContext;
import org.springframework.context.support.ClassPathXmlApplicationContext;
import org.springframework.test.context.junit4.SpringJUnit4ClassRunner;
import soundsystem.Cat;
import soundsystem.Dog;
@RunWith(SpringJUnit4ClassRunner.class)
public class Test {
@org.junit.Test
public static void main(String[] args) {
ApplicationContext ap=new ClassPathXmlApplicationContext("config/Bean_DogXML.xml");
Dog dog=(Dog)ap.getBean("Dog");
dog.DogCry();
}
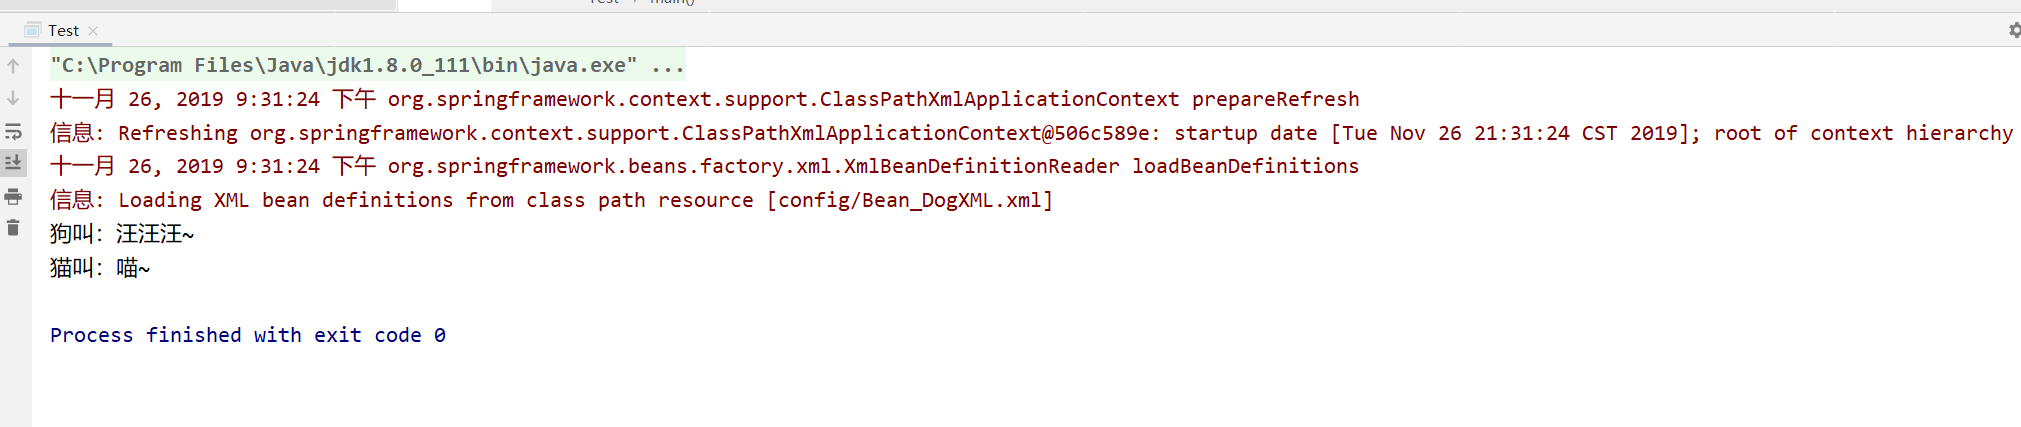
}输出结果:
以上是“spring使用xml装配bean的方法”这篇文章的所有内容,感谢各位的阅读!相信大家都有了一定的了解,希望分享的内容对大家有所帮助,如果还想学习更多知识,欢迎关注亿速云行业资讯频道!
免责声明:本站发布的内容(图片、视频和文字)以原创、转载和分享为主,文章观点不代表本网站立场,如果涉及侵权请联系站长邮箱:is@yisu.com进行举报,并提供相关证据,一经查实,将立刻删除涉嫌侵权内容。


