这篇文章给大家分享的是有关android中如何使用kotlin实现点击更换全局语言的内容。小编觉得挺实用的,因此分享给大家做个参考,一起跟随小编过来看看吧。
注:在这里我要说一下,我知道kotlin不太普及,如果有的同学需要java版的,可以在通读一遍代码,了解了之后把kotlin转化为java,因为kotlin与java是互通的,代码的一些关键点,java语言该怎么写还怎么写,如果有不明白的可以留言
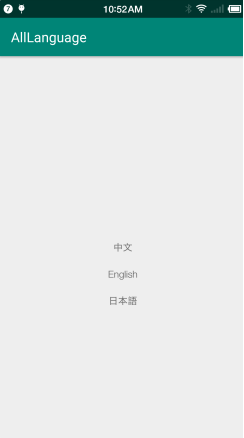
第一步:简单写一下选择语言的布局就好,会用到点击事件,因为我要用到三种语言,可以Button控件,TextView控件,都可以
第二步:可以看下面截图
1.右键res
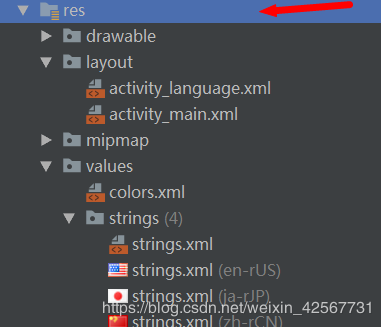
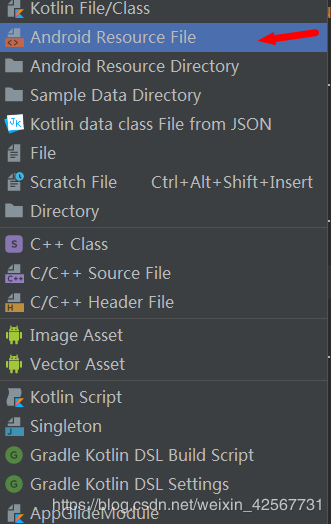
2.new–>android resource file
3.输入filename,在下满local选择需要的语言

4.最后像这样,然后在里面输入所需要控件的语言,在xml空间中运用到,比如 android:text=“@strings/定义的名字”,注意这4个string里面所有控件的数量与名字都要相同

第二步:这里要用到CommonUtil工具类,因为kotlin与java是互通的,我把代码写在下面可以直接用
public class CommonUtil {
 public static void configLanguage(Context mContext, String language) {
 Configuration config = mContext.getResources().getConfiguration();
 if (Build.VERSION.SDK_INT >= Build.VERSION_CODES.HONEYCOMB) {
 if (language.equals("CHINESE")) {
 config.locale = Locale.SIMPLIFIED_CHINESE;
 } else if (language.equals("ENGLISH")) {
 config.locale = Locale.US;
 } else if(language.equals("JAPANESE")){
 config.locale = Locale.JAPAN;
 }else {
 config.locale = Locale.SIMPLIFIED_CHINESE;
 }
 } else {
 if (language.equals("CHINESE")) {
 config.locale = Locale.CHINESE;
 } else if (language.equals("ENGLISH")) {
 config.locale = Locale.ENGLISH;
 } else if (language.equals("JAPANESE")){
 config.locale = Locale.JAPAN;
 }else {
 config.locale = Locale.CHINESE;
 }
 }
 mContext.getResources().updateConfiguration(config, null);
 }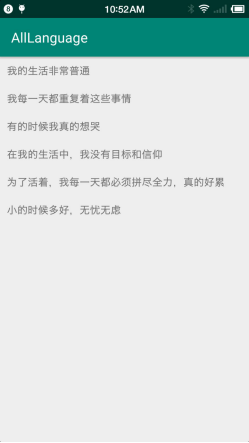
}第四步.然后在主页面进行跳转和调用,LanguageActivity就是需要改变控件语言的界面,下面会有activity_language界面代码
override fun onClick(v: View) {
 when(v.id){
 R.id.tvChinese->{
 CommonUtil.configLanguage(this,"CHINESE")
 startActivity<LanguageActivity>()
 }
 R.id.tvEnglish->{
 CommonUtil.configLanguage(this,"ENGLISH")
 startActivity<LanguageActivity>()
 }
 R.id.tvJan->{
 CommonUtil.configLanguage(this,"JAPANESE")
 startActivity<LanguageActivity>()
 }
 }
}第五步:activity_language代码
<?xml version="1.0" encoding="utf-8"?>
<LinearLayout
xmlns:android="http://schemas.android.com/apk/res/android"
xmlns:app="http://schemas.android.com/apk/res-auto"
android:orientation="vertical"
android:layout_width="match_parent"
android:layout_height="match_parent">
<TextView
android:layout_width="match_parent"
android:layout_height="wrap_content"
android:text="@string/text1"
android:padding="10dp"
android:textSize="15sp"
/>
<TextView
android:layout_width="match_parent"
android:layout_height="wrap_content"
android:text="@string/text2"
android:padding="10dp"
android:textSize="15sp"
/>
<TextView
android:layout_width="match_parent"
android:layout_height="wrap_content"
android:text="@string/text3"
android:padding="10dp"
android:textSize="15sp"
/>
<TextView
android:layout_width="match_parent"
android:layout_height="wrap_content"
android:text="@string/text4"
android:padding="10dp"
android:textSize="15sp"
/>
<TextView
android:layout_width="match_parent"
android:layout_height="wrap_content"
android:text="@string/text5"
android:padding="10dp"
android:textSize="15sp"
/>
<TextView
android:layout_width="match_parent"
android:layout_height="wrap_content"
android:text="@string/text6"
android:padding="10dp"
android:textSize="15sp"
/>
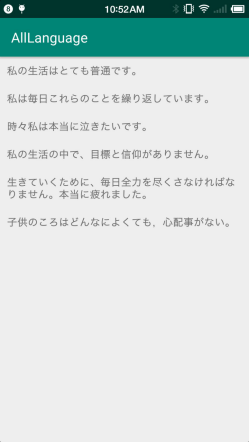
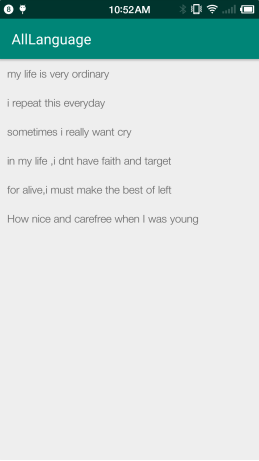
</LinearLayout>下面可以看一下整个的目录结构

运行截图:
Android是一种基于Linux内核的自由及开放源代码的操作系统,主要使用于移动设备,如智能手机和平板电脑,由美国Google公司和开放手机联盟领导及开发。
感谢各位的阅读!关于“android中如何使用kotlin实现点击更换全局语言”这篇文章就分享到这里了,希望以上内容可以对大家有一定的帮助,让大家可以学到更多知识,如果觉得文章不错,可以把它分享出去让更多的人看到吧!
亿速云「云服务器」,即开即用、新一代英特尔至强铂金CPU、三副本存储NVMe SSD云盘,价格低至29元/月。点击查看>>
免责声明:本站发布的内容(图片、视频和文字)以原创、转载和分享为主,文章观点不代表本网站立场,如果涉及侵权请联系站长邮箱:is@yisu.com进行举报,并提供相关证据,一经查实,将立刻删除涉嫌侵权内容。


 计算
计算 安全
安全 数据库
数据库 网络和加速
网络和加速 企业服务
企业服务


