这篇文章主要介绍了Android如何实现仿微信朋友圈点击评论自动定位到相关行功能,具有一定借鉴价值,感兴趣的朋友可以参考下,希望大家阅读完这篇文章之后大有收获,下面让小编带着大家一起了解一下。
打开你的微信朋友圈,点击评论,你就会发现有一个小细节:文本输入框的高度恰好定位到这条信息的底部位置

这个实现起来其实很简单,咱们就来看看吧
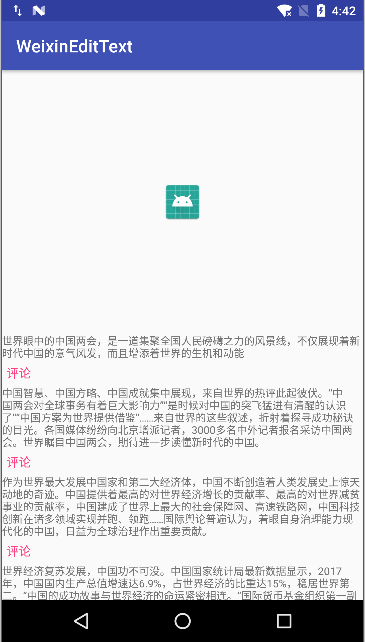
最简单的RecyclerView
依然是先实现RecyclerView。跟朋友圈一样,我们也把头给加上去,这样我们在点第一条信息的时候,效果会更好一些
信息内容简单些,反正我们就看看效果
<?xml version="1.0" encoding="utf-8"?>
<LinearLayout xmlns:android="http://schemas.android.com/apk/res/android"
  android:orientation="vertical" android:layout_width="match_parent"
  android:layout_height="wrap_content">
  <TextView
    android:id="@+id/tv_title"
    android:layout_width="wrap_content"
    android:layout_height="wrap_content"
    android:textSize="12sp" />
  <TextView
    android:id="@+id/tv_comment"
    android:text="评论"
    android:textSize="14sp"
    android:layout_margin="5dip"
    android:textColor="@color/colorAccent"
    android:layout_width="wrap_content"
    android:layout_height="wrap_content" />
</LinearLayout>头部也很简单,就一张图片作为区分
<?xml version="1.0" encoding="utf-8"?>
<RelativeLayout xmlns:android="http://schemas.android.com/apk/res/android"
  android:layout_width="match_parent" android:layout_height="300dip">
  <ImageView
    android:layout_centerInParent="true"
    android:layout_width="wrap_content"
    android:layout_height="wrap_content"
    android:src="@mipmap/ic_launcher"/>
</RelativeLayout>消息内容就以string作为信息数据类型,头的数据类型为TopClass
data class TopClass(val value: String)实现一个adapter
class MainAdapter(private val beans: ArrayList<Any>, val context: Context) : RecyclerView.Adapter<RecyclerView.ViewHolder>() {
  var height = 0
  enum class TYPE(val value: Int) {
    TOP(0), NORMAL(1)
  }
  override fun onCreateViewHolder(parent: ViewGroup?, viewType: Int): RecyclerView.ViewHolder {
    when(viewType) {
      TYPE.NORMAL.value -> {
        val view = LayoutInflater.from(context).inflate(R.layout.adapter_main, parent, false)
        return MainNormalViewHolder(view)
      }
      TYPE.TOP.value -> {
        val view = LayoutInflater.from(context).inflate(R.layout.adapter_top, parent, false)
        return MainTopViewHolder(view)
      }
    }
    throw Exception()
  }
  override fun getItemCount() = beans.size
  override fun onBindViewHolder(holder: RecyclerView.ViewHolder?, position: Int) {
    if (holder != null) {
      when(getItemViewType(position)) {
        TYPE.NORMAL.value -> {
          (holder as MainNormalViewHolder).setText(beans[position] as String)
          holder.clickComment(holder.layoutPosition)
        }
        TYPE.TOP.value -> {}
      }
    }
  }
  override fun getItemViewType(position: Int): Int {
    when(beans[position]) {
      is String -> return TYPE.NORMAL.value
      is TopClass -> return TYPE.TOP.value
    }
    return super.getItemViewType(position)
  }
  inner class MainNormalViewHolder(itemView: View) : RecyclerView.ViewHolder(itemView) {
    fun setText(text: String) {
      itemView.tv_title.text = text
    }
    fun clickComment(position: Int) {
      itemView.tv_comment.setOnClickListener {
        (context as MainActivity).showInputComment(itemView.tv_comment, position)
      }
    }
  }
  inner class MainTopViewHolder(itemView: View) : RecyclerView.ViewHolder(itemView)
}这样一个列表就完成了
输入框的产生
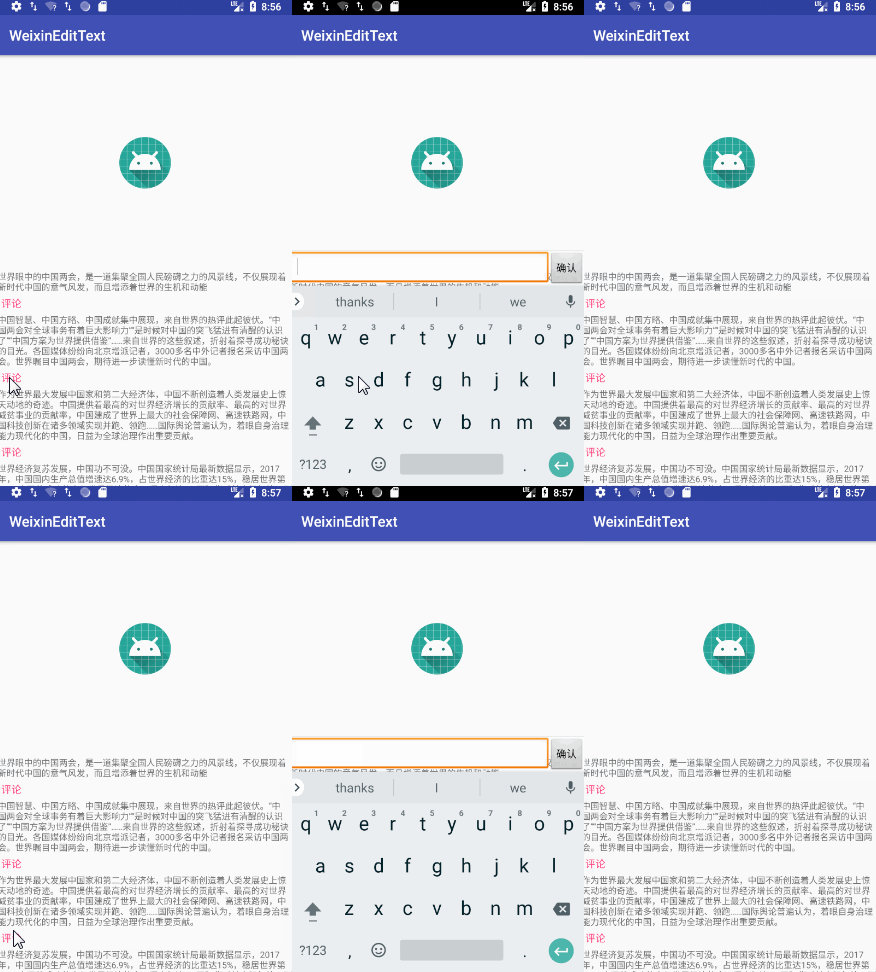
这里有一个关键的地方,如何将EditText悬浮在键盘上,并且RecyclerView不会被挤上去。这里我们可以使用Dialog,同时在布局中要使用ScrollView来进行占位
<?xml version="1.0" encoding="utf-8"?>
<LinearLayout xmlns:android="http://schemas.android.com/apk/res/android"
  android:orientation="vertical"
  android:layout_width="match_parent"
  android:layout_height="match_parent">
  <ScrollView
    android:layout_width="match_parent"
    android:layout_height="match_parent"
    android:layout_weight="1">
  </ScrollView>
  <View
    android:layout_width="match_parent"
    android:layout_height="0.5dip"
    android:background="#666666"></View>
  <LinearLayout
    android:id="@+id/dialog_layout_comment"
    android:layout_width="match_parent"
    android:layout_height="wrap_content">
    <EditText
      android:layout_width="match_parent"
      android:layout_height="wrap_content"
      android:layout_weight="1"/>
    <Button
      android:layout_width="wrap_content"
      android:layout_height="wrap_content"
      android:text="确认"/>
  </LinearLayout>
</LinearLayout>只有ScrollView进行配合,才能实现我们的效果。
来看看效果
列表的滚动
输入框也有了,这时候就差滚动了。我们可以通过smoothScrollBy来让RecyclerView按X或者Y轴进行滚动。那我们这里到底应该滚动多少距离才对呢?,咱们来计算一下吧
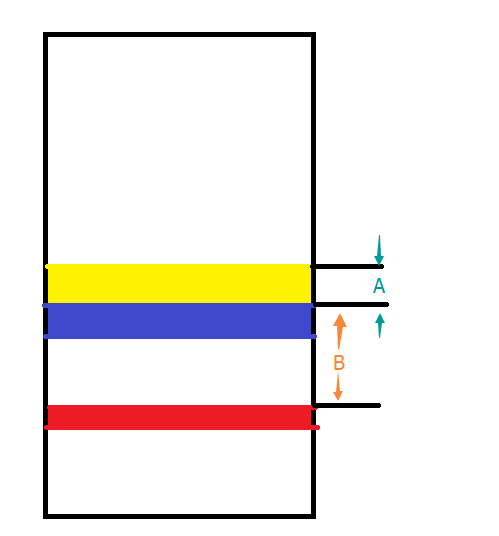
图中红色部分为键盘展现之前某条信息评论区所在位置;蓝色部分为键盘,当键盘打开的时候,我们需要将红色的部分移动到黄色的位置。这样黄色顶部与红色顶部中间的区域高度,就是RecyclerView需要滚动的数值这样就好办了,我们使用getLocationOnScreen去获取差值,再加上评论区域高度就行了
fun showInputComment(commentView: View, position: Int) {
  // RV中评论区起始Y的位置
  val rvInputY = getY(commentView)
  val rvInputHeight = commentView.height
  dialog = Dialog(this, android.R.style.Theme_Translucent_NoTitleBar)
  dialog!!.setContentView(R.layout.dialog_comment)
  dialog!!.show()
  val handler = object : Handler() {}
  handler.postDelayed({
    // 对话框中的输入框Y的位置
    val dialogY = getY(dialog!!.findViewById<LinearLayout>(R.id.dialog_layout_comment))
    rv_main.smoothScrollBy(0, rvInputY - (dialogY - rvInputHeight))
  }, 300)
}
private fun getY(view: View): Int {
  val rect = IntArray(2)
  view.getLocationOnScreen(rect)
  return rect[1]
}来看看效果
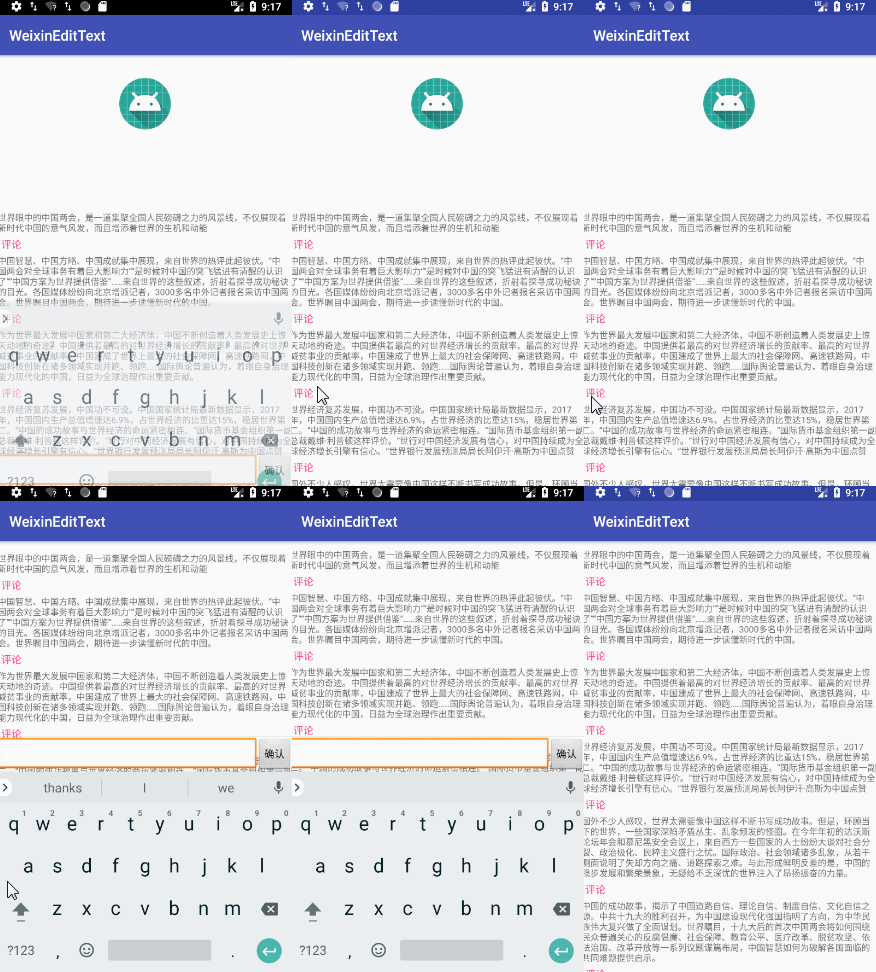
但是还有几个小问题,如果是点击最后一行的话,会因为滚动空间不足而不能实现相同的效果,并且按返回键的时候,键盘先消失,然后再按一次之后Dialog才消失。
针对第一个问题,我们直接添加一个空View作为列表最后一项即可,并且高度要等于输入框的高度;第二个问题也很简单,就是监听键盘弹出与隐藏时View高度发生的变化
data class BottomClass(val value: String)
点击的时候再添加
handler.postDelayed({
  // 对话框中的输入框Y的位置
  val dialogY = getY(dialog!!.findViewById<LinearLayout>(R.id.dialog_layout_comment))
  if (position == arrays.size - 1) {
    arrays.add(BottomClass(""))
    adapter?.height = dialog!!.findViewById<LinearLayout>(R.id.dialog_layout_comment).height
    adapter?.notifyDataSetChanged()
  }
  rv_main.smoothScrollBy(0, rvInputY - (dialogY - rvInputHeight))
}, 300)关闭Dialog的时候删除这个对象
window.decorView.viewTreeObserver.addOnGlobalLayoutListener {
  val rect = Rect()
  window.decorView.getWindowVisibleDisplayFrame(rect)
  val displayHeight = rect.bottom - rect.top
  val height = window.decorView.height
  val keyboardHeight = height - displayHeight
  if (previousKeyboardHeight != keyboardHeight) {
    val hide = displayHeight.toDouble() / height > 0.8
    if (hide) {
      if (arrays[arrays.size - 1] is BottomClass) {
        arrays.removeAt(arrays.size - 1)
        adapter?.notifyDataSetChanged()
      }
      dialog?.dismiss()
    }
  }
}来看看最终效果
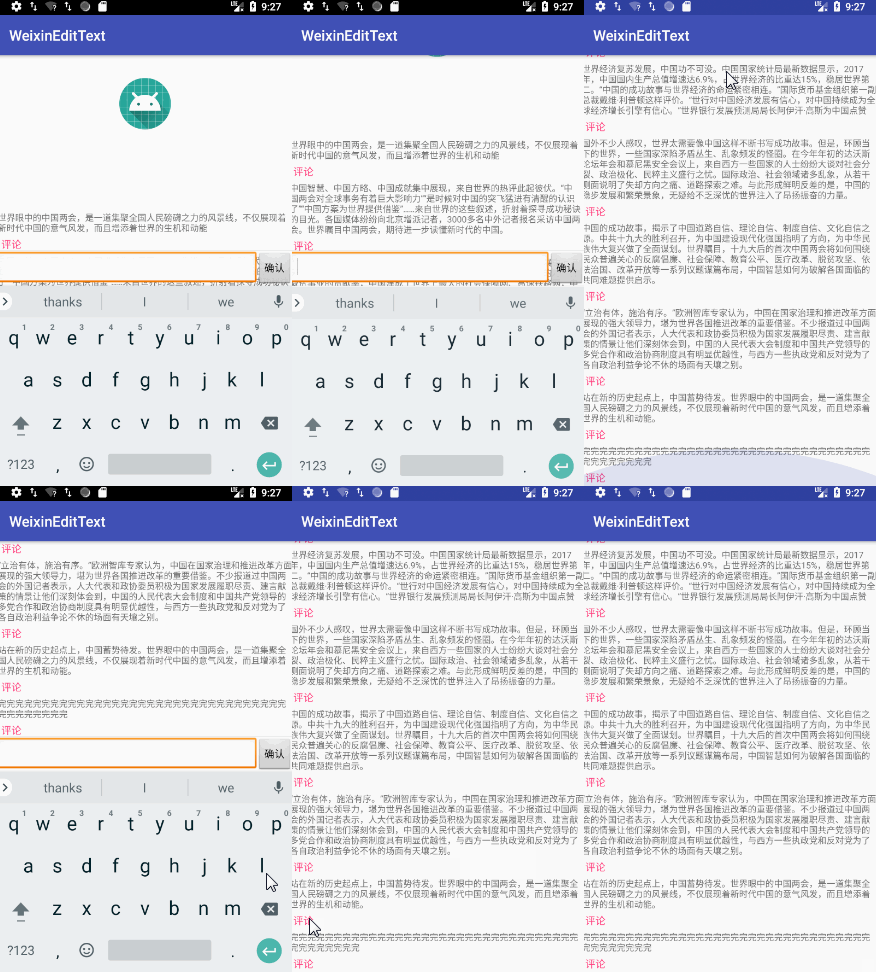
感谢你能够认真阅读完这篇文章,希望小编分享的“Android如何实现仿微信朋友圈点击评论自动定位到相关行功能”这篇文章对大家有帮助,同时也希望大家多多支持亿速云,关注亿速云行业资讯频道,更多相关知识等着你来学习!
亿速云「云服务器」,即开即用、新一代英特尔至强铂金CPU、三副本存储NVMe SSD云盘,价格低至29元/月。点击查看>>
免责声明:本站发布的内容(图片、视频和文字)以原创、转载和分享为主,文章观点不代表本网站立场,如果涉及侵权请联系站长邮箱:is@yisu.com进行举报,并提供相关证据,一经查实,将立刻删除涉嫌侵权内容。