1.基础安装
yum install pcre pcre-devel openssl  openssl-devel
tar xf  haproxy-1.7.1.tar.gz
cd haproxy-1.7.1
make TARGET=linux2628 USE_PCRE=1 USE_OPENSSL=1 USE_ZLIB=1  PREFIX=/usr/local/haproxy
 make install PREFIX=/usr/local/haproxy
cd examples/
cp  haproxy.init   /etc/init.d/haproxy
chmod +x /etc/init.d/haproxy2.本机IP:192.168.56.15
[root@bogon examples]# cat /etc/haproxy/haproxy.cfg
global
maxconn 100000
chroot /usr/local/haproxy
uid 99
gid 99
daemon
nbproc 1
pidfile /usr/local/haproxy/logs/haproxy.pid
log 127.0.0.1 local0 info

defaults
option http-keep-alive
maxconn 100000
mode http
timeout connect 300000ms
timeout client  300000ms
timeout server  300000ms

listen stats
 mode http
 bind 0.0.0.0:9999
 stats enable
 log global
 stats uri     /haproxy-status
 stats auth    haadmin:123456

listen  web_port
 bind 0.0.0.0:80
 mode tcp
 log global
[root@bogon examples]#
[root@bogon examples]# /etc/init.d/haproxy  restart
Restarting haproxy (via systemctl):                        [  OK  ]
[root@bogon examples]#http://192.168.56.15:9999/haproxy-status

3.对后端代理


[root@bogon examples]# cat /etc/haproxy/haproxy.cfg
global
maxconn 100000
chroot /usr/local/haproxy
uid 99
gid 99
daemon
nbproc 1
pidfile /usr/local/haproxy/logs/haproxy.pid
log 127.0.0.1 local0 info

defaults
option http-keep-alive
maxconn 100000
mode http
timeout connect 300000ms
timeout client  300000ms
timeout server  300000ms

listen stats
 mode http
 bind 0.0.0.0:9999
 stats enable
 log global
 stats uri     /haproxy-status
 stats auth    haadmin:123456

listen  web_port
 bind 0.0.0.0:80
 mode tcp  #tcp的方式
 log global
 server web1  192.168.56.12:80  check inter 2000 fall 15 rise 10
 server web2  192.168.56.16:80    check inter 2000 fall 15 rise 10
[root@bogon examples]#
 /etc/init.d/haproxy  restart
 #inter是监控检查时间间隔,即每间隔2秒进行一次检查,
 rise是连续检查10次失败后将服务器从负载删除,
 fall是连续15次监控检查成功后重新添加至负载,一般fall大于rise几次,
[root@bogon html]# curl 192.168.56.15
192.168.56.12 web1
[root@bogon html]# curl 192.168.56.15
192.168.56.16 web2
[root@bogon html]# curl 192.168.56.15
192.168.56.12 web1
[root@bogon html]# curl 192.168.56.15
192.168.56.16 web2
[root@bogon html]# curl 192.168.56.15
192.168.56.12 web1
[root@bogon html]# curl 192.168.56.15
192.168.56.16 web2
[root@bogon html]# curl 192.168.56.15
192.168.56.12 web1
[root@bogon html]# curl 192.168.56.15
192.168.56.16 web2
[root@bogon html]# curl 192.168.56.15
192.168.56.12 web1
[root@bogon html]# curl 192.168.56.15
192.168.56.16 web2
[root@bogon html]#查看负载状况

################################################
haproxy调度算法
HAProxy的算法有如下8种:
roundrobin,表示简单的轮询,
static-rr,表示根据权重,建议关注;
leastconn,表示最少连接者先处理,建议关注;
source,表示根据请求源IP,建议关注;
uri,表示根据请求的URI;
url_param,表示根据请求的URl参数'balanceurl_param' requires an URL parameter name
hdr(name),表示根据HTTP请求头来锁定每一次HTTP请求;
rdp-cookie(name),表示根据据cookie(name)来锁定并哈希每一次TCP请求。haproxy的摘除节点的 yum安装的
global
maxconn 100000
chroot /var/lib/haproxy
user haproxy
group haproxy
daemon
nbproc 1
pidfile /usr/local/haproxy/logs/haproxy.pid
stats socket /var/lib/haproxy.sock mode 600 level admin
log 127.0.0.1 local10 info

defaults
option http-keep-alive
maxconn 100000
mode http
timeout connect 5000ms
timeout client  50000ms
timeout server 50000ms

listen stats
mode http
bind 0.0.0.0:8888
stats enable
stats uri     /haproxy-status
stats auth    haproxy:saltstack

frontend frontend_www_example_com
bind 192.168.56.21:80
mode http
option httplog
log global
    default_backend backend_www_example_com

backend backend_www_example_com
option forwardfor header X-REAL-IP
option httpchk HEAD / HTTP/1.0
balance   roundrobin
server web-node1  192.168.56.11:8080 check inter 2000 rise 30 fall 15
server web-node2  192.168.56.12:8080 check inter 2000 rise 30 fall 15

[root@web-node1 ~]#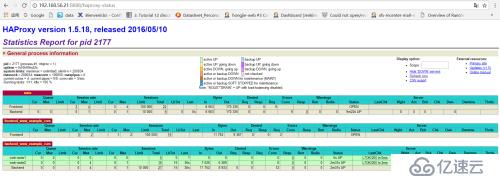
这样就能吧haproxy的节点删除或者增加
echo "disable server backend_www_example_com/web-node1" | socat /var/lib/haproxy.sock stdio
echo "enable server backend_www_example_com/web-node1" | socat /var/lib/haproxy.sock stdio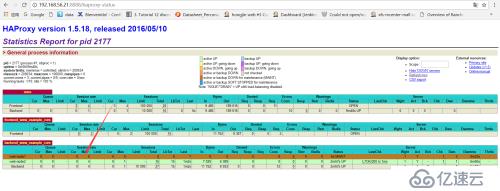
haproxy增加日志的功能
mkdir /var/log/haproxy
chmod a+w /var/log/haproxy
/etc/rsyslog.conf
打开选项:
$ModLoad imudp
$UDPServerRun 514
# Save haproxy log
local0.*                       /var/log/haproxy/haproxy.log
vim  /etc/sysconfig/rsyslog
[root@web-node1 nginx]# cat /etc/sysconfig/rsyslog
# Options for rsyslogd
# Syslogd options are deprecated since rsyslog v3.
# If you want to use them, switch to compatibility mode 2 by "-c 2"
  See rsyslogd(8) for more details
SYSLOGD_OPTIONS="-r -m 0 -c 2"   #修改此处
[root@web-node1 nginx]#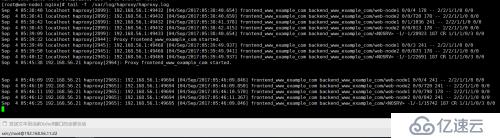
haproxy日志里面的localhost 和配置文件有关 这个IP可以修改
log 127.0.0.1 local10 info3.集群配置
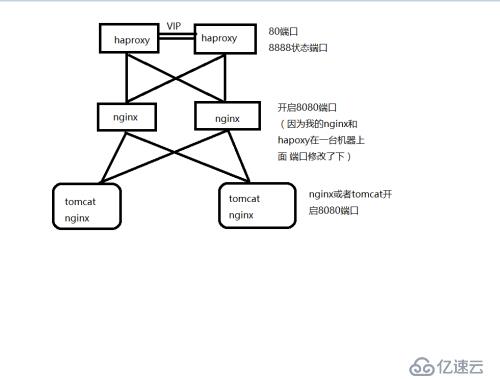
192.168.56.11 nginx 反向代理 keepalived haproxy
192.168.56.12 nginx 反向代理 keepalived haproxy
192.168.56.13 nginx 模拟tomcat
192.168.56.14 nginx 模拟tomcat
keepalived的VIP为192.168.56.21
问题:haproxy 不会绑定不存在的VIP 所以启动不起来 so,这样可以绑定不存在的VIP
echo 1 > /proc/sys/net/ipv4/ip_nonlocal_bind
vi /etc/sysctl.conf sysctl -p
net.ipv4.ip_nonlocal_bind = 1
开启允许绑定非本机的IP
查看keepalived的配置文件192.168.56.11(主)
[root@web-node1 nginx]# cat  /etc/keepalived/keepalived.conf
! Configuration File for keepalived
global_defs {
   notification_email {
     saltstack@example.com
   }
   notification_email_from keepalived@example.com
   smtp_server 127.0.0.1
   smtp_connect_timeout 30
   router_id haproxy_ha
}

vrrp_instance haproxy_ha {
state MASTER
interface eth0
    virtual_router_id 36
priority 150
    advert_int 1
authentication {
auth_type PASS
        auth_pass 1111
    }
    virtual_ipaddress {
       192.168.56.21
    }
}

[root@web-node1 nginx]#查看keepalived的配置文件192.168.56.12(备)
[root@web-node2 ~]# cat /etc/keepalived/keepalived.conf
! Configuration File for keepalived
global_defs {
   notification_email {
     saltstack@example.com
   }
   notification_email_from keepalived@example.com
   smtp_server 127.0.0.1
   smtp_connect_timeout 30
   router_id haproxy_ha
}

vrrp_instance haproxy_ha {
state BACKUP
interface eth0
    virtual_router_id 36
priority 100
    advert_int 1
authentication {
auth_type PASS
        auth_pass 1111
    }
    virtual_ipaddress {
       192.168.56.21
    }
}

[root@web-node2 ~]#[root@web-node2 ~]# cat /etc/haproxy/haproxy.cfg
global
maxconn 100000
chroot /var/lib/haproxy
user haproxy
group haproxy
daemon
nbproc 1
pidfile /usr/local/haproxy/logs/haproxy.pid
stats socket /var/lib/haproxy.sock mode 600 level admin
log 127.0.0.1 local3 info
defaults
option http-keep-alive
maxconn 100000
mode http
timeout connect 5000ms
timeout client 50000ms
timeout server 50000ms
listen stats
mode http
bind 0.0.0.0:8888
stats enable
stats uri /haproxy-status
stats auth haproxy:saltstack
frontend frontend_www_example_com
bind 192.168.56.21:80
mode tcp
option httplog
log global
default_backend backend_www_example_com
backend backend_www_example_com
option forwardfor header X-REAL-IP
option httpchk HEAD / HTTP/1.0
balance roundrobin
server web-node1 192.168.56.11:8080 check inter 2000 rise 30 fall 15
server web-node2 192.168.56.12:8080 check inter 2000 rise 30 fall 15
[root@web-node2 ~]#查看192.168.56.12 haproxy的配置文件
[root@web-node1 nginx]# cat /etc/haproxy/haproxy.cfg
global
maxconn 100000
chroot /var/lib/haproxy
user haproxy
group haproxy
daemon
nbproc 1
pidfile /usr/local/haproxy/logs/haproxy.pid
stats socket /var/lib/haproxy.sock mode 600 level admin
#log 127.0.0.1 local3 info
log  192.168.56.21 local0 debug
defaults
option http-keep-alive
maxconn 100000
mode http
timeout connect 5000ms
timeout client  50000ms
timeout server 50000ms

listen stats
mode http
bind 0.0.0.0:8888
stats enable
stats uri     /haproxy-status
stats auth    haproxy:saltstack

frontend frontend_www_example_com
bind 192.168.56.21:80
mode http
option httplog
log global
    default_backend backend_www_example_com

backend backend_www_example_com
option forwardfor header X-REAL-IP
option httpchk HEAD / HTTP/1.0
balance   roundrobin
server web-node1  192.168.56.11:8080 check inter 2000 rise 30 fall 15
server web-node2  192.168.56.12:8080 check inter 2000 rise 30 fall 15

[root@web-node1 nginx]#[root@web-node1 nginx]# cat /etc/nginx/nginx.conf
worker_processes 1;
events {
worker_connections 1024;
}
http {
include mime.types;
default_type application/octet-stream;
sendfile on;
keepalive_timeout 65;
upstream server_pools {
server 192.168.56.13:8080 weight=1;
server 192.168.56.14:8080 weight=1;
}
server {
listen 192.168.56.11:8080;
server_name blog.liuhaixiao.com;
location / {
proxy_pass http://server_pools;
proxy_set_header Host $host;
proxy_set_header X-Forwarded-For $remote_addr;
}
}
}
[root@web-node1 nginx]#查看192.168.56.12的nginx反向代理的配置文件(最简单的配置 demo)
[root@web-node2 ~]# cat /etc/nginx/nginx.conf
worker_processes  1;
events {
    worker_connections  1024;
}
http {
    include       mime.types;
    default_type  application/octet-stream;
    sendfile        on;
    keepalive_timeout  65;

    upstream server_pools {
         server 192.168.56.13:8080  weight=1;
         server 192.168.56.14:8080  weight=1;
    }

    server {
        listen       192.168.56.12:8080;
        server_name blog.liuhaixiao.com;
        location / {
            proxy_pass http://server_pools;
            proxy_set_header Host  $host;
            proxy_set_header X-Forwarded-For $remote_addr;
        }
    }
}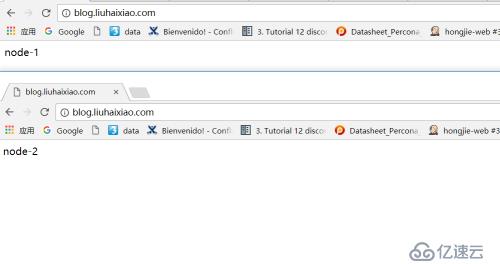
[root@web-node2 ~]#查看192.168.56.13的nginx web容器
[root@web-node3 html]# cat /usr/share/nginx/html/index.html
node-2
查看192.168.56.14的nginx web容器
[root@web-node4 html]# cat /usr/share/nginx/html/index.html
node-1检查VIP zai 192.168.56.11上面
[root@web-node1 nginx]# ip addr
1: lo: <LOOPBACK,UP,LOWER_UP> mtu 65536 qdisc noqueue state UNKNOWN
    link/loopback 00:00:00:00:00:00 brd 00:00:00:00:00:00
    inet 127.0.0.1/8 scope host lo
       valid_lft forever preferred_lft forever
    inet6 ::1/128 scope host
       valid_lft forever preferred_lft forever
2: eth0: <BROADCAST,MULTICAST,UP,LOWER_UP> mtu 1500 qdisc pfifo_fast state UP qlen 1000
    link/ether 00:0c:29:10:66:98 brd ff:ff:ff:ff:ff:ff
    inet 192.168.56.11/24 brd 192.168.56.255 scope global eth0
       valid_lft forever preferred_lft forever
    inet 192.168.56.21/32 scope global eth0
       valid_lft forever preferred_lft forever
    inet6 fe80::20c:29ff:fe10:6698/64 scope link
       valid_lft forever preferred_lft forever
[root@web-node1 nginx]#现在把本地的电脑blog.liuhaixiao.com 解析到192.168.56.21上面去
####################################################
新添加:192.168.56.15 增加一个nginx 域名
haproxy 监听80端口 nginx 监听的端口千万不能和后端tomcat一样 否则回包回不来
[root@web-node1 ~]# cat  /etc/nginx/nginx.conf
worker_processes  1;
events {
    worker_connections  1024;
}
http {
    include       mime.types;
    default_type  application/octet-stream;
    sendfile        on;
    keepalive_timeout  65;

    upstream server_pools {
         server 192.168.56.13:8080  weight=1;
         server 192.168.56.14:8080  weight=1;
    }


    upstream server_tt {
         server 192.168.56.15:8080  weight=1;
    }
    server {
        listen       81;
        server_name  blog.liuhaixiao.com;
        location / {
            proxy_pass http://server_pools;
            proxy_set_header Host  $host;
            proxy_set_header X-Forwarded-For $remote_addr;
        }
    }
       server {
        listen      81;
        server_name  blog.sanlang.com;
        location / {
            proxy_pass http://server_tt;
            proxy_set_header Host  $host;
            proxy_set_header X-Forwarded-For $remote_addr;
        }
    }

}
[root@web-node1 ~]#
3是 另外一台服务器的192.168.56.15 tomcat/nginx 的页面


haproxy具体参数请参考:
http://www.cnblogs.com/zhang789/p/6057402.html
haproxy:多域名参考
基于域名负载均衡的Haproxy配置
http://blog.csdn.net/youyudehexie/article/details/7606504
#####################
亿速云「云服务器」,即开即用、新一代英特尔至强铂金CPU、三副本存储NVMe SSD云盘,价格低至29元/月。点击查看>>
免责声明:本站发布的内容(图片、视频和文字)以原创、转载和分享为主,文章观点不代表本网站立场,如果涉及侵权请联系站长邮箱:is@yisu.com进行举报,并提供相关证据,一经查实,将立刻删除涉嫌侵权内容。


 计算
计算 安全
安全 数据库
数据库 网络和加速
网络和加速 企业服务
企业服务


