什么是LNMP?
LNMP(别名LEMP)是指由Linux, Nginx, MySQL/MariaDB, PHP/Perl/Python组合成的动态Web应用程序和服务器,它是一组Web应用程序的基础软件包,在这个基础环境上我们可以搭建任何使用PHP/Perl/Python等语言的动态网站,如商务网站、博客、论坛和开源Web应用程序软件等,它是互联网上被广泛使用的Web网站架构之一。
部署方式
从网站规模大小(访问流量、注册用户等)角度来看,LNMP架构可以使用单机部署方式和集群部署方式。单机部署方式即所有的软件都部署在一台Linux服务器上;集群部署方式可以将Nginx网络服务器,MySQL/MariaDB数据库,PHP软件分开安装到不同的服务器上,它们彼此之间通过TCP网络协议相互通信协助工作,以及对外提供Web应用访问服务。因此,当单台服务器不能满足性能要求时,可以使用集群方式部署。
本教程将指导您如何在RHEL 7/CentOS 7以及Fedora 23/24/25等衍生版本中使用Nginx 1.10, MariaDB 10和PHP 6安装LNMP应用服务器环境。(在其他系统如SUSE、Ubuntu中源码编译安装LNMP同样可以参考本教程。)
前提要求
准备2台RHEL 7或CentOS 7服务器,一台用于安装MariaDB,另一台用于安装Nginx和PHP。当然你也可以仅仅使用1台服务器部署LNMP以通过实验来验证LNMP。
| HOSTNAME | IP | OS | NODE |
hming-server217-mdb | 10.0.6.217 | CentOS 7.2 x86_64 | MariaDB |
| hming-server218-web | 10.0.6.218 | CentOS 7.2 x86_64 | MariaDB,Nginx,PHP |
主软件包(源码包)
DB mariadb-10.1.20.tar.gz
PHP php-5.6.30.tar.bz2
Nginx nginx-1.10.2.tar.gz
注意:主软件包在这之前我已经提前下载好了,可能并不是最新和稳定版,你也可以根据你的需求选择其他版本。
依赖软件
源码编译安装LNMP有许多依赖软件(如gcc、make)是必要的,一般可以通过YUM软件管理程序来安装,另外小部分需要源码编译安装。
通过yum安装gcc、gcc-c++、make等必需软件包
# yum install -y gcc gcc-c++ make automake安装MariaDB
1. 使用yum安装gcc、make、bison、ncurses-devel等依赖软件包
# yum install zlib-devel ncurses ncurses-devel bison2. 安装cmake,cmake是编译MySQL/MariaDB的必要工具(MySQL5.6/MariaDB 10及以后的版本) 你可以在网站https://cmake.org/中下载cmake软件包
将软件包上传到/usr/local/src目录下,然后解压cmake包,cd到cmake目录执行./bootstrap脚本进行安装,同时可以使用--prefix=<install dir>选项指定安装的目录。
# tar -zxf cmake-3.7.2.tar.gz
# cd cmake-3.7.2/
# ./bootstrap --prefix=/usr/local/cmake
# make && make install当安装完之后,你可以使用执行/usr/local/cmake/bin/cmake --version查看安装的cmake版本
[root@hming-server217-mdb ~ ]# /usr/local/cmake/bin/cmake --version
cmake version 3.7.2

CMake suite maintained and supported by Kitware (kitware.com/cmake).3. 安装完cmake编译工具之后,接下来我们安装MariaDB(你可以访问https://mariadb.org/下载MariaDB), 首先创建MariaDB安装目录/usr/local/mysql和数据库服务器的数据目录/data/mysql/webdata,并创建MySQL用户,并将/data/mysql/webdata目录的所属主权限修改为mysql用户
创建安装目录和数据目录
# mkdir /usr/local/mysql
# mkdir /data/mysql/webdata -p创建mysql用户,并修改数据目录的权限
# groupadd mysql
# useradd -r -g mysql -s /sbin/nologin mysql -M
# chown -R mysql:mysql /data/mysql/4. 编译安装MariaDB,将MariaDB软件包解压后使用cmake进行编译,根据需求选择相应的编译参数进行编译(查看编译选项/usr/local/cmake/bin/cmake . -LH). (或者访问MariaDB编译安装帮助文档https://mariadb.com/kb/en/mariadb/compiling-mariadb-from-source/)
[root@hming-server217-mdb /usr/local/src ]# tar -zxf mariadb-10.1.20.tar.gz
[root@hming-server217-mdb /usr/local/src ]# cd mariadb-10.1.20/

[root@hming-server217-mdb /usr/local/src/mariadb-10.1.20 ]# /usr/local/cmake/bin/cmake . -DCMAKE_INSTALL_PREFIX=/usr/local/mysql -DMYSQL_DATADIR=/data/mysql/webdata -DSYSCONFDIR=/etc -DMYSQL_TCP_PORT=3306 -DMYSQL_USER=mysql -DDEFAULT_CHARSET=utf8 -DEXTRA_CHARSETS=all -DDEFAULT_COLLATION=utf8_general_ci -DMYSQL_UNIX_ADDR=/data/mysql/webdata/mysql.sock -DWITH_INNOBASE_STORAGE_ENGINE=1 -DWITH_MYISAM_STORAGE_ENGINE=1 -DWITH_MEMORY_STORAGE_ENGINE=1 -DWITH_PARTITION_STORAGE_ENGINE=1 -DWITH_ARCHIVE_STORAGE_ENGINE=1 -DENABLED_LOCAL_INFILE=1 -DWITH_EMBEDDED_SERVER=1 -DWITH_READLINE=1 -DWITH_DEBUG=0执行gmake 和 gmake install进行最后的安装
[root@hming-server217-mdb /usr/local/src/mariadb-10.1.20 ]# gmake
[root@hming-server217-mdb /usr/local/src/mariadb-10.1.20 ]# gmake install5. 配置mysql环境变量,如果不配置默认系统找不到mysql的可执行程序和命令,否则你必须使用全路径执行与mysql相关的任何命令,查看系统默认的环境变量
使用export命令添加mysql环境变量
[root@hming-server217-mdb ~ ]# export PATH=$PATH:/usr/local/mysql/bin
[root@hming-server217-mdb ~ ]# echo $PATH
/usr/local/sbin:/usr/local/bin:/usr/sbin:/usr/bin:/root/bin:/usr/local/mysql/bin最后将mysql环境配置添加到/etc/profile或者/etc/profile.d/的自定义文件中
[root@hming-server217-mdb ~ ]# echo "export PATH=$PATH:/usr/local/mysql/bin" > /etc/profile.d/mysql.sh
[root@hming-server217-mdb ~ ]# source /etc/profile.d/mysql.sh配置了环境变量,我们就可以直接在shell终端下执行mysql命令,使用mysql -V查看mysql版本
[root@hming-server217-mdb ~ ]# mysql -V
mysql Ver 15.1 Distrib 10.1.20-MariaDB, for Linux (x86_64) using readline 5.16. 添加MariaDB库文件
[root@hming-server217-mdb ~ ]# echo "/usr/local/mysql/lib" >> /etc/ld.so.conf.d/mariadb-x86_64.conf7. 拷贝MariaDB服务启动脚本到/etc/init.d/目录中
[root@hming-server217-mdb ~ ]# cp /usr/local/mysql/support-files/mysql.server /etc/init.d/mysqld
[root@hming-server217-mdb ~ ]# chmod 755 /etc/init.d/mysqld
[root@hming-server217-mdb ~ ]# chkconfig --add mysqld
[root@hming-server217-mdb ~ ]# chkconfig mysqld on
[root@hming-server217-mdb ~ ]# systemctl daemon-reload8. 执行初始化数据库脚本,安装MariaDB基础数据库(执行./mysql_install_db --basedir=/usr/local/mysql --datadir=/data/mysql/webdata --user=mysql --no-defaults)
[root@hming-server217-mdb ~ ]# cd /usr/local/mysql/scripts/
[root@hming-server217-mdb /usr/local/mysql/scripts ]# ./mysql_install_db --basedir=/usr/local/mysql --datadir=/data/mysql/webdata --user=mysql --no-defaults
[root@hming-server217-mdb /usr/local/mysql/scripts ]# ls /data/mysql/webdata/
aria_log.00000001  ibdata1      ib_logfile1  performance_schema
aria_log_control ib_logfile0 mysql test9. 配置/etc/my.cnf,该文件是mysql服务的主要配置文件
[root@hming-server217-mdb ~ ]# cp /etc/my.cnf /etc/my.cnf.save
[root@hming-server217-mdb ~ ]# cat /etc/my.cnf
[client]
port=3306
socket=/data/mysql/webdata/mysql.sock
default-character-set=utf8

[mysqld]
port=3306
user=mysql
basedir=/usr/local/mysql
datadir=/data/mysql/webdata
socket=/data/mysql/webdata/mysql.sock
character-set-server=utf8
external-locking=FALSE
skip-name-resolv
default-storage-engine=InnoDB
back_log=1024
transaction_isolation=REPEATABLE-READ
max_connections=5000
max_connect_errors=6000
open_files_limit=65535
table_open_cache=512

[mysqldump]
quick
max_allowed_packet=32M

[mysql]
no-auto-rehash
default-character-set=utf8

[mysqld_safe]
open-files-limit=8192
log-error=/var/log/mariadb/mariadb.log
pid-file=/var/run/mariadb/mariadb.pid创建/var/log/mariadb和/var/run/mariadb目录
[root@hming-server217-mdb ~ ]# mkdir /var/log/mariadb
[root@hming-server217-mdb ~ ]# mkdir /var/run/mariadb
[root@hming-server217-mdb ~ ]# chown mysql:mysql /var/log/mariadb
[root@hming-server217-mdb ~ ]# chown mysql:mysql /var/run/mariadb10. 启动MariaDB服务
[root@hming-server217-mdb ~ ]# systemctl start mysqld
[root@hming-server217-mdb ~ ]# systemctl status mysqld

[root@hming-server217-mdb ~ ]# systemctl status mysqld
● mysqld.service - LSB: start and stop MySQL
   Loaded: loaded (/etc/rc.d/init.d/mysqld)
   Active: active (running) since Fri 2017-06-02 23:53:09 CST; 3 days ago
     Docs: man:systemd-sysv-generator(8)
  Process: 27419 ExecStop=/etc/rc.d/init.d/mysqld stop (code=exited, status=0/SUCCESS)
  Process: 27449 ExecStart=/etc/rc.d/init.d/mysqld start (code=exited, status=0/SUCCESS)
   CGroup: /system.slice/mysqld.service
           ├─27460 /bin/sh /usr/local/mysql/bin/mysqld_safe --datadir=/data/mysql/webdata --pid-file=/data/mysq...
           └─27595 /usr/local/mysql/bin/mysqld --basedir=/usr/local/mysql --datadir=/data/mysql/webdata --plugi...

Jun 02 23:53:08 hming-server217-mdb systemd[1]: Starting LSB: start and stop MySQL...
Jun 02 23:53:08 hming-server217-mdb mysqld[27449]: Starting MySQL.170602 23:53:08 mysqld_safe Logging to '/...og'.
Jun 02 23:53:09 hming-server217-mdb mysqld[27449]: SUCCESS!
Jun 02 23:53:09 hming-server217-mdb systemd[1]: Started LSB: start and stop MySQL.
Hint: Some lines were ellipsized, use -l to show in full.查看MariaDB服务进程
[root@hming-server217-mdb ~ ]# ps aux | grep mysql
root     27460  0.0  0.0 115380  1744 ?        S    23:53   0:00 /bin/sh /usr/local/mysql/bin/mysqld_safe --datadir=/data/mysql/webdata --pid-file=/data/mysql/webdata/hming-server217-mdb.pid
mysql    27595  1.0  5.2 1209380 99428 ?       Sl   23:53   0:00 /usr/local/mysql/bin/mysqld --basedir=/usr/local/mysql --datadir=/data/mysql/webdata --plugin-dir=/usr/local/mysql/lib/plugin --user=mysql --log-error=/var/log/mariadb/mariadb.log --open-files-limit=8192 --pid-file=/data/mysql/webdata/hming-server217-mdb.pid --socket=/data/mysql/webdata/mysql.sock --port=3306
root 27627 0.0 0.0 112644 952 pts/2 S+ 23:53 0:00 grep --color=auto mysql11. 执行mysql_secure_installation初始化数据库,设mysql用户root密码
[root@hming-server217-mdb ~ ]# mysql_secure_installation

NOTE: RUNNING ALL PARTS OF THIS SCRIPT IS RECOMMENDED FOR ALL MariaDB
      SERVERS IN PRODUCTION USE!  PLEASE READ EACH STEP CAREFULLY!

In order to log into MariaDB to secure it, we'll need the current
password for the root user.  If you've just installed MariaDB, and
you haven't set the root password yet, the password will be blank,
so you should just press enter here.

Enter current password for root (enter for none):
OK, successfully used password, moving on...

Setting the root password ensures that nobody can log into the MariaDB
root user without the proper authorisation.

Set root password? [Y/n] y
New password:
Re-enter new password:
Password updated successfully!
Reloading privilege tables..
 ... Success!


By default, a MariaDB installation has an anonymous user, allowing anyone
to log into MariaDB without having to have a user account created for
them.  This is intended only for testing, and to make the installation
go a bit smoother.  You should remove them before moving into a
production environment.

Remove anonymous users? [Y/n] y
 ... Success!

Normally, root should only be allowed to connect from 'localhost'.  This
ensures that someone cannot guess at the root password from the network.

Disallow root login remotely? [Y/n] y
 ... Success!

By default, MariaDB comes with a database named 'test' that anyone can
access.  This is also intended only for testing, and should be removed
before moving into a production environment.

Remove test database and access to it? [Y/n] y
 - Dropping test database...
 ... Success!
 - Removing privileges on test database...
 ... Success!

Reloading the privilege tables will ensure that all changes made so far
will take effect immediately.

Reload privilege tables now? [Y/n] y
 ... Success!

Cleaning up...

All done!  If you've completed all of the above steps, your MariaDB
installation should now be secure.

Thanks for using MariaDB!12. 登录MariaDB数据库
[root@hming-server217-mdb ~ ]# mysql -uroot -p
Enter password:
Welcome to the MariaDB monitor.  Commands end with ; or \g.
Your MariaDB connection id is 353
Server version: 10.1.20-MariaDB Source distribution

Copyright (c) 2000, 2016, Oracle, MariaDB Corporation Ab and others.

Type 'help;' or '\h' for help. Type '\c' to clear the current input statement.

MariaDB [(none)]> select version();
+-----------------+
| version()       |
+-----------------+
| 10.1.20-MariaDB |
+-----------------+
1 row in set (0.00 sec)

MariaDB [(none)]>安装Nginx
1. 安装依赖软件包
[root@hming-server218-web ~ ]# yum install gcc gcc-c++ zlib zlib-devel pcre pcre-devel openssl-devel gd gd-devel perl-devel perl-ExtUtils-Embed2. 创建nginx用户
[root@hming-server218-web ~ ]# groupadd nginx
[root@hming-server218-web ~ ]# useradd -g nginx -s /sbin/nologin nginx -M3. 编译安装Nginx
[root@hming-server218-web /usr/local/src ]# tar -zxf nginx-1.10.2.tar.gz
[root@hming-server218-web /usr/local/src ]# cd nginx-1.10.2/
[root@hming-server218-web /usr/local/src/nginx-1.10.2 ]# ./configure \
--user=nginx \
--group=nginx \
--prefix=/usr/local/nginx \
--pid-path=/var/run/nginx/nginx.pid \
--lock-path=/var/lock/subsys/nginx \
--with-http_stub_status_module \
--with-pcre \
--with-http_ssl_module \
--with-mail_ssl_module \
--with-http_gzip_static_module \
--http-log-path=/var/log/nginx/access.log \
--error-log-path=/var/log/nginx/error.log \
--http-client-body-temp-path=/tmp/nginx/client_body \
--http-proxy-temp-path=/tmp/nginx/proxy \
--http-fastcgi-temp-path=/tmp/nginx/fastcgi \
--http-uwsgi-temp-path=/tmp/nginx/uwsgi \
--with-http_degradation_module \
--with-http_realip_module \
--with-http_addition_module \
--with-http_sub_module \
--with-http_perl_module \
--with-http_p_w_picpath_filter_module=dynamic \
--with-http_flv_module

[root@hming-server218-web /usr/local/src/nginx-1.10.2 ]# make && make install4. 启动Nginx服务
[root@hming-server218-web ~ ]# ln -s /usr/local/nginx/sbin/nginx /usr/local/sbin/
[root@hming-server218-web ~ ]# mkdir /tmp/nginx
[root@hming-server218-web ~ ]# nginx
[root@hming-server218-web ~ ]# ps -ef | grep nginx
root     27913     1  0 00:49 ?        00:00:00 nginx: master process nginx
nginx    27914 27913  0 00:49 ?        00:00:00 nginx: worker process
root 27923 22381 0 00:49 pts/1 00:00:00 grep --color=auto nginx5. 添加防火墙
[root@hming-server218-web ~ ]# firewall-cmd --permanent --add-port=80/tcp
success
[root@hming-server218-web ~ ]# firewall-cmd --reload
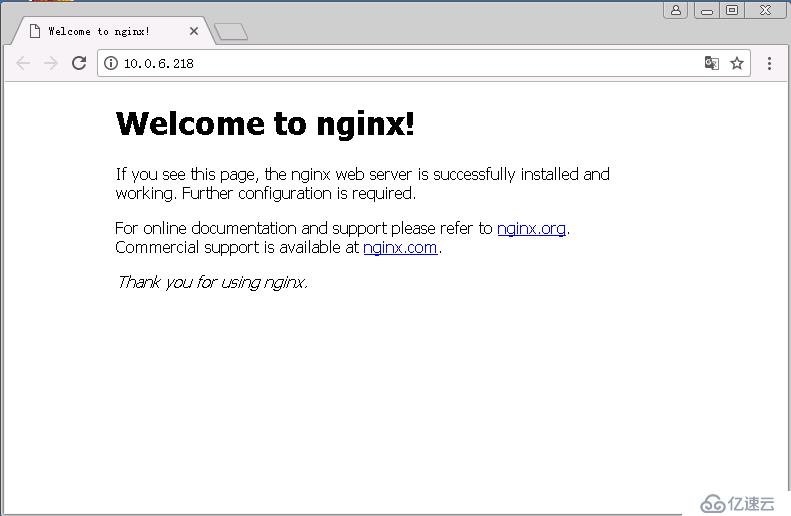
success6. 通过客户端访问http://10.0.6.218
安装PHP
安装依赖软件包
[root@hming-server218-web ~ ]# yum install gcc gcc-c++ libtool libxslt-devel libpng libpng-devel bzip2 bzip2-devel libxml2-devel libXpm-devel libcurl-devel curl libmcrypt expat libxslt freetype freetype-devel libmcrypt-devel autoconf libpng zlib-devel zlib net-snmp net-snmp-devel2. 安装libiconv
[root@hming-server218-web ~ ]# tar -zxf libiconv-1.15.tar.gz
[root@hming-server218-web ~ ]# cd libiconv-1.15/
[root@hming-server218-web ~/libiconv-1.15 ]# ./configure --prefix=/usr/local/libiconv
[root@hming-server218-web ~/libiconv-1.15 ]# make && make install
[root@hming-server218-web ~ ]# echo "/usr/local/libiconv/lib" >> /etc/ld.so.conf
[root@hming-server218-web ~ ]# ldconfig3. 安装libmcrypt
[root@hming-server218-web ~ ]# tar -jxf libmcrypt-2.5.8.tar.bz2
[root@hming-server218-web ~ ]# cd libmcrypt-2.5.8/
[root@hming-server218-web ~/libmcrypt-2.5.8 ]# ./configure --prefix=/usr/local/libmcrypt
[root@hming-server218-web ~/libmcrypt-2.5.8 ]# make && make install4. 安装 jpeg
# tar -zxf jpegsrc.v9b.tar.gz
# cd jpeg-9b/
# mkdir /usr/local/jpeg9 && mkdir /usr/local/jpeg9/{bin,lib,include}
# mkdir /usr/local/jpeg9/man/man1 -p
#  cp -rf /usr/share/libtool/config/config.sub . && cp -rf /usr/share/libtool/config/config.guess .
cp: overwrite \u2018./config.sub\u2019? y
cp: overwrite \u2018./config.guess\u2019? y
# ./configure --prefix=/usr/local/jpeg9 --enable-shared --enable-static
# make && make install5. 安装libgd
[root@hming-server218-web ~ ]# tar -zxf libgd-2.2.3.tar.gz
[root@hming-server218-web ~ ]# cd libgd-2.2.3/
[root@hming-server218-web ~/libgd-2.2.3 ]# ./configure --prefix=/usr/local/libgd2 --with-zlib --with-jpeg=/usr/local/jpeg9 --with-png --with-freetype
[root@hming-server218-web ~/libgd-2.2.3 ]# make && make install6. 编译安装PHP
[root@hming-server218-web ~ ]# groupadd php-fpm
[root@hming-server218-web ~ ]# useradd -g php-fpm -s /sbin/nologin php-fpm -M
[root@hming-server218-web ~ ]# tar -jxf php-5.6.30.tar.bz2
[root@hming-server218-web ~ ]# cd php-5.6.30/
[root@hming-server218-web ~ ]# ./configure \
--prefix=/usr/local/php \
--with-config-file-path=/usr/local/php/etc \
--enable-fpm \
--with-fpm-user=php-fpm \
--with-fpm-group=php-fpm \
--with-mysql=/usr/local/mysql \
--with-mysqli=/usr/local/mysql/bin/mysql_config \
--with-jpeg-dir=/usr/local/jpeg9 \
--with-mcrypt=/usr/local/libmcrypt \
--with-gd=/usr/local/libgd2 \
--with-iconv-dir=/usr/local/libiconv \
--with-openssl-dir \
--with-freetype-dir \
--with-libxml-dir \
--with-png-dir \
--with-zlib \
--with-curl \
--with-mhash \
--with-pear \
--with-pcre-dir \
--with-gettext \
--enable-soap \
--enable-gd-native-ttf \
--enable-mbstring \
--enable-exif \
--enable-sockets \
--enable-ftp \
--disable-ipv6 \
--enable-bcmath \
--enable-shmop \
--with-snmp \
--enable-sysvsem

[root@hming-server218-web ~/php-5.6.30 ]# make
[root@hming-server218-web ~/php-5.6.30 ]# make test
[root@hming-server218-web ~/php-5.6.30 ]# make install[root@hming-server218-web ~/php-5.6.30 ]# cp php.ini-production /usr/local/php/etc/php.ini8. 修改php-fpm.conf配置文件
[root@hming-server218-web ~ ]# vim /usr/local/php/etc/php-fpm.conf
[global]
pid = /usr/local/php/var/run/php-fpm.pid
error_log = /usr/local/php/var/log/php-fpm.log
[www]
listen = /var/lib/php/php-fcgi.sock
user = php-fpm
group = php-fpm
listen.owner = nginx
listen.group = nginx
pm = dynamic
pm.max_children = 100
pm.start_servers = 20
pm.min_spare_servers = 5
pm.max_spare_servers = 35
pm.max_requests = 500
rlimit_files = 10249. 检查配置
[root@hming-server218-web ~ ]# /usr/local/php/sbin/php-fpm -t
[05-Jun-2017 20:23:27] NOTICE: configuration file /usr/local/php/etc/php-fpm.conf test is successful10. 拷贝启动脚本
[root@hming-server218-web ~ ]# cp php-5.6.30/sapi/fpm/init.d.php-fpm /etc/init.d/php-fpm
[root@hming-server218-web ~ ]# chmod 755 /etc/init.d/php-fpm
[root@hming-server218-web ~ ]# /etc/init.d/php-fpm start
Starting php-fpm done测试nginx是否正常解析PHP脚本
1. 修改nginx.conf配置文件
user  nginx nginx;
worker_processes  4;
error_log  /var/log/nginx/error.log notice;
pid        /var/run/nginx/nginx.pid;
worker_rlimit_nofile    65535;

events {
    use epoll;
    worker_connections  65535;
}

http {
    include       mime.types;
    default_type  application/octet-stream;
    server_names_hash_bucket_size 2048;
    server_names_hash_max_size 4096;

    log_format  main  '$remote_addr - $remote_user [$time_local] "$request" '
                      '$status $body_bytes_sent "$http_referer" '
                      '"$http_user_agent" "$http_x_forwarded_for"';

    access_log  /var/log/nginx/access.log  main;

    sendfile       on;
    tcp_nopush     on;
    tcp_nodelay    on;
    keepalive_timeout  65;

    client_header_timeout 30;
    client_body_timeout 3m;
    client_max_body_size 10m;
    client_body_buffer_size 256k;

    send_timeout 3m;
    connection_pool_size 256;
    client_header_buffer_size 32k;
    large_client_header_buffers 4 64k;
    request_pool_size 4k;
    output_buffers 4 32k;
    postpone_output 1460;

    client_body_temp_path /tmp/nginx/client_body;
    proxy_temp_path       /tmp/nginx/proxy;
fastcgi_temp_path     /tmp/nginx/fastcgi;

    gzip  on;
    gzip_min_length 1k;
    gzip_buffers 4 16k;
    gzip_comp_level 3;
    gzip_http_version 1.1;
    gzip_types text/plain application/x-javascript text/css text/htm application/xml;
    gzip_vary on;

    fastcgi_connect_timeout 300;
    fastcgi_send_timeout 300;
    fastcgi_read_timeout 300;
    fastcgi_buffer_size 64k;
    fastcgi_buffers 4 64k;
    fastcgi_busy_buffers_size 128k;
    fastcgi_temp_file_write_size 128k;
    fastcgi_intercept_errors on;

    server {
        listen       80;
        server_name  10.0.6.218;
        charset UTF8;
        index index.html index.htm index.php index.jsp;
        root  /usr/local/nginx/html;

        #access_log  logs/host.access.log  main;

        location / {
            root   html;
            index  index.html index.htm;
        }

        # redirect server error pages to the static page /50x.html
        error_page   500 502 503 504  /50x.html;
        location = /50x.html {
            root   html;
        }

        # pass the PHP scripts to FastCGI server listening on 127.0.0.1:9000
        location ~ \.php$ {
            root           html;
            fastcgi_pass   unix:/var/lib/php/php-fcgi.sock;
            fastcgi_index  index.php;
            fastcgi_param  SCRIPT_FILENAME  /usr/local/nginx/html$fastcgi_script_name;
            include        fastcgi_params;
        }

    }

}2. 测试nginx配置文件语法是否存在错误
[root@hming-server218-web ~ ]# nginx -t
nginx: the configuration file /usr/local/nginx/conf/nginx.conf syntax is ok
nginx: configuration file /usr/local/nginx/conf/nginx.conf test is successful3. 创建测试解析php脚本
[root@hming-server218-web ~ ]# vim /usr/local/nginx/html/info.php
<?php
phpinfo();
?>

[root@hming-server218-web ~ ]# nginx -s reload4. 访问http://10.0.6.218/info.php
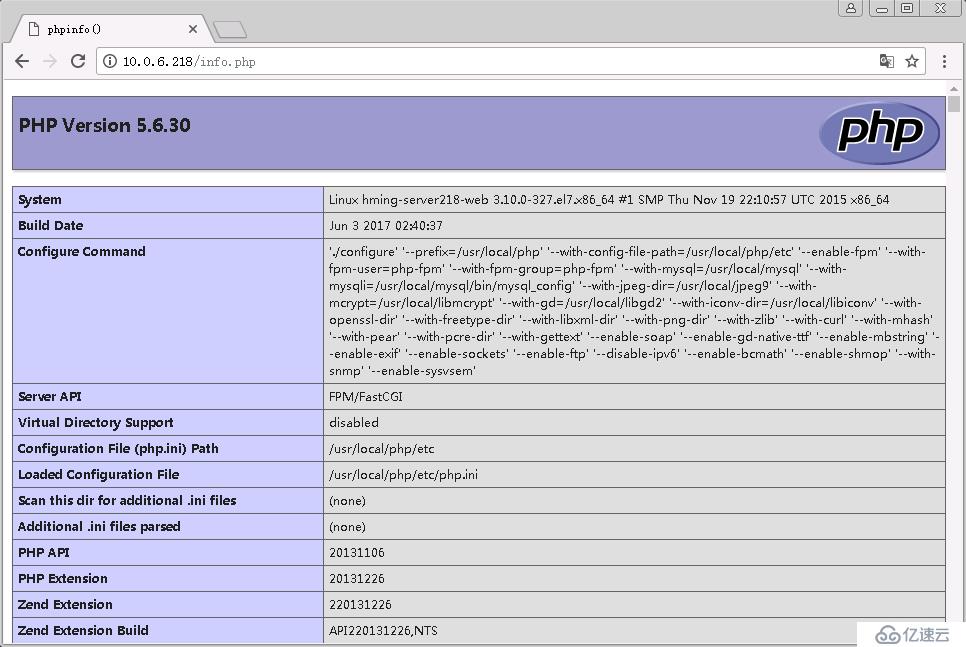
注意:该测试脚本仅用于我们查看当前安装的php支持的模块信息,在测试之后应当立即删除
安装phpMyAdmin
phpMyAdmin是一个使用PHP语言编写的免费软件,旨在通过Web界面管理MySQL数据库。phpMyAdmin支持MySQL和MariaDB上的各种操作。用户可以通过Web界面执行数据库的常用操作(数据库管理,表,字段,索引,用户,权限,视图,函数等),以及直接执行任何SQL语句。
1. 创建phpMyAdmin Web目录
[root@hming-server218-web ~ ]# mkdir /app/data/phpMyAdmin -p2. 将phpMyAdmin软件包解压到/app/data/phpMyAdmin 目录下
# tar -zxf phpMyAdmin-4.7.1-all-languages.tar.gz
# cp -ar phpMyAdmin-4.7.1-all-languages/* /app/data/phpMyAdmin/
# chown -R nginx:nginx /app/data/phpMyAdmin
# chown -R php-fpm:php-fpm /app/data/phpMyAdmin3. 修改nginx配置,创建一个server虚拟机配置文件
http {
    ......
    # phpMyAdmin
    server {
        listen       8000;
        server_name  10.0.6.218;
        charset UTF8;
        index index.html index.htm index.php index.jsp;
        root  /app/data;
        access_log  /var/log/nginx/phpMyAdmin.log  main;

        location /phpMyAdmin/ {
            index index.html index.htm index.php;
        }

        location ~ \.php$ {
            fastcgi_pass   unix:/var/lib/php/php-fcgi.sock;
            fastcgi_index  index.php;
            fastcgi_param  SCRIPT_FILENAME  /app/data$fastcgi_script_name;
            include        fastcgi_params;
        }
    }
}4. 创建数据库root用户权限,允许php服务器使用root用户管理数据服务器
[root@hming-server217-mdb ~ ]# mysql -uroot -p
Enter password:
Welcome to the MariaDB monitor.  Commands end with ; or \g.
Your MariaDB connection id is 13
Server version: 10.1.20-MariaDB Source distribution

Copyright (c) 2000, 2016, Oracle, MariaDB Corporation Ab and others.

Type 'help;' or '\h' for help. Type '\c' to clear the current input statement.

MariaDB [(none)]> select user,host,password from mysql.user;
+------+-----------+-------------------------------------------+
| user | host      | password                                  |
+------+-----------+-------------------------------------------+
| root | localhost | *84BB5DF4823DA319BBF86C99624479A198E6EEE9 |
| root | 127.0.0.1 | *84BB5DF4823DA319BBF86C99624479A198E6EEE9 |
| root | ::1       | *84BB5DF4823DA319BBF86C99624479A198E6EEE9 |
+------+-----------+-------------------------------------------+
3 rows in set (0.00 sec)

MariaDB [(none)]> grant all privileges on *.* to 'root'@'10.0.6.218' identified by 'phpMyAdmin_123';
Query OK, 0 rows affected (0.00 sec)

MariaDB [(none)]> flush privileges;
Query OK, 0 rows affected (0.00 sec)5. 配置防火墙规则
# iptables -I INPUT -p tcp --dport 3306 -s 10.0.6.0/24 -j ACCEPT

或者

# firewall-cmd --permanent --add-rich-rule 'rule family=ipv4 source address=10.0.6.0/24 port port=3306 protocol=tcp accept'6. 修改phpMyAdmin配置文件
#cp/app/data/phpMyAdmin/libraries/config.default.php /app/data/phpMyAdmin/libraries/config.default.php.save
# vim /app/data/phpMyAdmin/libraries/config.default.php

/**
 * The 'cookie' auth_type uses AES algorithm to encrypt the password. If
 * at least one server configuration uses 'cookie' auth_type, enter here a
 * pass phrase that will be used by AES. The maximum length seems to be 46
 * characters.
 *
 * @global string $cfg['blowfish_secret']
 */
$cfg['blowfish_secret'] = '123456';


/**
 * MySQL hostname or IP address
 *
 * @global string $cfg['Servers'][$i]['host']
 */
$cfg['Servers'][$i]['host'] = '10.0.6.217';

/**
 * MySQL port - leave blank for default port
 *
 * @global string $cfg['Servers'][$i]['port']
 */
$cfg['Servers'][$i]['port'] = '3306';

/**
 * Path to the socket - leave blank for default socket
 *
 * @global string $cfg['Servers'][$i]['socket']
 */
$cfg['Servers'][$i]['socket'] = '';


/**
 * Authentication method (valid choices: config, http, signon or cookie)
 *
 * @global string $cfg['Servers'][$i]['auth_type']
 */
$cfg['Servers'][$i]['auth_type'] = 'cookie';

/**
 * HTTP Basic Auth Realm name to display (only used with 'HTTP' auth_type)
 *
 * @global string $cfg['Servers'][$i]['auth_http_realm']
 */
$cfg['Servers'][$i]['auth_http_realm'] = '';

/**
 * MySQL user
 *
 * @global string $cfg['Servers'][$i]['user']
 */
$cfg['Servers'][$i]['user'] = 'root';

/**
 * MySQL password (only needed with 'config' auth_type)
 *
 * @global string $cfg['Servers'][$i]['password']
 */
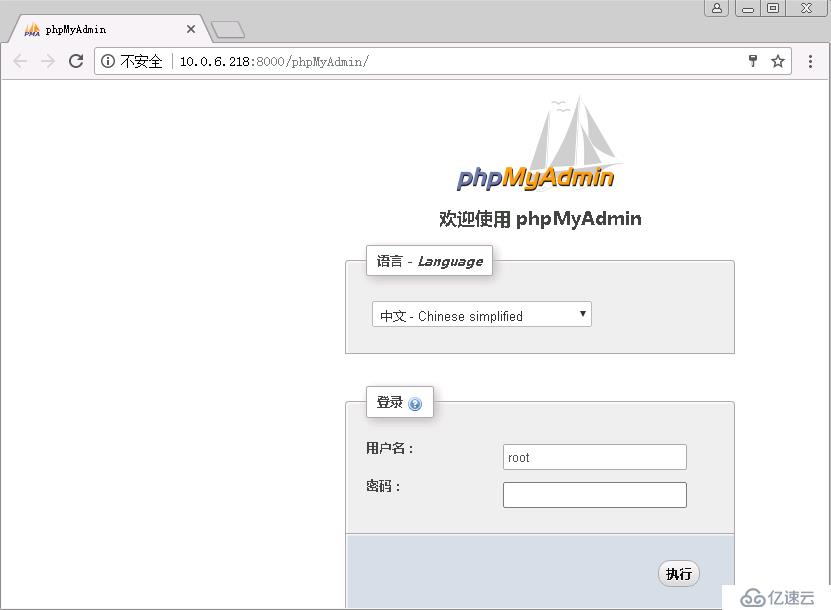
$cfg['Servers'][$i]['password'] = 'phpMyAdmin_123';7. 登录phpMyAdmin Web管理界面,打开http://10.0.6.218:8000/phpMyAdmin/
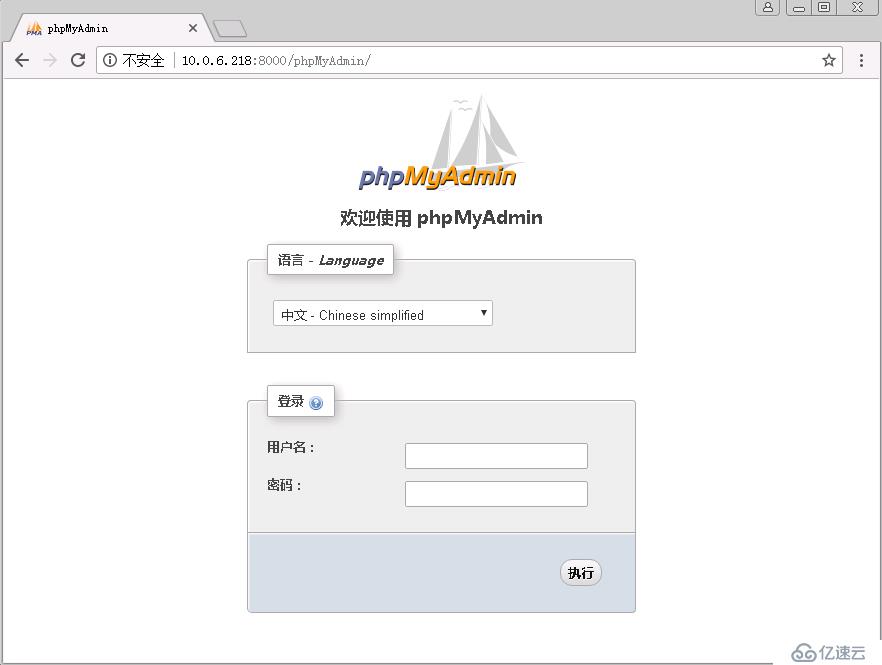
输入数据库用户和密码
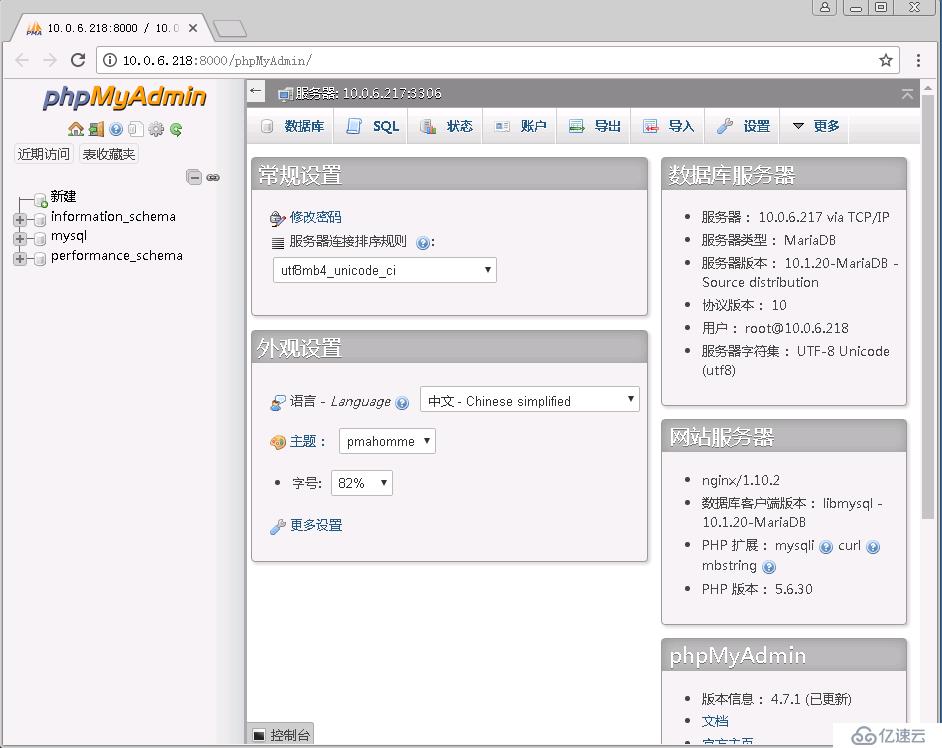
测试创建数据库
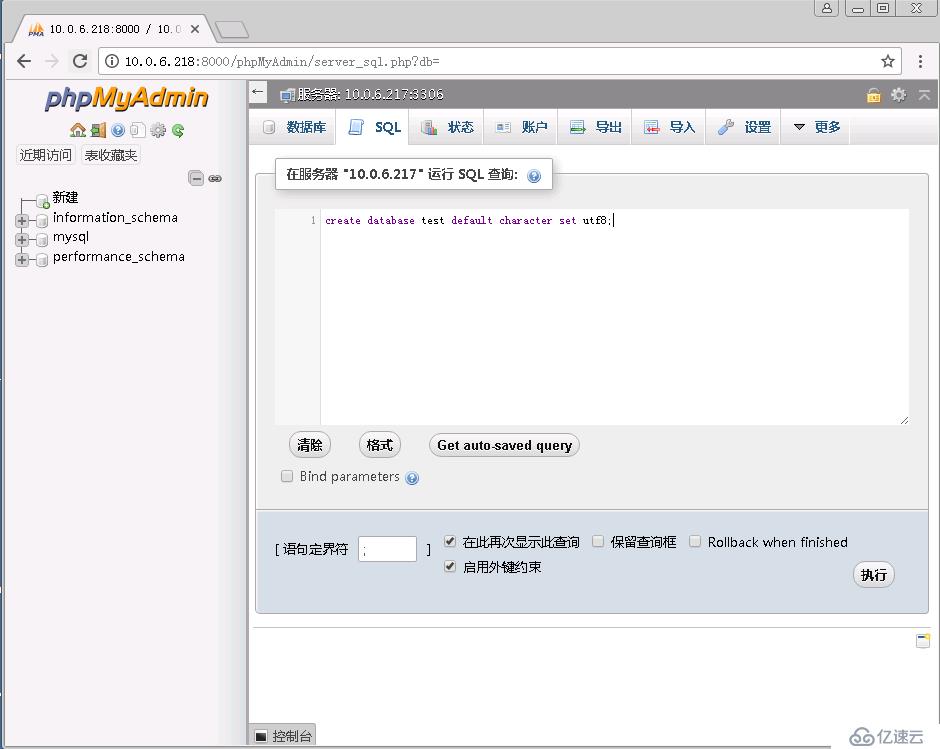
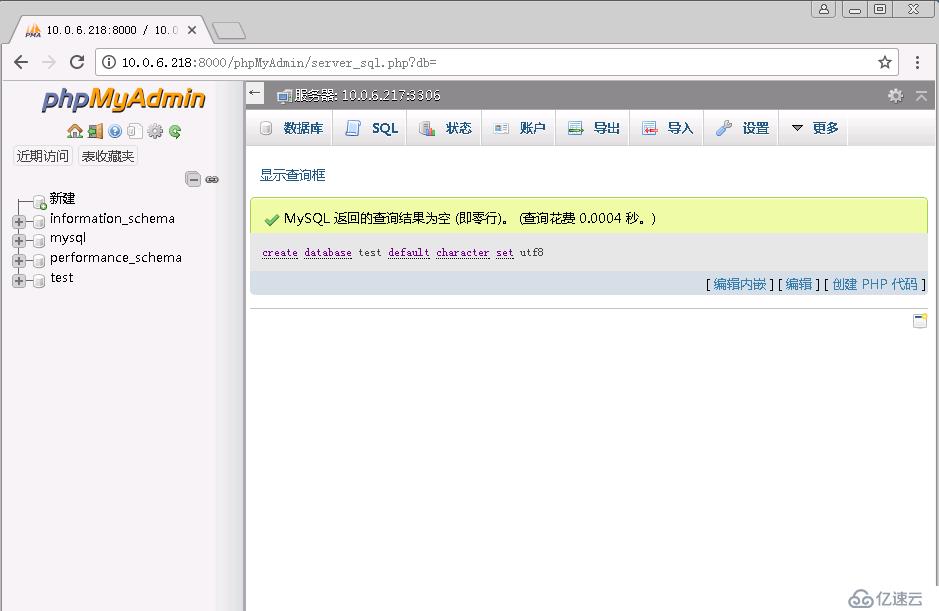
配置phpMyAdmin增加Nginx登录身份验证功能
1. 修改Nginx配置文件,在/phpMyAdmin/处增加允许访问规则和auth_basic身份验证配置
    # phpMyAdmin
    server {
        listen       8000;
        server_name  10.0.6.218;
        charset UTF8;
        index index.html index.htm index.php index.jsp;
        root  /app/data;
        access_log  /var/log/nginx/phpMyAdmin.log  main;

        location /phpMyAdmin/ {
            allow 10.0.6.0/24;
            deny all;
            auth_basic            "Auth";
            auth_basic_user_file  /usr/local/nginx/.htpassword;
            index index.html index.htm index.php;
        }

        location ~ \.php$ {
            fastcgi_pass   unix:/var/lib/php/php-fcgi.sock;
            fastcgi_index  index.php;
            fastcgi_param  SCRIPT_FILENAME  /app/data$fastcgi_script_name;
            include        fastcgi_params;
        }
}2. 使用htpasswd创建用户(HM)和密码
[root@hming-server218-web ~ ]# yum install httpd
[root@hming-server218-web ~ ]# htpasswd -c /usr/local/nginx/.htpassword HM
New password:
Re-type new password:
Adding password for user HM
[root@hming-server218-web ~ ]# ls -l /usr/local/nginx/.htpassword
-rw-r--r-- 1 root root 41 Jun 6 18:04 /usr/local/nginx/.htpassword3. 重新访问phpMyAdmin,再次登录需要进行身份验证,以后的每一次登录都将需要进行此验证
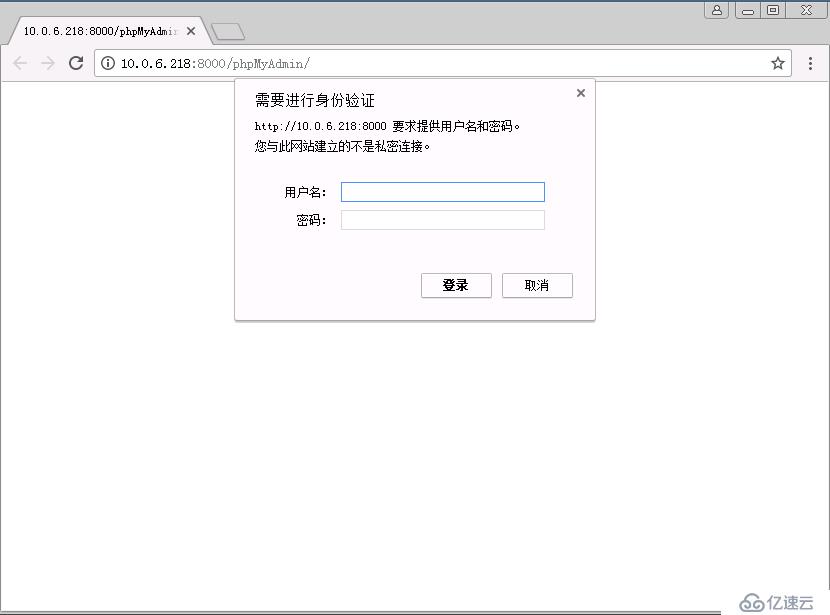
输入用户和密码
亿速云「云服务器」,即开即用、新一代英特尔至强铂金CPU、三副本存储NVMe SSD云盘,价格低至29元/月。点击查看>>
免责声明:本站发布的内容(图片、视频和文字)以原创、转载和分享为主,文章观点不代表本网站立场,如果涉及侵权请联系站长邮箱:is@yisu.com进行举报,并提供相关证据,一经查实,将立刻删除涉嫌侵权内容。