本篇文章为大家展示了Android应用中怎么对超大的图片进行加载,内容简明扼要并且容易理解,绝对能使你眼前一亮,通过这篇文章的详细介绍希望你能有所收获。
1.Bitmap的使用
- 2.Android手机中加载图片的原理
有的时候,我们加载一张不足1M的图片,尽管手机的堆内存有16M,仍然会导致内存溢出,why?
这就更计算机加载图片的原理有关了:
1).手机会解析图片的所有像素信息,把每个像素信息都存入到内存中
2).Android中保存图片是用ARGB保存的,A表示阿尔法透明度,所以一个像素点占用了4个字节
例如:一张1080*720像素的24位位图图片,可能实际上经过压缩后大小只有几十K,而在android手机加载这张图片所需要的内存大小为:
1080*720*(3+1)=3110400 byte = 3037 KB = 2.9MB
实际上,图片中还包含一点其他的信息,例如图片保存的格式,使用的相机名称,以及拍摄时间等,所以总体来说要比3110400字节大一旦,大概多上几十个字节
步骤:
1.创建一个Android项目,编写布局文件:
<LinearLayout xmlns:android="http://schemas.android.com/apk/res/android"
 xmlns:tools="http://schemas.android.com/tools"
 android:layout_width="match_parent"
 android:layout_height="match_parent"
 android:orientation="vertical"
 tools:context="hhh.exercise.smultimedia_a_image.MainActivity" >

 <EditText
  android:id="@+id/ed"
  android:layout_width="match_parent"
  android:layout_height="wrap_content"
  android:gravity="center"
  android:text="a.jpg"
  android:textColor="#00ff00"
  android:textSize="30sp" />

 <requestFocus />

 <Button
  android:onClick="see"
  android:layout_width="match_parent"
  android:layout_height="wrap_content"
  android:text="点击看片"
  android:textColor="#00ffff"
  android:textSize="30sp" />

 <ImageView
  android:id="@+id/iv"
  android:layout_width="match_parent"
  android:layout_height="match_parent"
  android:layout_gravity="center"
  android:src="@drawable/ic_launcher" />
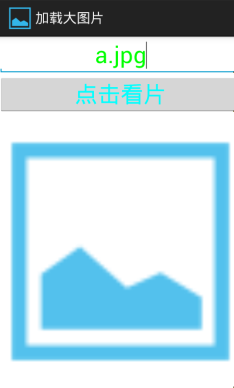
</LinearLayout>界面如下所示:

2.在MainActivity中编写代码:
public class MainActivity extends Activity {
 private EditText ed;
 private ImageView iv;
 @Override
 protected void onCreate(Bundle savedInstanceState) {
  super.onCreate(savedInstanceState);
  setContentView(R.layout.activity_main);
  ed = (EditText) findViewById(R.id.ed);
  iv = (ImageView) findViewById(R.id.iv);
 }
 public void see(View view) {
  // 确定要加载的图片(这里为了调试方面,把所有的图片都放在SD卡中,然后在界面上输入图片的名字,根据给名字拼接字符串)
  String fileName = ed.getText().toString();
  String path = Environment.getExternalStorageDirectory().getPath()+ "/" + fileName;

  // 该类为位图工厂(BitmapFactory)的内部类,用来封装参数对象
  Options opts = new Options();

  // 不为像素申请内存,只获取图片的宽、高信息
  // inJustDecodeBound该字段设置为true,那么位图工厂构建BitMap对象时返回的是空值,但是会把图片的一些信息返回在Options对象中(如图片的宽、高等)
  opts.inJustDecodeBounds = true;

  // 第二个参数是解析图片时传入的参数,由于可能传入的参数过多,所以直接把所有参数封装成一个对象
  BitmapFactory.decodeFile(path, opts);

  // 获取图片的额宽高
  int imgWidth = opts.outWidth;
  int imgHeight = opts.outHeight;

  // 获取当前手机屏幕的宽高
  Display dp = getWindowManager().getDefaultDisplay();
  int screenWidth = dp.getWidth();
  int screenHeight = dp.getHeight();

  // 设置默认缩放比为1
  int scale = 1;

  // 计算图片宽高与屏幕宽高比例,即计算宽缩放比,高缩放比
  int scaleWidth = imgWidth / screenWidth;
  int scaleHeight = imgHeight / screenHeight;

  // 选择缩放比例,如果图片比屏幕小,就不进行缩放.如果图片比屏幕大,但是宽高缩放比例不同,选择缩放比大
  if (scaleWidth >= scaleHeight && scaleWidth > 1) {
   scale = scaleWidth;
  } else if (scaleWidth < scaleHeight && scaleHeight > 1) {
   scale = scaleHeight;
  }
  // 在Options的对象中设置缩放比例
  opts.inSampleSize = scale;
  // 一定要把inJustDecodeBound该字段设置为false,实际上默认值是false,
  // 但是在前面的代码中已经改为了true,所以要更改过来。当然,也可以重新new 一个Option是对象
  opts.inJustDecodeBounds = false;
  Bitmap bm = BitmapFactory.decodeFile(path, opts);
  iv.setImageBitmap(bm);
 }
}上述内容就是Android应用中怎么对超大的图片进行加载,你们学到知识或技能了吗?如果还想学到更多技能或者丰富自己的知识储备,欢迎关注亿速云行业资讯频道。
亿速云「云服务器」,即开即用、新一代英特尔至强铂金CPU、三副本存储NVMe SSD云盘,价格低至29元/月。点击查看>>
免责声明:本站发布的内容(图片、视频和文字)以原创、转载和分享为主,文章观点不代表本网站立场,如果涉及侵权请联系站长邮箱:is@yisu.com进行举报,并提供相关证据,一经查实,将立刻删除涉嫌侵权内容。