这期内容当中小编将会给大家带来有关在Spring-Session使用Redis如何实现共享session,文章内容丰富且以专业的角度为大家分析和叙述,阅读完这篇文章希望大家可以有所收获。
1、添加依赖
<dependency>
 <groupId>org.springframework.session</groupId>
 <artifactId>spring-session-data-redis</artifactId>
 <version>1.2.1.RELEASE</version>
</dependency>
<dependency>
 <groupId>redis.clients</groupId>
 <artifactId>jedis</artifactId>
 <version>2.8.1</version>
</dependency>
2、配置
spring-mvc.xml:
<bean id="redisHttpSessionConfiguration"
   class="org.springframework.session.data.redis.config.annotation.web.http.RedisHttpSessionConfiguration">
  <property name="maxInactiveIntervalInSeconds" value="600"/>
</bean>

<bean id="jedisPoolConfig" class="redis.clients.jedis.JedisPoolConfig">
  <property name="maxTotal" value="100" />
  <property name="maxIdle" value="10" />
</bean>

<bean id="jedisConnectionFactory"
   class="org.springframework.data.redis.connection.jedis.JedisConnectionFactory" destroy-method="destroy">
  <property name="hostName" value="${redis_hostname}"/>
  <property name="port" value="${redis_port}"/>
  <property name="password" value="${redis_pwd}" />
  <property name="timeout" value="3000"/>
  <property name="usePool" value="true"/>
  <property name="poolConfig" ref="jedisPoolConfig"/>
</bean>
web.xml添加拦截器:
<filter>
  <filter-name>springSessionRepositoryFilter</filter-name>
  <filter-class>org.springframework.web.filter.DelegatingFilterProxy</filter-class>
</filter>
<filter-mapping>
  <filter-name>springSessionRepositoryFilter</filter-name>
  <url-pattern>/*</url-pattern>
</filter-mapping>
3、使用spring-session
只要使用标准的servlet api调用session,在底层就会通过Spring Session得到的,并且会存储到Redis或其他你所选择的数据源中。
这里是我写的一个demo:
/**
 * @author fengzp
 * @date 17/2/23下午3:19
 */
@Controller
@RequestMapping(value = "index")
public class IndexController {

  private final Gson gson = new GsonBuilder().setDateFormat("yyyyMMddHHmmss").create();

  @RequestMapping(value = "login")
  public String login(HttpServletRequest request, String username){

    request.getSession().setAttribute("user", gson.toJson(new User(username,"123456")));

    return "login";
  }

  @RequestMapping(value = "index")
  public String index(HttpServletRequest request, Model model){

    User user = gson.fromJson(request.getSession().getAttribute("user").toString(), User.class);

    model.addAttribute("user", user);

    return "index";
  }
}
index.jsp:
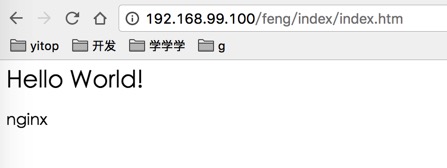
第一个tomcat
<html>
<body>
<h3>Hello World!</h3>
<p>${user.username}</p>
</body>
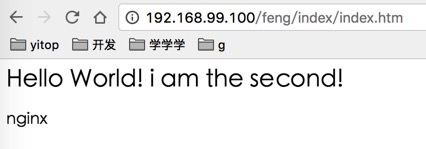
</html>第二个tomcat
<html>
<body>
<h3>Hello World! i am the second!</h3>
<p>${user.username}</p>
</body>
</html>
测试
这里利用上一篇nginx负载配置的两个tomcat来测试。
首先访问 http://192.168.99.100/feng/index/login.htm?username=nginx 来触发生成session。
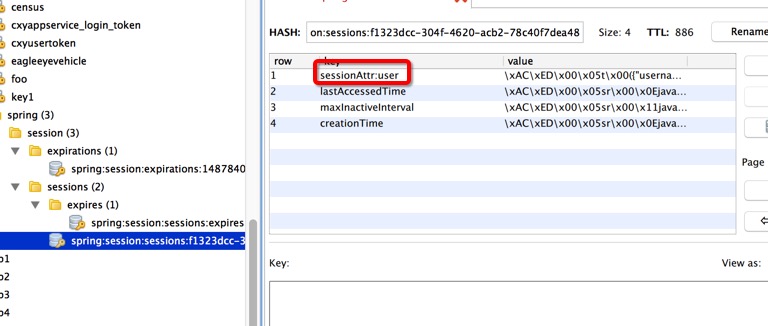
查看redis,发现session已经保存到redis。
访问 http://192.168.99.100/feng/index/index.htm 来读取session, 并刷新多次。
上述就是小编为大家分享的在Spring-Session使用Redis如何实现共享session了,如果刚好有类似的疑惑,不妨参照上述分析进行理解。如果想知道更多相关知识,欢迎关注亿速云行业资讯频道。
免责声明:本站发布的内容(图片、视频和文字)以原创、转载和分享为主,文章观点不代表本网站立场,如果涉及侵权请联系站长邮箱:is@yisu.com进行举报,并提供相关证据,一经查实,将立刻删除涉嫌侵权内容。


