这期内容当中小编将会给大家带来有关使用nodejs+koa2 如何模仿springMVC框架,文章内容丰富且以专业的角度为大家分析和叙述,阅读完这篇文章希望大家可以有所收获。
1、在硬盘上新增一个文件夹,打开VSC,点击‘添加工作区文件夹',如果没有欢迎‘使用页面',点击--文件--新建窗口,效果如下图:
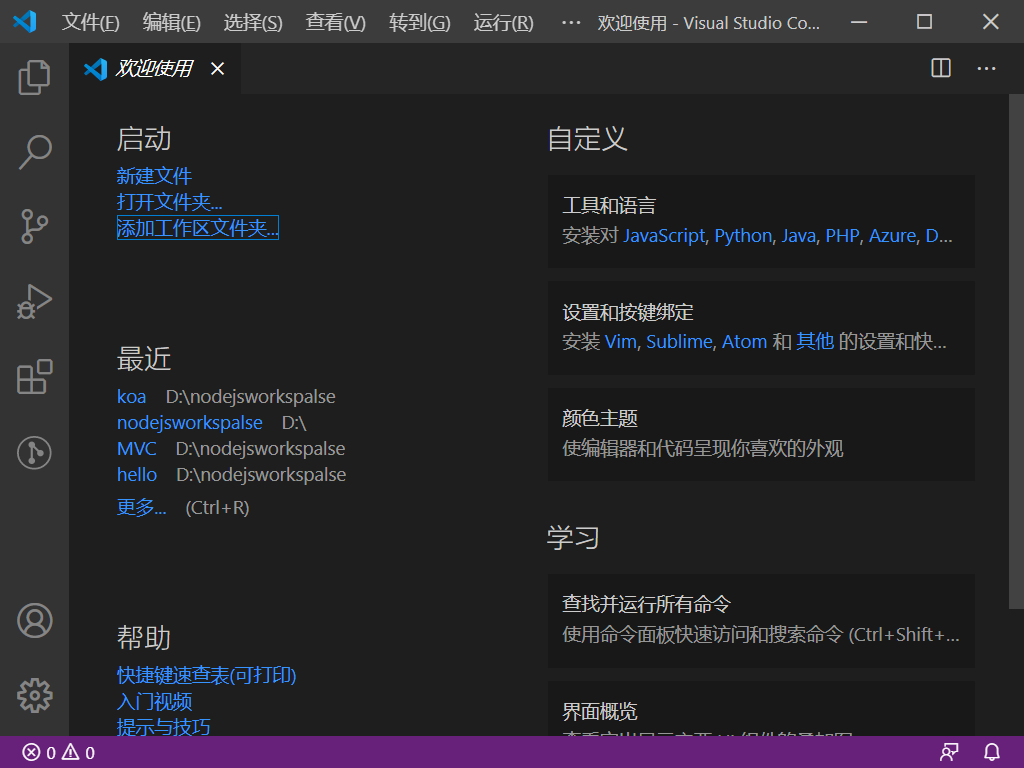
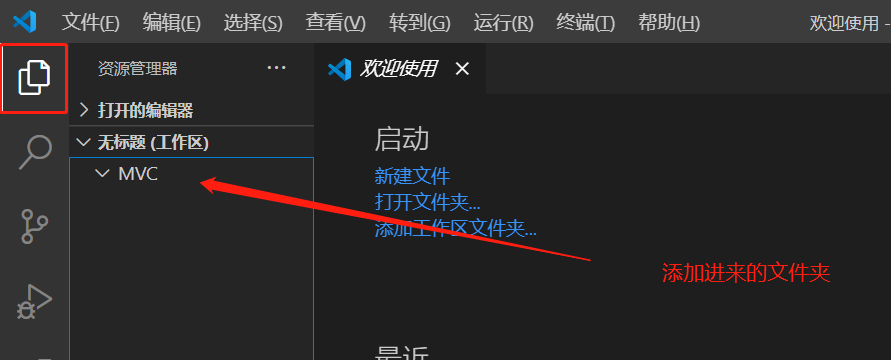
2、添加vsc调试。Shift+ctrl+p,输入框内输入:launch.json

选择刚刚的文件夹


3、目录结构
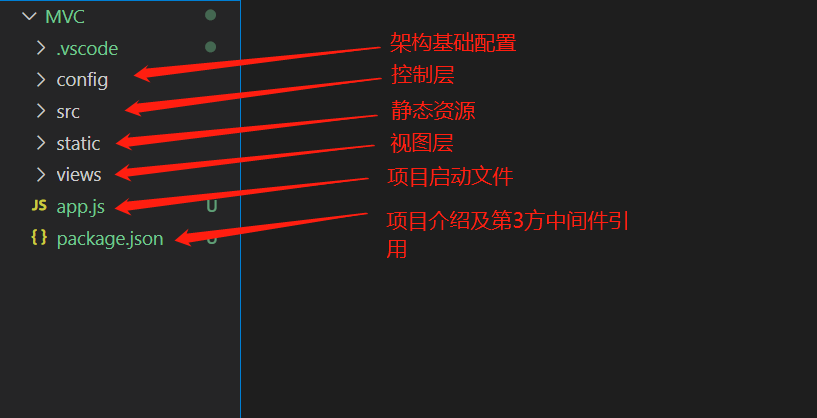
从低到高one by one
3-1、package.json
{
 "name": "koa2mcv",
 "version": "1.0.0",
 "description": "Hello Koa 2 example with MVC",
 "main": "app.js",
 "scripts": {
  "start": "node app.js"
 },
 "author": "baba",
 "dependencies": {
  "koa": "2.11.0",
  "koa-router": "8.0.8",
  "koa-bodyparser": "4.3.0",
  "koa-static-plus": "0.1.1",
  "koa-view": "2.1.3",
  "koa-jwt": "4.0.0",
  "koa-log4": "2.3.2",
  "jsonwebtoken": "8.5.1",
  "nunjucks": "3.2.1",
  "mime": "2.4.5",
  "mz": "2.7.0"
 }
}
参数介绍:name项目名称、version版本号、description项目描述、main项目启动文件、scripts启动快捷设置,author作者,dependencies第3方中间件名称及版本。
3-2、app.js
//启动服务
require('./config/init').startServer();
启动相关配置,封装到config/init.js中,启动文件直接引用即可。
3-3、views存放html页面
3-4、static存放静态文件,css,js,font等
3-5、src存放业务控制,类似于springMVC中的controller、service。
3-6、config存放核心配置文件。
3-6-1、init.js项目核心。
异常友好处理
function handler(){
 return async (ctx, next) => {

  const start = new Date().getTime();

  var urlReq=ctx.request.url;
  if(urlReq !== '/favicon.ico'){

   console.log(`请求地址:${ctx.request.method} ${urlReq}`);
   try {

    let params =Object.assign({}, ctx.request.query, ctx.request.body);

    if(config["token"].excludeUrl.indexOf(urlReq) == -1 && !tokenFunction.varifyToken(params.token)){
     ctx.status =401;
    }else{
     await next();
    }
   } catch (error) {
    ctx.status=401;
    console.log(`错误!无法获取token参数`);
   }finally{

     let err={};
     if(!ctx.status){
      err.status = 500;
     }else if(ctx.status==200){
      return;
     }else{
      err.status = ctx.status;
     }

     switch(err.status){
      case 404:
       err.url = config["server-name"]+'/static/public/404.html';
       err.message="资源不存在!";
       break;
      case 401:
       err.url = config["server-name"]+'/static/public/10000.html';
       err.message="登陆失效!请重新登陆!";
       break;
      case 500:
       err.url = config["server-name"]+'/static/public/500.html';
       err.message="系统内部错误!";
       break;
     }

     switch(ctx.request.type){
      case 'application/json':
       ctx.type = 'application/json';
       ctx.body = {errorCode:err.errorCode,message: err.message}
       break;
      default:

       ctx.type = 'text/html';
       ctx.redirect(err.url);
       break;
     }
   }
  }
  const ms = new Date().getTime() - start;
  console.log(`请求消耗时间: ${ms}ms`);
 }
}
路由配置
function controller(){

 const router = new koaRouter({
  prefix: config["server-name"]
 });

 function findJsonFile(rootpathStr){

  fs.readdirSync(rootpathStr).forEach(function (item, index) {

   let fPath = path.join(rootpathStr,item);

   let stat = fs.statSync(fPath);

   if(stat.isDirectory() === true) {
    findJsonFile(fPath);
   }

   if (stat.isFile() === true&&fPath.endsWith('.js')) {

    var mapping = require(fPath);
    for (var url in mapping) {
     if (url.startsWith('GET ')) {
      router.get(url.substring(4), mapping[url]);
     } else if (url.startsWith('POST ')) {
      router.post(url.substring(5), mapping[url]);
     } else if (url.startsWith('PUT ')) {
      router.put(url.substring(4), mapping[url]);
     } else if (url.startsWith('DELETE ')) {
      router.del(url.substring(7), mapping[url]);
     }
     console.log(`注册 URL: ${url}`);
    }
   }
  });
 }

 findJsonFile(rootpath + 'src');
 return router.routes();
}
视图渲染
function templating() {
 var
  autoescape = config['templating-autoescape'] === null ? true : config['templating-autoescape'],
  noCache = config['templating-noCache'] === null ? false : config['templating-noCache'],
  watch = config['templating-watch'] === null ? false : config['templating-watch'],
  throwOnUndefined = config['templating-throwOnUndefined'] === null ? false :config['templating-throwOnUndefined'],
  env = new nunjucks.Environment(
   new nunjucks.FileSystemLoader(rootpath+'views', {
    noCache: noCache,
    watch: watch,
   }), {
    autoescape: autoescape,
    throwOnUndefined: throwOnUndefined
   });
 if (config['templating-filters'] != null) {
  for (var f in config['templating-filters']) {
   env.addFilter(f, config['templating-filters'][f]);
  }
 }
 return async (ctx, next) => {
  ctx.render = function (view, model) {
   ctx.response.body = env.render(view, Object.assign({}, ctx.state || {}, model || {}));
   ctx.response.type = 'text/html';
  };
  await next();
 };
}
启动构建
function startServer(){

 const app = new koa();

 app.use(koaStaticPlus(rootpath+'static', {
  pathPrefix: config["server-name"]+'/static'
 })
 );

 app.use(koaBodyParser());

 app.use(handler());

 app.use(templating());

 app.use(controller());

 app.listen(config["server-port"]);

}
3-6-2、config.js项目参数配置。
module.exports ={
 'server-name':'/koa',
 'server-port':3000,
 "templating-noCache":true,
 "templating-watch":true,
 "templating-autoescape":null,
 "templating-throwOnUndefined":null,
 "templating-filters":null,
 "token":{
  "excludeUrl":[
  "/koa/login",
  "/koa/dologin"
  ],
  "timeout":1000 * 60 * 60 * 24 * 7,
  "secret":"jiaobaba"
 }


}
3-6-3、token.js项目token相关方法封装。
const jwt = require("jsonwebtoken");
const config = require('./config');
/**
 * 创建token的方法
 */
let createToken = (data)=>{
 let obj = {};
 //存入token的数据
 obj.data = data || {};
 //token的创建时间
 obj.ctime = (new Date()).getTime();
 return jwt.sign(obj,config["token"].secret);
}
/**
 * 验证token是否合法的方法
 * @param {*} token
 */
let varifyToken = (token)=>{
 let result = null;
 try{
  let {data,ctime,expiresIn} = jwt.verify(token,config["token"].secret);
  let nowTime = (new Date()).getTime();
  if(nowTime-ctime<config["token"].timeout){
   result = data;
  }
 }catch(error){

 }
 return result;
}

module.exports = {
 createToken,
 varifyToken
};
3-6-4、logger.js项目日志配置文件。
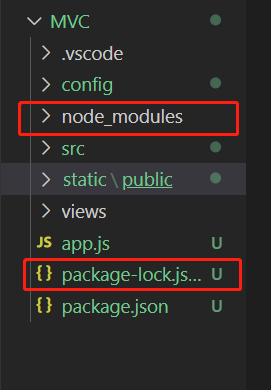
4、项目结构构建结束,接着引入所有依赖包,在终端中执行‘npm install' ,会下载package.json中dependencies所有包,以及这些包所依赖的包。
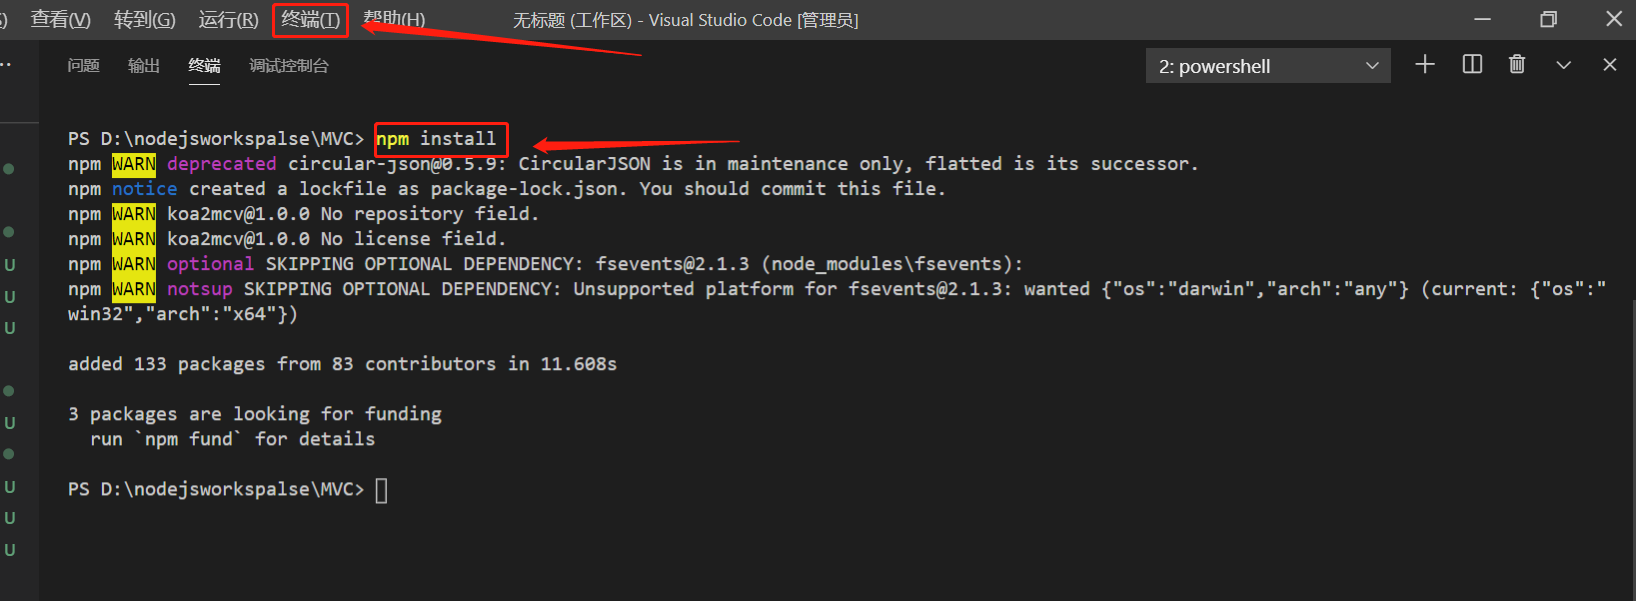
执行后项目结构会增加两个文件
5、编写测试用例,在src下新建hello.js。
//token
const token = require('../config/token');

var fn_hello = async (ctx, next) => {
 var name = ctx.params.name;
 ctx.response.body = `<h2>Hello, ${name}!</h2>`;
};


var fn_index = async (ctx, next) => {
 ctx.response.body = `<h2>Index</h2>
  <form action="/koa/signin" method="post">
   <p>Name: <input name="name" value=""></p>
   <p>Password: <input name="password" type="password"></p>
   <p><input type="submit" value="Submit"></p>
  </form>`;
};

var fn_signin = async (ctx, next) => {
 var
  name = ctx.request.body.name || '',
  password = ctx.request.body.password || '';
 console.log(`登陆名: ${name}, 密码: ${password}`);
  ctx.response.body = `<h2>Welcome, ${name}!</h2><br/>you token:<br/>${token.createToken({user: name,password: password})}`;

};

module.exports = {
 'GET /hello/:name': fn_hello,
 'GET /login': fn_index,
 'POST /dologin': fn_signin
};
6、启动项目
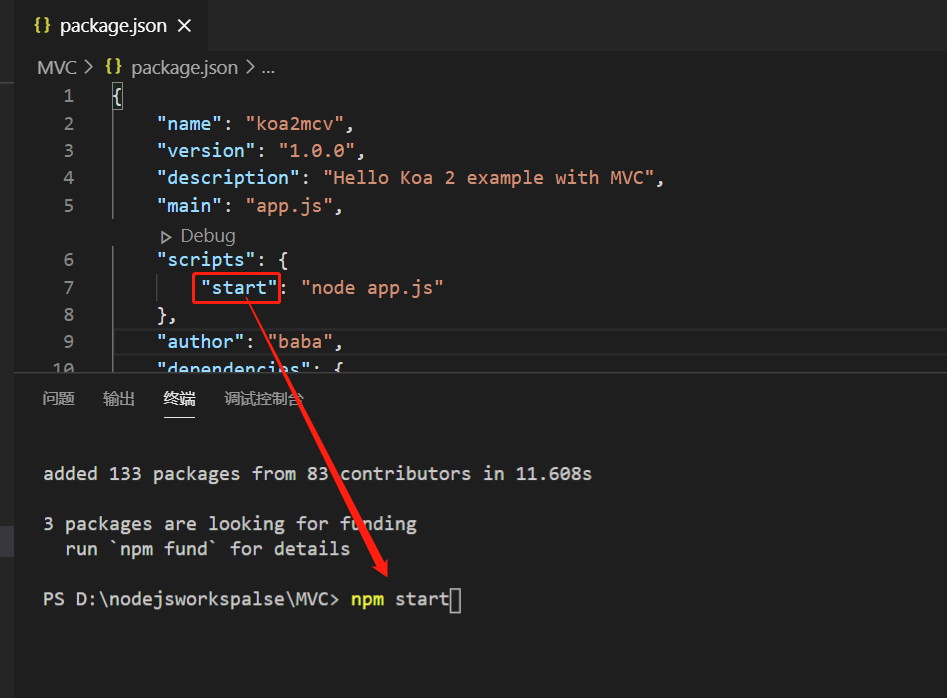
启动成功

测试访问:http://127.0.0.1:3000/koa/login
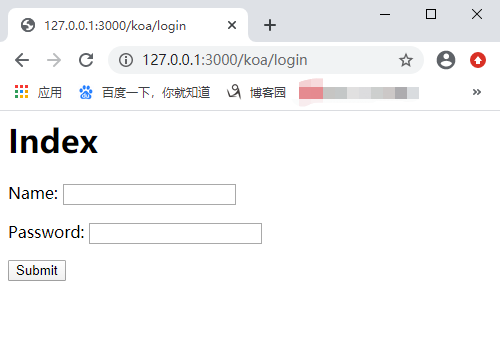
输入值获取token

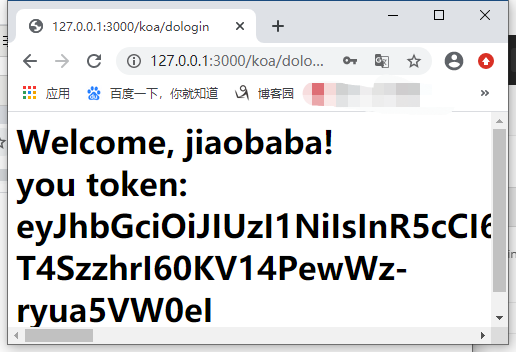
先不用带token进行访问
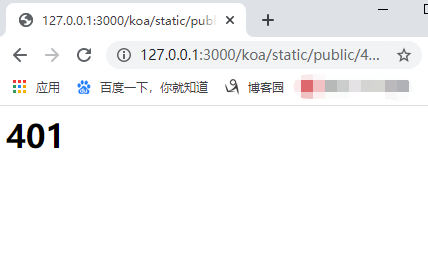
拦截成功
带上token 进行访问
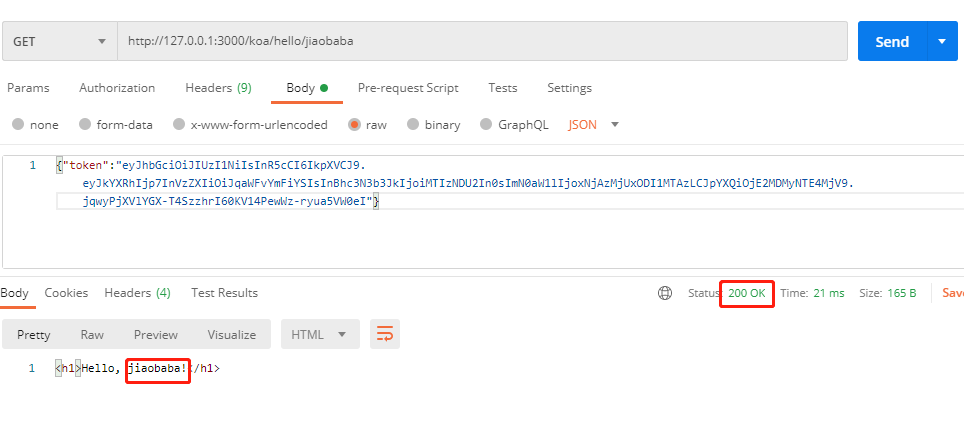
测试成功!
上述就是小编为大家分享的使用nodejs+koa2 如何模仿springMVC框架了,如果刚好有类似的疑惑,不妨参照上述分析进行理解。如果想知道更多相关知识,欢迎关注亿速云行业资讯频道。
免责声明:本站发布的内容(图片、视频和文字)以原创、转载和分享为主,文章观点不代表本网站立场,如果涉及侵权请联系站长邮箱:is@yisu.com进行举报,并提供相关证据,一经查实,将立刻删除涉嫌侵权内容。