今天就跟大家聊聊有关IDEA 中的SpringBoot 项目使用Swagger2的方法,可能很多人都不太了解,为了让大家更加了解,小编给大家总结了以下内容,希望大家根据这篇文章可以有所收获。
1、SpringBoot-web项目并添加pom.xml依赖
2、编写HelloController,测试成功运行
3、创建一个SwaggerConfig类,配置swagger-ui
流程确实是很简单的,但是能真正的在项目中活用swagger却不是那么简单
1、SpringBoot-web项目并添加pom.xml依赖
可以直接在maven repository搜索
多最一句,一般在选择maven依赖时,我们趋向于选择最稳定版本,可以通过Usages判断,尽量不要选择最新版,及时并没有什么影响。详细经历过版本冲突和版本不兼容的小伙伴应该深有体会。
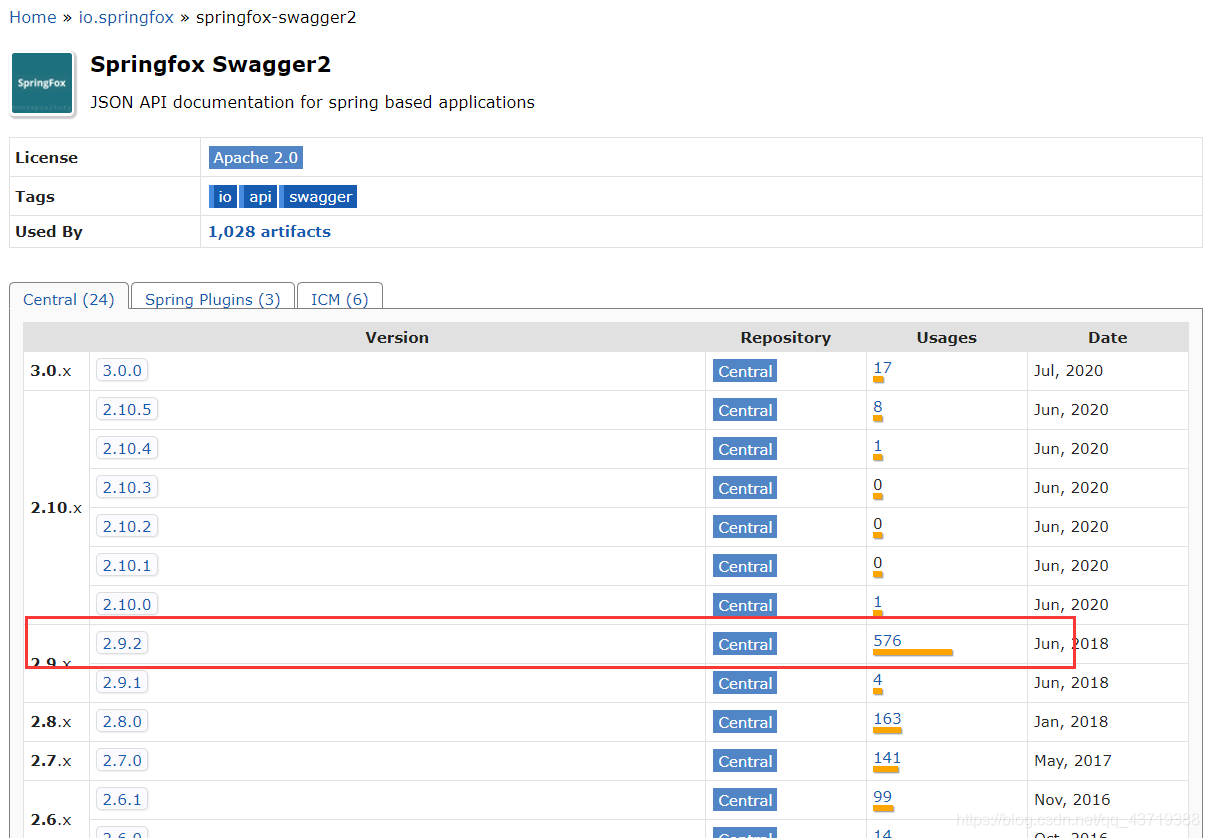
<!-- https://mvnrepository.com/artifact/io.springfox/springfox-swagger2 -->
<dependency>
  <groupId>io.springfox</groupId>
  <artifactId>springfox-swagger2</artifactId>
  <version>2.9.2</version>
</dependency>
<!-- https://mvnrepository.com/artifact/io.springfox/springfox-swagger-ui -->
<dependency>
  <groupId>io.springfox</groupId>
  <artifactId>springfox-swagger-ui</artifactId>
  <version>2.9.2</version>
</dependency>
2、编写HelloController,测试成功运行
package cn.swpu.myblog.controller;

import io.swagger.annotations.Api;
import io.swagger.annotations.ApiOperation;
import org.springframework.stereotype.Controller;
import org.springframework.web.bind.annotation.RequestMapping;
import org.springframework.web.bind.annotation.RequestMethod;

@Controller
@Api(tags = "测试-HelloWorld") //这个controller下的所有接口的描述
public class HelloController {

  @ApiOperation("测试Swagger2") //显示在接口的信息说明
  @RequestMapping(value = "/test", method = RequestMethod.GET) //请求路径和类型
  public void testSwagger(){

  }
}
3、创建一个SwaggerConfig类,配置swagger-ui
package cn.swpu.myblog.config;

import org.springframework.context.annotation.Configuration;
import springfox.documentation.swagger2.annotations.EnableSwagger2;

@Configuration
@EnableSwagger2
public class SwaggerConfig {
}
然后就可以根据你的端口访问swagger-ui了,例如我的是8099
http://localhost:8099/swagger-ui.html#/

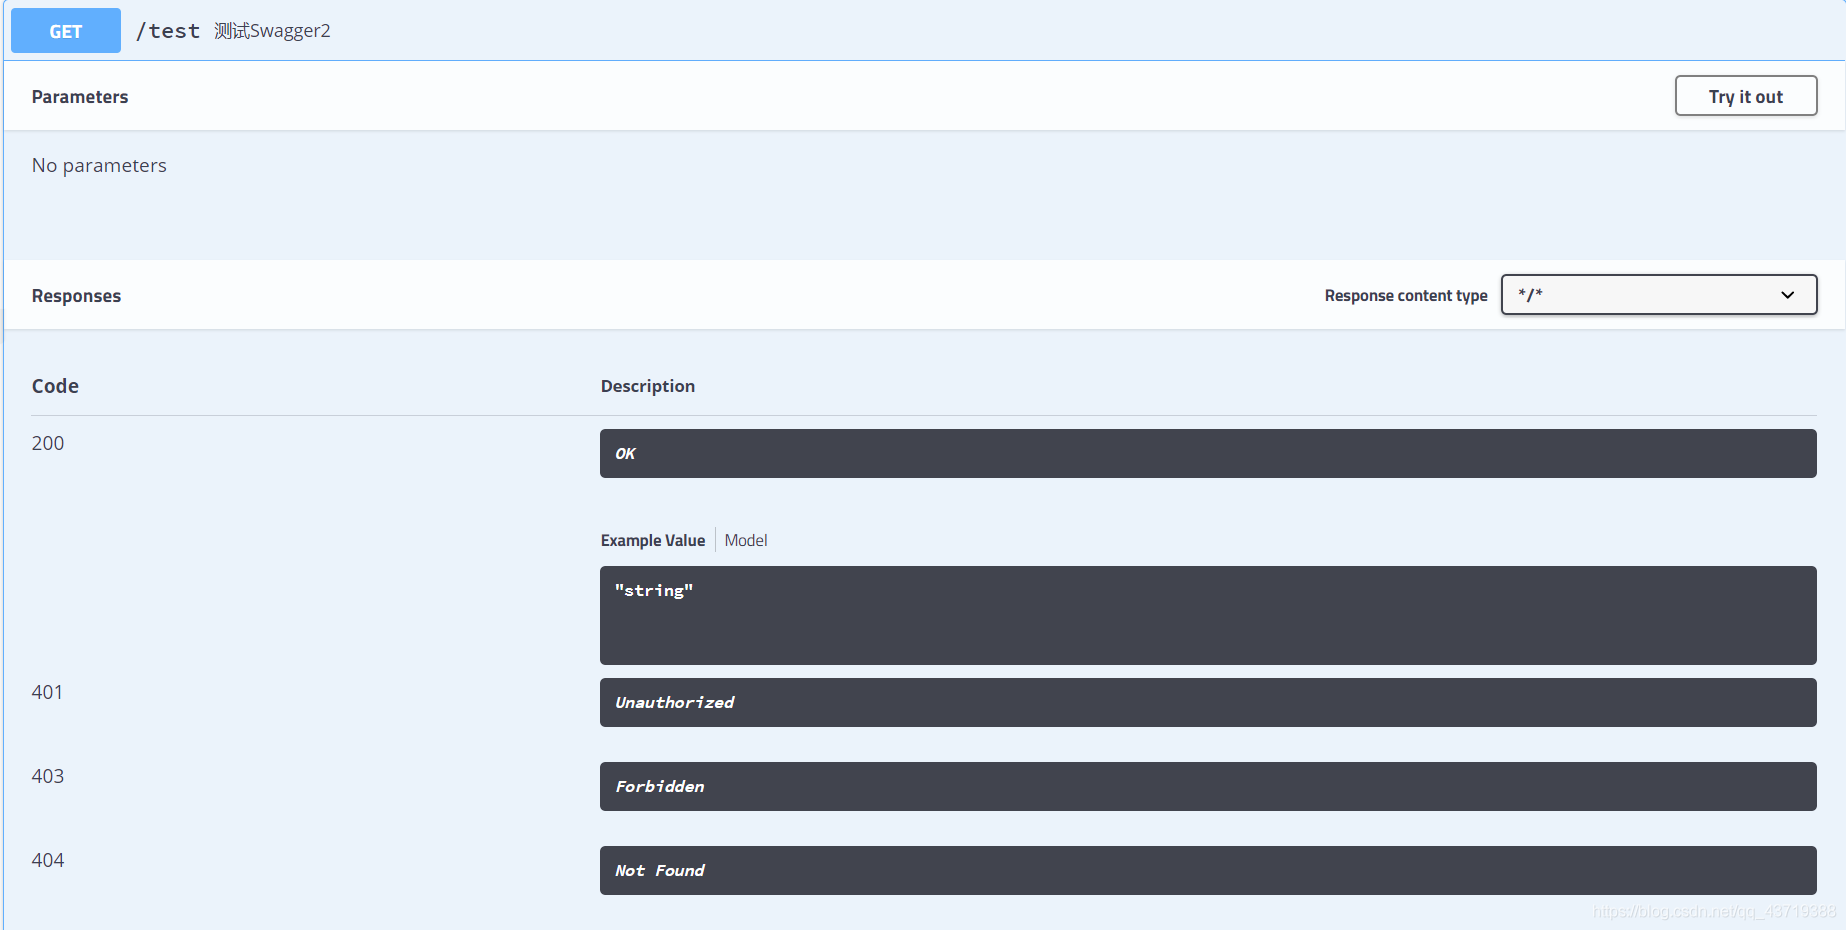
至此IDEA 继承Swagger就可以了,但这仅仅只是个开始,swagger还是有很多的实用技巧。
看完上述内容,你们对IDEA 中的SpringBoot 项目使用Swagger2的方法有进一步的了解吗?如果还想了解更多知识或者相关内容,请关注亿速云行业资讯频道,感谢大家的支持。
免责声明:本站发布的内容(图片、视频和文字)以原创、转载和分享为主,文章观点不代表本网站立场,如果涉及侵权请联系站长邮箱:is@yisu.com进行举报,并提供相关证据,一经查实,将立刻删除涉嫌侵权内容。


