这篇文章将为大家详细讲解有关微信小程序中如何实现底部导航栏,小编觉得挺实用的,因此分享给大家做个参考,希望大家阅读完这篇文章后可以有所收获。
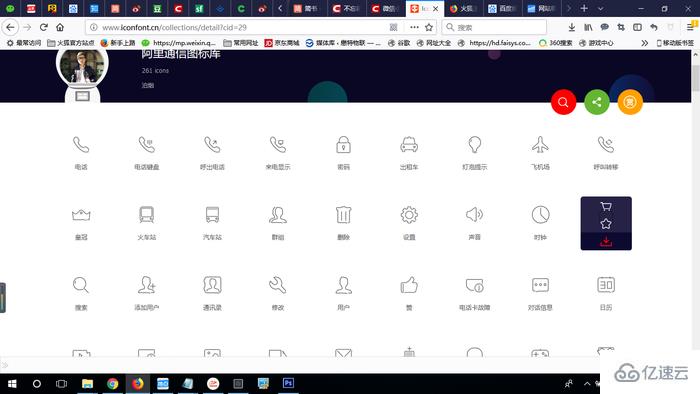
阿里图标库 http://www.iconfont.cn/collections/show/29
在这个网站上下载一些自己要用到的图标,比如人员头像,home主页等一些常用的图标,直接点击下载保存到本地,修改一下命名。也可以使用UI准备好的图标。
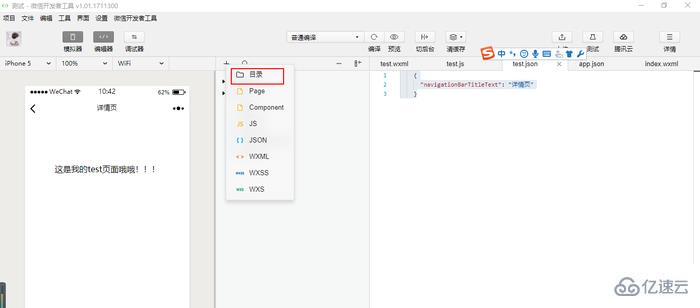
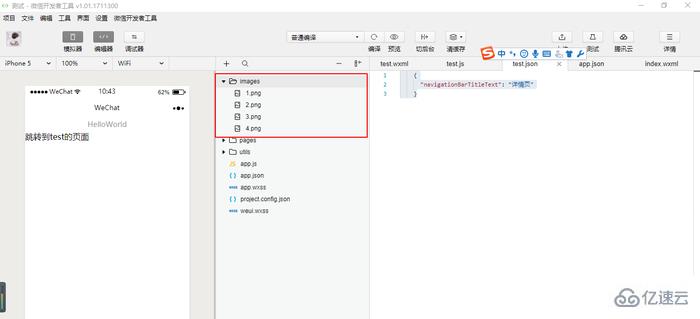
回到项目里,新建一个images文件夹,将刚刚下载好的图标放在文件夹底下备用,将上述起好名字的图标 保存到 小程序 项目目录中 新创建的 images 文件夹中,准备工作就做好了。
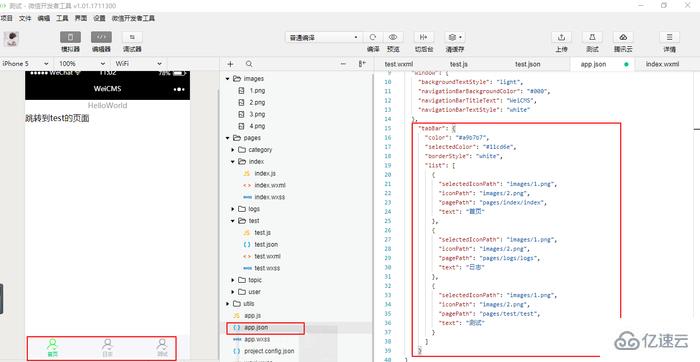
我们找到项目根目录中的配置文件 app.json 加入如下配置信息(app.json文件用来对微信小程序进行全局配置,决定页面文件的路径、窗口表现、设置网络超时时间、设置多 tab 等。)
   "tabBar": {  "color": "#a9b7b7",  "selectedColor": "#11cd6e",  "borderStyle": "white",  "list": [
    {      "selectedIconPath": "images/1.png",      "iconPath": "images/2.png",      "pagePath": "pages/index/index",      "text": "首页"
    },
    {      "selectedIconPath": "images/1.png",      "iconPath": "images/2.png",      "pagePath": "pages/logs/logs",      "text": "日志"
    },
    {      "selectedIconPath": "images/1.png",      "iconPath": "images/2.png",      "pagePath": "pages/test/test",      "text": "测试"
    }
  ]
}
以上只是基础的部分,当然了小程序的官方文档提供了更多的丰富的组件和样式
OK,结束,保存 编译 就可以实现小程序的经典的底部导航效果了
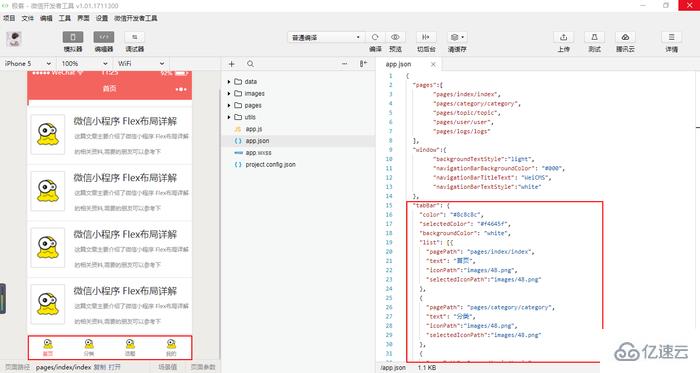
图片.png
{  "pages":[        "pages/index/index",        "pages/category/category",        "pages/topic/topic",
        "pages/user/user",        "pages/logs/logs"
  ],  "window":{        "backgroundTextStyle":"light",        "navigationBarBackgroundColor": "#000",        "navigationBarTitleText": "WeiCMS",        "navigationBarTextStyle":"white"
  },  "tabBar": {    "color": "#8c8c8c",    "selectedColor": "#f4645f",    "backgroundColor": "white",    "list": [{      "pagePath": "pages/index/index",      "text": "首页",      "iconPath":"images/48.png",      "selectedIconPath":"images/48.png"
    },
    {      "pagePath": "pages/category/category",
      "text": "分类",      "iconPath":"images/48.png",      "selectedIconPath":"images/48.png"
    },
    {      "pagePath": "pages/topic/topic",
      "text": "话题",      "iconPath":"images/48.png",      "selectedIconPath":"images/48.png"
    },
    {      "pagePath": "pages/user/user",
      "text": "我的",      "iconPath":"images/48.png",      "selectedIconPath":"images/48.png"
    }
    ],    "position": "bottom"
  }
}关于“微信小程序中如何实现底部导航栏”这篇文章就分享到这里了,希望以上内容可以对大家有一定的帮助,使各位可以学到更多知识,如果觉得文章不错,请把它分享出去让更多的人看到。
亿速云「云服务器」,即开即用、新一代英特尔至强铂金CPU、三副本存储NVMe SSD云盘,价格低至29元/月。点击查看>>
免责声明:本站发布的内容(图片、视频和文字)以原创、转载和分享为主,文章观点不代表本网站立场,如果涉及侵权请联系站长邮箱:is@yisu.com进行举报,并提供相关证据,一经查实,将立刻删除涉嫌侵权内容。