这篇文章将为大家详细讲解有关如何在springboot中使用mybatis-plus实现一个多表分页查询功能,文章内容质量较高,因此小编分享给大家做个参考,希望大家阅读完这篇文章后对相关知识有一定的了解。
1.新建一个springboot工程
2.需要导入mybatis和mybatis-plus的依赖文件
<dependency>
      <groupId>com.baomidou</groupId>
      <artifactId>mybatis-plus-boot-starter</artifactId>
      <version>3.1.1</version>
    </dependency>
     <dependency>
      <groupId>org.mybatis.spring.boot</groupId>
      <artifactId>mybatis-spring-boot-starter</artifactId>
      <version>2.0.1</version>
</dependency>3.application.yml配置文件
server:
 port: 8080
spring:
 datasource:
  url: jdbc:mysql://localhost:3306/mybatisplus?useUnicode=true&characterEncoding=utf-8&zeroDateTimeBehavior=convertToNull&useSSL=false&serverTimezone=UTC
  username: root
  password: 数据库密码
mybatis:
 mapper-locations: classpath*:mapper/*.xml

mybatis-plus:
 mapper-locations: classpath:/mapper/*Mapper.xml
logging:
 level:
com.tuanzi.*: debug4.首先我们需要写一个类来配置分页插件
省略import
@EnableTransactionManagement
@Configuration
@MapperScan("com.tuanzi.*.mapper*")
public class MybatisPlusConfig {

  /**
   * 分页插件
   */
  @Bean
  public PaginationInterceptor paginationInterceptor(){
    return new PaginationInterceptor();
  }
}5.controller类
@RestController
@RequestMapping("/user")
public class UserController {

  @Autowired
  UserService userService;

  /**
   * 多表关联,分页查询(1对1)
   * @param page
   * @return
   */
  @RequestMapping("/findAll")
  public Result<IPage<User>> findAll(@RequestBody Page<User> page){

     return userService.pages(page);

  }

  /**
   * 多表关联,分页查询(1对多)
   * @param page
   * @return
   */
  @RequestMapping("/selectAll")
  public Result<IPage<User>> selectAll(@RequestBody Page<User> page){

    return userService.pageList(page);

  }
}6.service类
public interface UserService extends IService<User> {

  Result<IPage<User>> pages(Page<User> page);

  Result<IPage<User>> pageList(Page<User> page);
}7.service实现类
@Service
public class UserServiceImpl extends ServiceImpl<UserMapper, User> implements UserService {

  @Autowired
  UserMapper userMapper;
  @Override
  public Result<IPage<User>> pages(Page<User> page) {
    IPage<User> userIPage = userMapper.Pages(page);
    return Result.getSuccess("分页查询成功",userIPage);
  }

  @Override
  public Result<IPage<User>> pageList(Page<User> page) {
    IPage<User> userIPage = userMapper.pageList(page);
    return Result.getSuccess("分页查询成功",userIPage);
  }
}8.mapper接口
注意!!: 如果入参是有多个,需要加注解指定参数名才能在xml中取值
@Mapper
@Repository
public interface UserMapper extends BaseMapper<User> {

  IPage<User> Pages(@Param("page") Page<User> page);

  IPage<User> pageList(@Param("page") Page<User> page);
}9.xml文件
一对一关联
 <!-- 一对一 通用查询映射结果 -->
  <resultMap id="BaseResultMap1" type="com.tuanzi.user.entity.User">
    <result column="id" property="id" />
    <result column="name" property="name" />
    <result column="age" property="age" />
    <result column="email" property="email" />
    <!--assocication  一对一关联查询
        可以指定联合的JavaBean对象
        property="work"指定哪个属性是联合的对象
        javaType:指定这个属性对象的类型
      -->
    <association property="work" javaType="com.tuanzi.user.entity.Work">
      <result column="id" property="id" />
      <result column="position" property="position" />
      <result column="user_id" property="userId" />
    </association>
</resultMap>一对多关联
<!-- 一对多 通用查询映射结果 -->
  <resultMap id="BaseResultMap2" type="com.tuanzi.user.entity.User">
    <result column="id" property="id" />
    <result column="name" property="name" />
    <result column="age" property="age" />
    <result column="email" property="email" />
    <!--
		collection定义关联结合类型的属性的封装规则
		property="workList"指定哪个属性是联合的对象
		ofType:指定集合里面元素的类型
		-->
    <collection property="workList" ofType="com.tuanzi.user.entity.Work">
      <result column="id" property="id" />
      <result column="position" property="position" />
      <result column="user_id" property="userId" />
    </collection>
</resultMap>SQL语句:
<select id="Pages" resultMap="BaseResultMap1">
    select a.id id,a.name name,a.age age,a.email email,b.position position,b.user_id user_id from user a LEFT JOIN work b on a.id=b.user_id
  </select>
  <select id="pageList" resultMap="BaseResultMap2">
    select a.id id,a.name name,a.age age,a.email email,b.position position,b.user_id user_id from user a LEFT JOIN work b on a.id=b.user_id
</select>10.这样就基本完成了!我这里省略了实体类
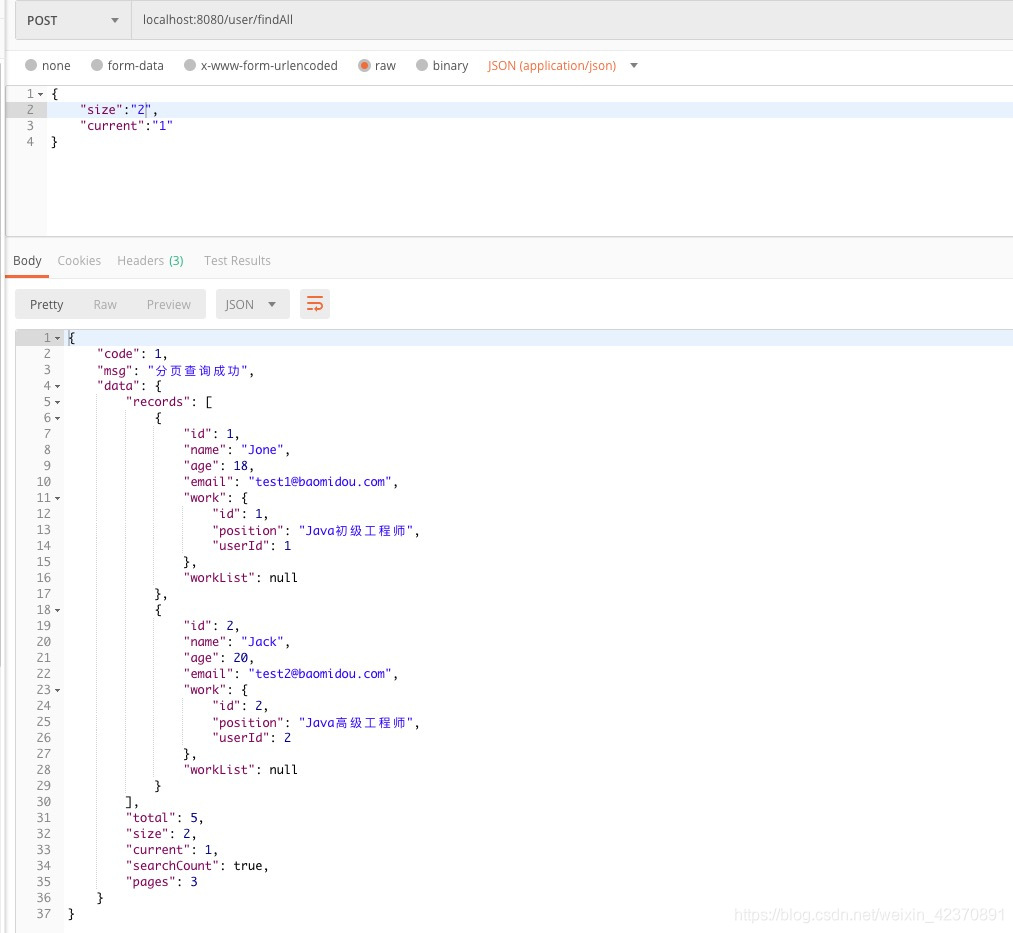
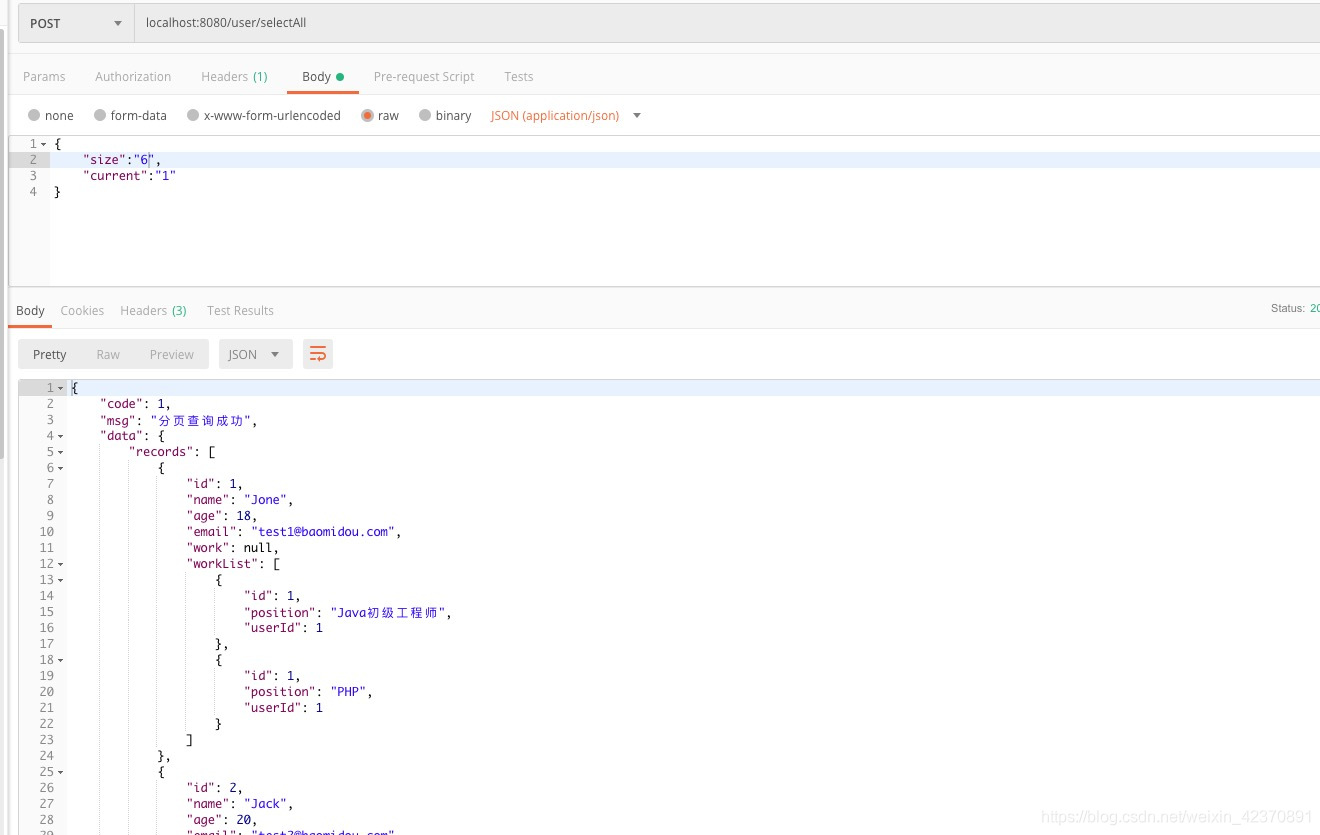
我们运行一下,用postman测试一下结果
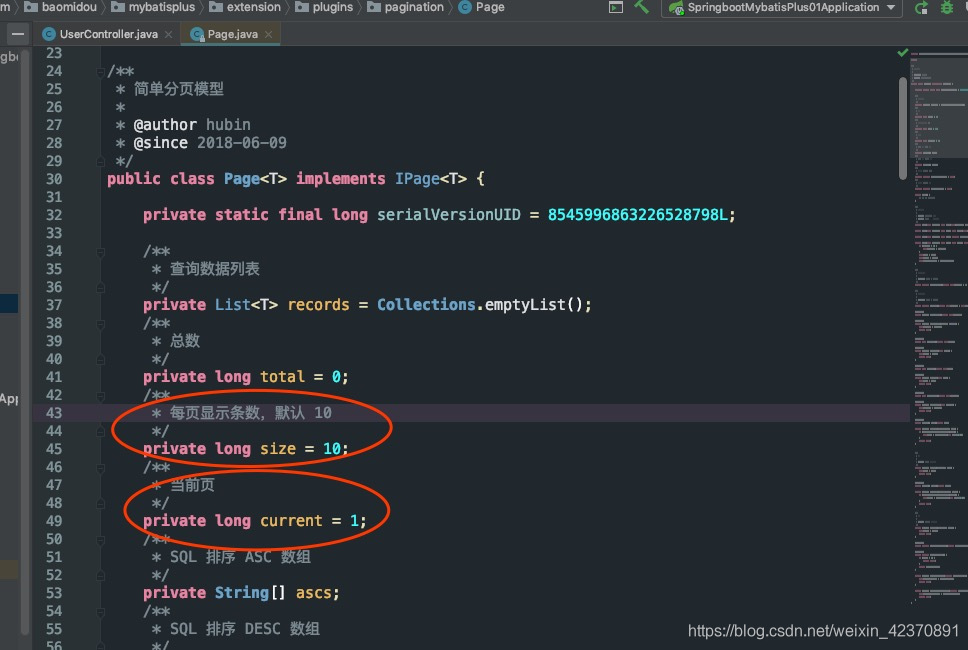
这里我们需要传2个参数,当然我们也可以不用传,因为mybatis-plus有默认值
来看下mybatis-plus的page源码

效果图:


关于如何在springboot中使用mybatis-plus实现一个多表分页查询功能就分享到这里了,希望以上内容可以对大家有一定的帮助,可以学到更多知识。如果觉得文章不错,可以把它分享出去让更多的人看到。
亿速云「云服务器」,即开即用、新一代英特尔至强铂金CPU、三副本存储NVMe SSD云盘,价格低至29元/月。点击查看>>
免责声明:本站发布的内容(图片、视频和文字)以原创、转载和分享为主,文章观点不代表本网站立场,如果涉及侵权请联系站长邮箱:is@yisu.com进行举报,并提供相关证据,一经查实,将立刻删除涉嫌侵权内容。