本篇内容介绍了“R语言怎么给图形填充颜色-polygon函数”的有关知识,在实际案例的操作过程中,不少人都会遇到这样的困境,接下来就让小编带领大家学习一下如何处理这些情况吧!希望大家仔细阅读,能够学有所成!
# polygon函数介绍
polygon(x, y = NULL, density = NULL, angle = 45,
    border = NULL, col = NA, lty = par("lty"),
    ..., fillOddEven = FALSE)
其中density为填充的阴影线的密度,angle为阴影线的斜率(角度)。值得注意的是,当你需要纯色填充时,density和angle可以忽略不写。然后border为边框的颜色。同时border也可以是逻辑。即FALSE相当于NULL,TRUE相当于为前景色。

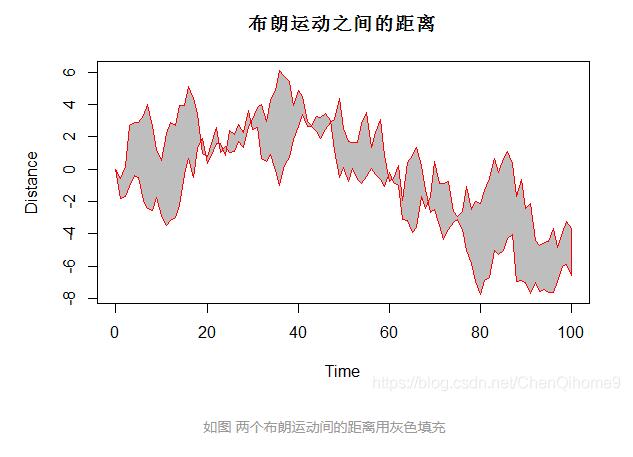
# Distance Between Brownian Motions 布朗运动之间的距离
n <- 100
xx <- c(0:n, n:0)  #生成202个元素的向量,其中前面101与后面101数字对称
yy <- c(c(0, cumsum(stats::rnorm(n))), rev(c(0, cumsum(stats::rnorm(n)))))
plot  (xx, yy, type = "n", xlab = "Time", ylab = "Distance")
polygon(xx, yy, col = "gray", border = "red")
title("布朗运动之间的距离")
如图 两个布朗运动间的距离用灰色填充
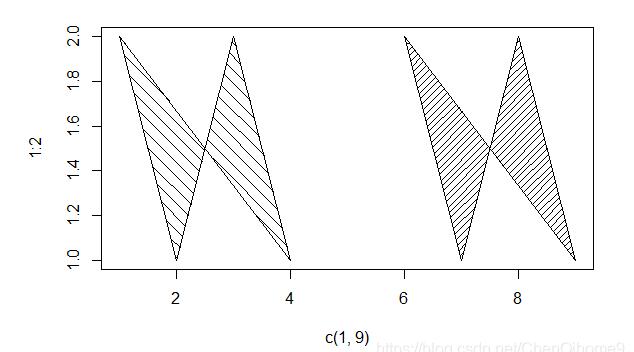
# Line-shaded polygons 线阴影多边形
plot(c(1, 9), 1:2, type = "n")
polygon(1:9, c(2,1,2,1,NA,2,1,2,1),
    density = c(10, 20), angle = c(-45, 45)) #density的值为两个,即不同的密度

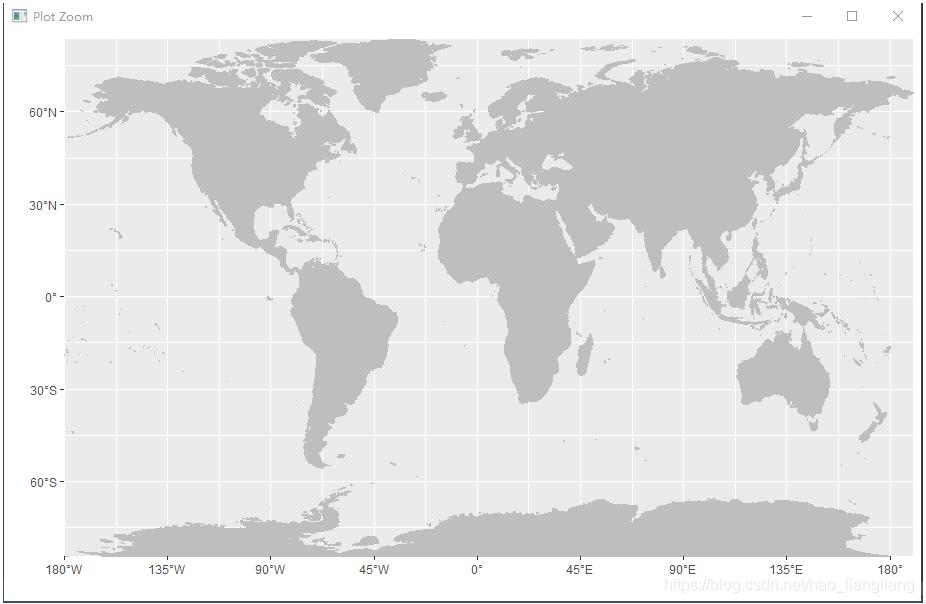
补充:R语言世界地图转为SpatialPolygons以及去除地图内国家边界
library(maps)
library(maptools)
library(ggplot2)
library(metR)
loc <- maps::map('world',interior = FALSE,
         plot = FALSE, fill = TRUE,col = 'transparent')
ids <- sapply(strsplit(loc$names, ":"), function(x) x[1])
loc <- map2SpatialPolygons(map = loc, IDs = ids,proj4string = CRS('+proj=longlat +datum=WGS84 +no_defs'))worldmap1 <- unionSpatialPolygons(loc, IDs = rep(1,length(loc)))
worldmap2 <- fortify(worldmap1)
ggplot()+
  scale_x_longitude(expand = c(0, 0), breaks = seq(-180, 180, 45))+
  scale_y_latitude(expand = c(0, 0), breaks = seq(-90, 90, 30))+
  geom_polygon(data = worldmap2,
         mapping = aes(x = long, y = lat, group = group),
         colour = 'gray', fill = 'gray', size = 0.5)

“R语言怎么给图形填充颜色-polygon函数”的内容就介绍到这里了,感谢大家的阅读。如果想了解更多行业相关的知识可以关注亿速云网站,小编将为大家输出更多高质量的实用文章!
免责声明:本站发布的内容(图片、视频和文字)以原创、转载和分享为主,文章观点不代表本网站立场,如果涉及侵权请联系站长邮箱:is@yisu.com进行举报,并提供相关证据,一经查实,将立刻删除涉嫌侵权内容。