这篇文章主要介绍了如何使用SpringBoot自定义starter,具有一定借鉴价值,感兴趣的朋友可以参考下,希望大家阅读完这篇文章之后大有收获,下面让小编带着大家一起了解一下。
springboot一种全新的编程规范,其设计目的是用来简化新Spring应用的初始搭建以及开发过程,SpringBoot也是一个服务于框架的框架,服务范围是简化配置文件。
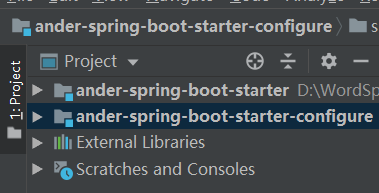
工程由xxx-sprig-boot-starter和xxx-sprig-boot-starter-configure两个模块组成;
xxx-sprig-boot-starter模块
只用来做依赖导入
依赖于 xxx-sprig-boot-starter-configure模块,没有实际代码
<?xml version="1.0" encoding="UTF-8"?>
<project xmlns="http://maven.apache.org/POM/4.0.0"
         xmlns:xsi="http://www.w3.org/2001/XMLSchema-instance"
         xsi:schemaLocation="http://maven.apache.org/POM/4.0.0 http://maven.apache.org/xsd/maven-4.0.0.xsd">
    <modelVersion>4.0.0</modelVersion>

    <groupId>com.ander</groupId>
    <artifactId>ander-spring-boot-starter</artifactId>
    <version>1.0-SNAPSHOT</version>

    <!--依赖ander-spring-boot-starter-configure工程-->
    <dependencies>
        <dependency>
            <groupId>com.ander</groupId>
            <artifactId>ander-spring-boot-starter-configure</artifactId>
            <version>0.0.1-SNAPSHOT</version>
        </dependency>
    </dependencies>

</project>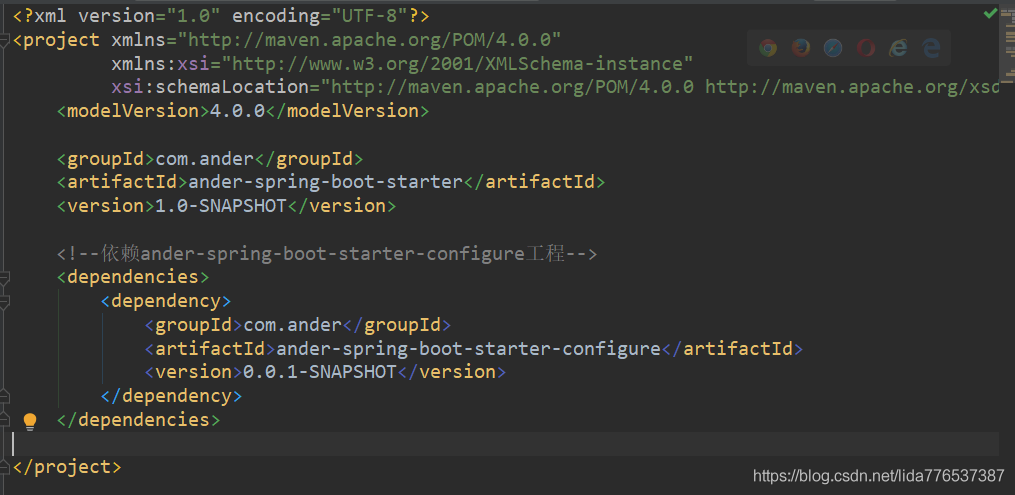
xxx-sprig-boot-starter-configure模块
专门自动配置模块
依赖于spring-boot-starter-web
<?xml version="1.0" encoding="UTF-8"?>
<project xmlns="http://maven.apache.org/POM/4.0.0" xmlns:xsi="http://www.w3.org/2001/XMLSchema-instance"
         xsi:schemaLocation="http://maven.apache.org/POM/4.0.0 https://maven.apache.org/xsd/maven-4.0.0.xsd">
    <modelVersion>4.0.0</modelVersion>
    <parent>
        <groupId>org.springframework.boot</groupId>
        <artifactId>spring-boot-starter-parent</artifactId>
        <version>2.3.10.RELEASE</version>
        <relativePath/> <!-- lookup parent from repository -->
    </parent>

    <groupId>com.ander</groupId>
    <artifactId>ander-spring-boot-starter-configure</artifactId>
    <version>0.0.1-SNAPSHOT</version>
    <name>ander-spring-boot-starter-configure</name>
    <description>Demo project for Spring Boot</description>

    <properties>
        <java.version>1.8</java.version>
    </properties>

    <dependencies>
        <dependency>
            <groupId>org.springframework.boot</groupId>
            <artifactId>spring-boot-starter-web</artifactId>
        </dependency>
    </dependencies>

</project>
/**
 * Service层
 *
 * @Author: Ander
 * @Date: 2021-05-04
 */
public class HelloService {

    private HelloServiceProperties helloServiceProperties;

    public String helloService(String name) {
        return helloServiceProperties.getPrefix() + " "+ name + " " + helloServiceProperties.getSuffix();
    }

    public HelloServiceProperties getHelloServiceProperties() {
        return helloServiceProperties;
    }

    public void setHelloServiceProperties(HelloServiceProperties helloServiceProperties) {
        this.helloServiceProperties = helloServiceProperties;
    }
}/**
* 属性配置类
*
* @Author: Ander
* @Date: 2021-05-04
*/
@ConfigurationProperties(prefix = "com.ander")
public class HelloServiceProperties {
private String prefix = "hi";
private String suffix = "hello world";
public String getPrefix() {
return prefix;
}
public void setPrefix(String prefix) {
this.prefix = prefix;
}
public String getSuffix() {
return suffix;
}
public void setSuffix(String suffix) {
this.suffix = suffix;
}
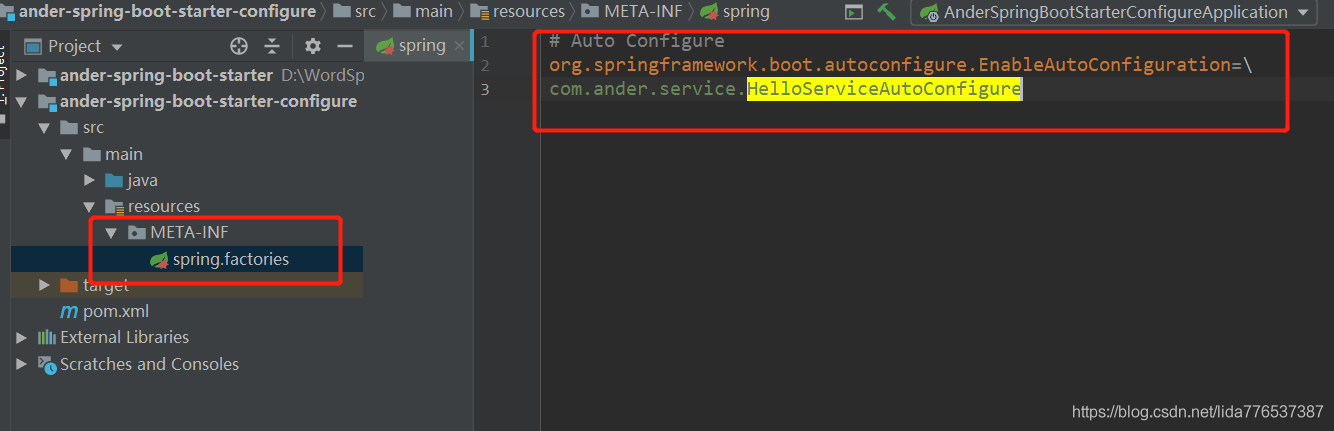
}@EnableConfigurationProperties({HelloServiceProperties.class})作用:让xxxProperties生效加入到容器中
/**
 * 自定义starter自动配置类
 *
 * @Date: 2021-05-04
 */
@Configuration
@ConditionalOnWebApplication // 指定web应用才生效
@EnableConfigurationProperties({HelloServiceProperties.class})
public class HelloServiceAutoConfigure {

    @Autowired
    private HelloServiceProperties helloServiceProperties;

    @Bean
    public HelloService helloService() {
        HelloService helloService = new HelloService();
        helloService.setHelloServiceProperties(helloServiceProperties);
        return helloService;
    }
}
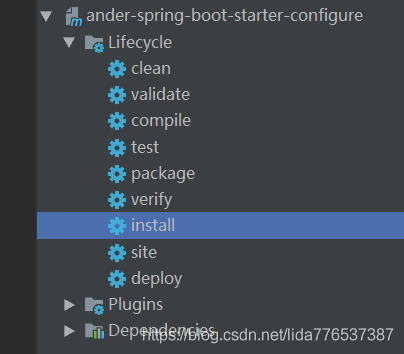
注意先安装xxx-spring-boot-starter-configure,再安装xxx-spring-boot-starter
/**
* starter测试控制类
*
* @Author: Ander
* @Date: 2021-05-05
*/
@RestController
public class StarterTestController {
@Autowired
private HelloService helloService;
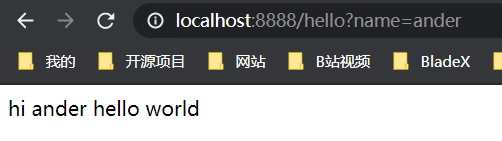
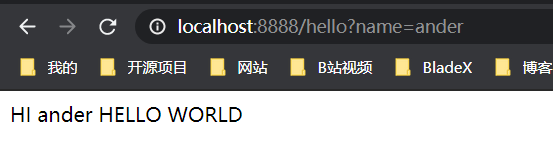
@GetMapping("hello")
public String hello(String name) {
return helloService.helloService(name);
}
}server.port=8888
com.ander.prefix=HI
com.ander.suffix=HELLO WORLD
感谢你能够认真阅读完这篇文章,希望小编分享的“如何使用SpringBoot自定义starter”这篇文章对大家有帮助,同时也希望大家多多支持亿速云,关注亿速云行业资讯频道,更多相关知识等着你来学习!
亿速云「云服务器」,即开即用、新一代英特尔至强铂金CPU、三副本存储NVMe SSD云盘,价格低至29元/月。点击查看>>
免责声明:本站发布的内容(图片、视频和文字)以原创、转载和分享为主,文章观点不代表本网站立场,如果涉及侵权请联系站长邮箱:is@yisu.com进行举报,并提供相关证据,一经查实,将立刻删除涉嫌侵权内容。


 计算
计算 安全
安全 数据库
数据库 网络和加速
网络和加速 企业服务
企业服务


