本篇内容主要讲解“如何使用装饰器”,感兴趣的朋友不妨来看看。本文介绍的方法操作简单快捷,实用性强。下面就让小编来带大家学习“如何使用装饰器”吧!
下面这是一个最简单的装饰器示例,在运行 myfunc 函数的前后都会打印一条日志。
def deco(func): def wrapper(*args, **kw): print("Ready to run task") func(*args, **kw) print("Successful to run task") return wrapper @deco def myfunc(): print("Running the task") myfunc()装饰器使用起来,似乎有些高端和魔幻,对于一些重复性的功能,往往我们会封装成一个装饰器函数。
在定义一个装饰器的时候,我们都需要像上面一样机械性的写一个嵌套的函数,对装饰器原理理解不深的初学者,往往过段时间就会忘记如何定义装饰器。
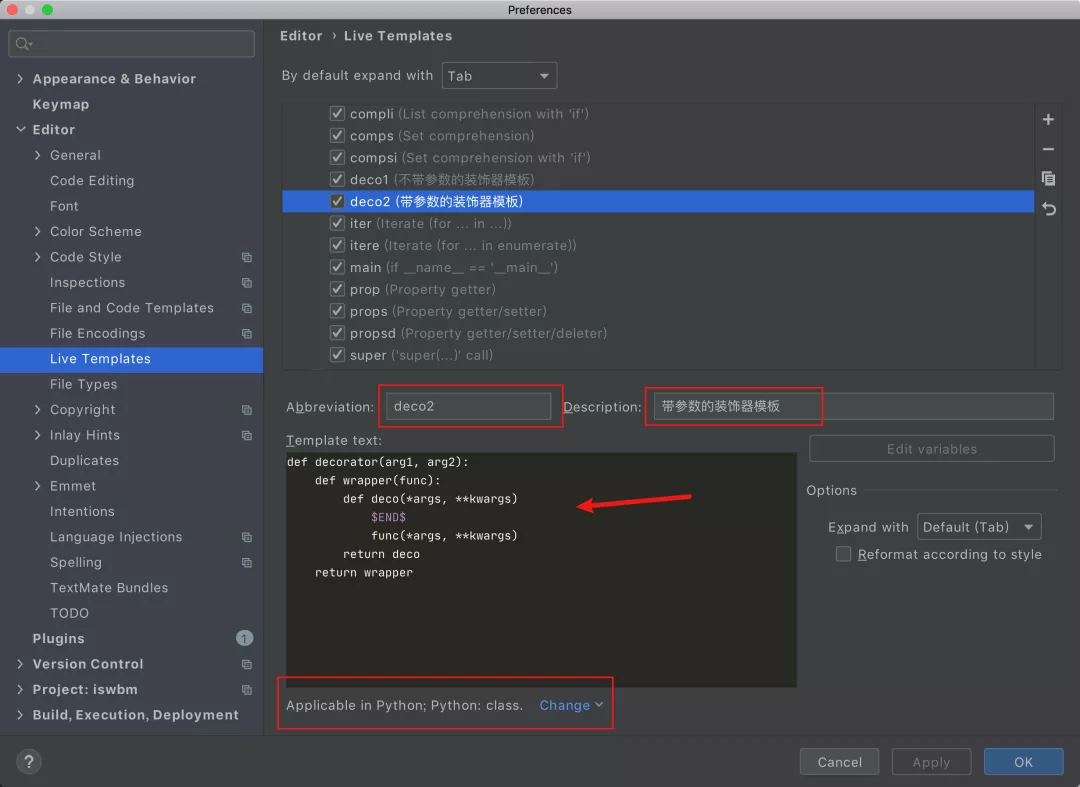
有一些比较聪明的同学,会利用 PyCharm 来自动生成装饰器模板

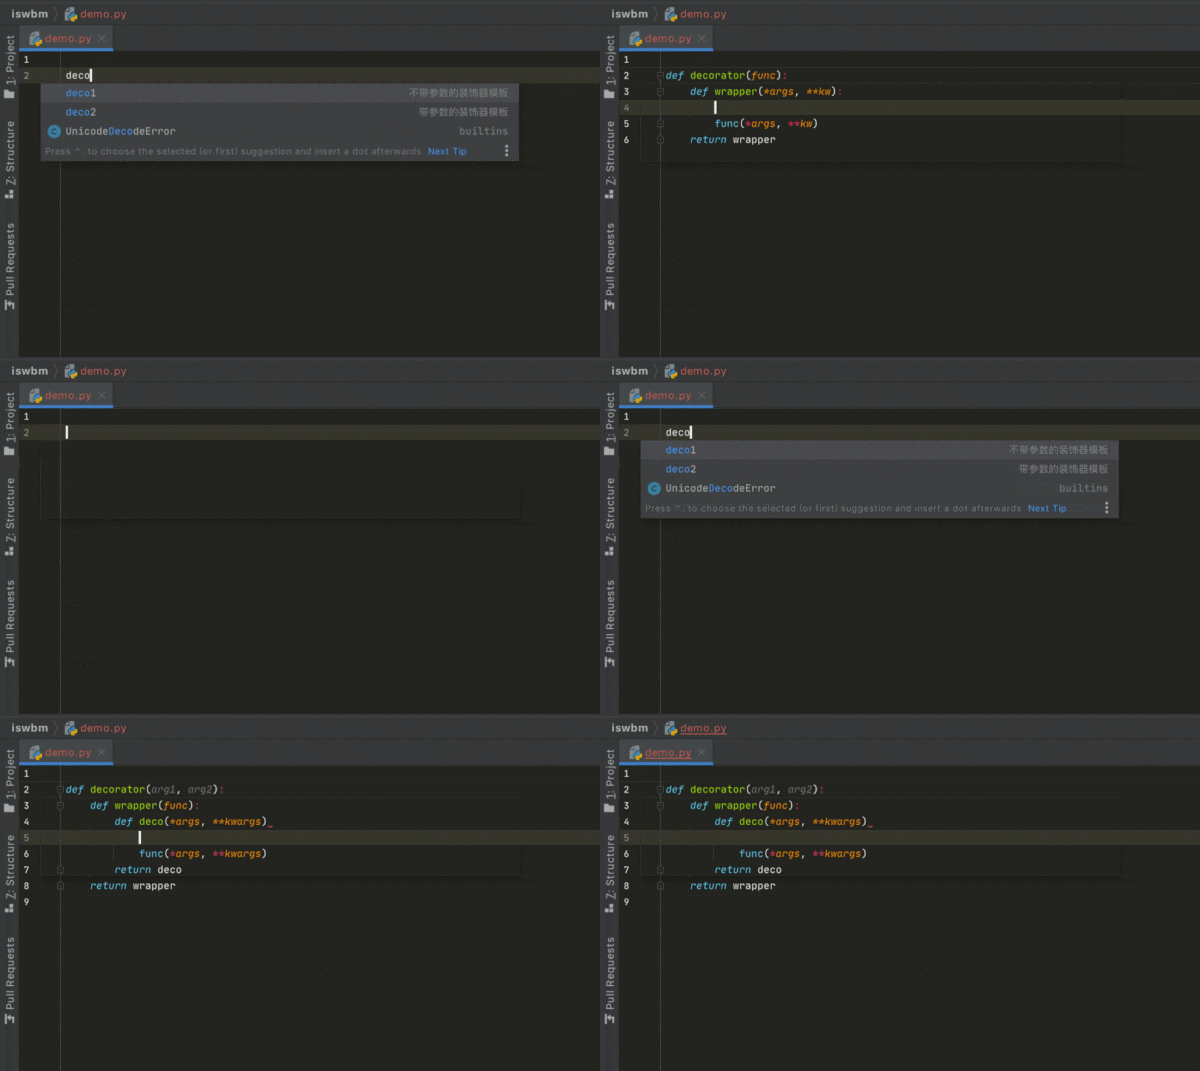
然后要使用的时候,直接敲入 deco 就会生成一个简单的生成器代码,提高编码的准备效率

使用 PyCharm 的 Live Template ,虽然能降低编写装饰器的难度,但却要依赖 PyCharm 这一专业的代码编辑器。
这里,明哥要教你一个更加简单的方法,使用这个方法呢,你需要先安装一个库 :decorator,使用 pip 可以很轻易地去安装它
$ python3 -m pip install decorator
从库的名称不难看出,这是一个专门用来解决装饰器问题的第三方库。
有了它之后,你会惊奇的发现,以后自己定义的装饰器,就再也不需要写嵌套的函数了
from decorator import decorator @decorator def deco(func, *args, **kw): print("Ready to run task") func(*args, **kw) print("Successful to run task") @deco def myfunc(): print("Running the task") myfunc()deco 作为装饰函数,第一个参数是固定的,都是指被装饰函数,而后面的参数都固定使用 可变参数 *args 和 **kw 的写法,代码被装饰函数的原参数。
这种写法,不得不说,更加符合直觉,代码的逻辑也更容易理解。
装饰器根据有没有携带参数,可以分为两种
第一种:不带参数,最简单的示例,上面已经举例
def decorator(func): def wrapper(*args, **kw): func(*args, **kw) return wrapper
第二种:带参数,这就相对复杂了,理解起来了也不是那么容易。
def decorator(arg1, arg2): def wrapper(func): def deco(*args, **kwargs) func(*args, **kwargs) return deco return wrapper
那么对于需要带参数的装饰器,decorator 是否也一样能很好的支持呢?
下面是一个官方的示例
from decorator import decorator @decorator def warn_slow(func, timelimit=60, *args, **kw): t0 = time.time() result = func(*args, **kw) dt = time.time() - t0 if dt > timelimit: logging.warn('%s took %d seconds', func.__name__, dt) else: logging.info('%s took %d seconds', func.__name__, dt) return result @warn_slow(timelimit=600) # warn if it takes more than 10 minutes def run_calculation(tempdir, outdir): pass可以看到:
装饰函数的第一个参数,还是被装饰器 func ,这个跟之前一样
而第二个参数 timelimit 写成了位置参数的写法,并且有默认值
再往后,就还是跟原来一样使用了可变参数的写法
不难推断,只要你在装饰函数中第二个参数开始,使用了非可变参数的写法,这些参数就可以做为装饰器调用时的参数。
我们在自己写装饰器的时候,通常都会顺手加上一个叫 functools.wraps 的装饰器,我想你应该也经常见过,那他有啥用呢?
先来看一个例子
def wrapper(func): def inner_function(): pass return inner_function @wrapper def wrapped(): pass print(wrapped.__name__) #inner_function
为什么会这样子?不是应该返回 func 吗?
这也不难理解,因为上边执行func 和下边 decorator(func) 是等价的,所以上面 func.__name__ 是等价于下面decorator(func).__name__ 的,那当然名字是 inner_function
def wrapper(func): def inner_function(): pass return inner_function def wrapped(): pass print(wrapper(wrapped).__name__) #inner_function
目前,我们可以看到当一个函数被装饰器装饰过后,它的签名信息会发生变化(譬如上面看到的函数名)
那如何避免这种情况的产生?
解决方案就是使用我们前面所说的 functools .wraps 装饰器。
它的作用就是将 被修饰的函数(wrapped) 的一些属性值赋值给 修饰器函数(wrapper) ,最终让属性的显示更符合我们的直觉。
from functools import wraps def wrapper(func): @wraps(func) def inner_function(): pass return inner_function @wrapper def wrapped(): pass print(wrapped.__name__) # wrapped
那么问题就来了,我们使用了 decorator 之后,是否还会存在这种签名的问题呢?
写个例子来验证一下就知道啦
from decorator import decorator @decorator def deco(func, *args, **kw): print("Ready to run task") func(*args, **kw) print("Successful to run task") @deco def myfunc(): print("Running the task") print(myfunc.__name__)输出的结果是 myfunc,说明 decorator 已经默认帮我们处理了一切可预见的问题。
到此,相信大家对“如何使用装饰器”有了更深的了解,不妨来实际操作一番吧!这里是亿速云网站,更多相关内容可以进入相关频道进行查询,关注我们,继续学习!
免责声明:本站发布的内容(图片、视频和文字)以原创、转载和分享为主,文章观点不代表本网站立场,如果涉及侵权请联系站长邮箱:is@yisu.com进行举报,并提供相关证据,一经查实,将立刻删除涉嫌侵权内容。