这篇文章主要为大家展示了“如何使用kubekey安装kubesphere”,内容简而易懂,条理清晰,希望能够帮助大家解决疑惑,下面让小编带领大家一起研究并学习一下“如何使用kubekey安装kubesphere”这篇文章吧。
下载 KubeKey
KubeKey 是新一代 Kubernetes 和 KubeSphere 安装器,可帮助您以简单、快速、灵活的方式安装 Kubernetes 和 KubeSphere。
export KKZONE=cn curl -sfL https://get-kk.kubesphere.io | VERSION=v1.0.1 sh -准备镜像
如果您想让安装加快或者您的机房没有外网,可以使用公司内部的私有仓库,预先把镜像推送到私有仓库中,我这里的仓库使用harbor
下载离线安装工具,我这里只是用这个脚本来下载和推送镜像
curl -L -O https://github.com/kubesphere/ks-installer/releases/download/v3.0.0/offline-installation-tool.sh curl -L -O https://github.com/kubesphere/ks-installer/releases/download/v3.0.0/images-list.txt拉取镜像
./offline-installation-tool.sh -s -l images-list.txt -d ./kubesphere-images 在./kubesphere-images目录下能看到以下压缩包 # ll total 8606088 -rw-r--r-- 1 root root 454465957 Feb 2 15:37 csi-images.tar.gz -rw-r--r-- 1 root root 1231853258 Feb 2 15:33 example-images.tar.gz -rw-r--r-- 1 root root 445244294 Feb 2 14:50 istio-images.tar.gz -rw-r--r-- 1 root root 762326634 Feb 2 14:27 k8s-images.tar.gz -rw-r--r-- 1 root root 1297767607 Feb 2 14:40 ks-core-images.tar.gz -rw-r--r-- 1 root root 3439146357 Feb 2 15:19 ks-devops-images.tar.gz -rw-r--r-- 1 root root 733165078 Feb 2 14:46 ks-logging-images.tar.gz -rw-r--r-- 1 root root 448651153 Feb 2 15:23 openpitrix-images.tar.gz推送镜像到私有仓库,待脚本完成即可
./offline-installation-tool.sh -l images-list.txt -d ./kubesphere-images -r hub.evbj.easou.com
创建多节点集群
您可用使用 KubeKey 同时安装 Kubernetes 和 KubeSphere,通过自定义配置文件中的参数创建多节点集群。
创建安装有 KubeSphere 的 Kubernetes 集群(例如 --with-kubesphere v3.0.0)
./kk create config --with-kubernetes v1.17.9 --with-kubesphere v3.0.0系统将创建默认的 config-sample.yaml 文件。您可以根据您的环境修改此文件。
apiVersion: kubekey.kubesphere.io/v1alpha1 kind: Cluster metadata: name: ESCloud spec: hosts: - {name: kubesphere001, address: 10.26.31.34, internalAddress: 10.26.31.34, privateKeyPath: "~/.ssh/id_dsa", port: 20755} - {name: kubesphere002, address: 10.26.31.36, internalAddress: 10.26.31.36, privateKeyPath: "~/.ssh/id_dsa", port: 20755} - {name: kubesphere003, address: 10.26.31.42, internalAddress: 10.26.31.42, privateKeyPath: "~/.ssh/id_dsa", port: 20755} - {name: kubesphere004, address: 10.26.31.46, internalAddress: 10.26.31.46, privateKeyPath: "~/.ssh/id_dsa", port: 20755} - {name: kubesphere005, address: 10.26.31.118, internalAddress: 10.26.31.118, privateKeyPath: "~/.ssh/id_dsa", port: 20755} - {name: kubesphere006, address: 10.26.31.119, internalAddress: 10.26.31.119, privateKeyPath: "~/.ssh/id_dsa", port: 20755} - {name: kubesphere007, address: 10.26.31.120, internalAddress: 10.26.31.120, privateKeyPath: "~/.ssh/id_dsa", port: 20755} - {name: kubesphere008, address: 10.26.31.121, internalAddress: 10.26.31.121, privateKeyPath: "~/.ssh/id_dsa", port: 20755} roleGroups: etcd: - kubesphere001 - kubesphere002 - kubesphere003 master: - kubesphere001 - kubesphere002 - kubesphere003 worker: - kubesphere004 - kubesphere005 - kubesphere006 - kubesphere007 - kubesphere008 controlPlaneEndpoint: domain: lb.kubesphere.local address: "" port: "6443" kubernetes: version: v1.17.9 imageRepo: kubesphere clusterName: cluster.local network: plugin: calico kubePodsCIDR: 10.233.64.0/18 kubeServiceCIDR: 10.233.0.0/18 registry: registryMirrors: [] insecureRegistries: ["hub.kubeops.net"] privateRegistry: "hub.kubeops.net" addons: [] --- apiVersion: installer.kubesphere.io/v1alpha1 kind: ClusterConfiguration metadata: name: ks-installer namespace: kubesphere-system labels: version: v3.0.0 spec: local_registry: "hub.kubeops.net" persistence: storageClass: "" authentication: jwtSecret: "" etcd: monitoring: true endpointIps: localhost port: 2379 tlsEnable: true common: es: elasticsearchDataVolumeSize: 20Gi elasticsearchMasterVolumeSize: 4Gi elkPrefix: logstash logMaxAge: 7 mysqlVolumeSize: 20Gi minioVolumeSize: 20Gi etcdVolumeSize: 20Gi openldapVolumeSize: 2Gi redisVolumSize: 2Gi console: enableMultiLogin: true # enable/disable multi login port: 30880 alerting: enabled: false auditing: enabled: false devops: enabled: false jenkinsMemoryLim: 2Gi jenkinsMemoryReq: 1500Mi jenkinsVolumeSize: 8Gi jenkinsJavaOpts_Xms: 512m jenkinsJavaOpts_Xmx: 512m jenkinsJavaOpts_MaxRAM: 2g events: enabled: false ruler: enabled: true replicas: 2 logging: enabled: false logsidecarReplicas: 2 metrics_server: enabled: true monitoring: prometheusMemoryRequest: 400Mi prometheusVolumeSize: 20Gi multicluster: clusterRole: none # host | member | none networkpolicy: enabled: false notification: enabled: false openpitrix: enabled: false servicemesh: enabled: false环境初始化
./kk init os -f config-sample.yaml INFO[14:04:19 CST] Init operating system INFO[14:04:20 CST] Start initializing kubesphere008 [10.26.31.121] node=10.26.31.121 INFO[14:04:20 CST] Start initializing kubesphere001 [10.26.31.34] node=10.26.31.34 INFO[14:04:20 CST] Start initializing kubesphere003 [10.26.31.42] node=10.26.31.42 INFO[14:04:20 CST] Start initializing kubesphere005 [10.26.31.118] node=10.26.31.118 INFO[14:04:20 CST] Start initializing kubesphere006 [10.26.31.119] node=10.26.31.119 INFO[14:04:20 CST] Start initializing kubesphere004 [10.26.31.46] node=10.26.31.46 INFO[14:04:20 CST] Start initializing kubesphere007 [10.26.31.120] node=10.26.31.120 INFO[14:04:20 CST] Start initializing kubesphere002 [10.26.31.36] node=10.26.31.36 INFO[14:06:34 CST] Complete initialization kubesphere005 [10.26.31.118] node=10.26.31.118 INFO[14:06:56 CST] Complete initialization kubesphere002 [10.26.31.36] node=10.26.31.36 INFO[14:07:04 CST] Complete initialization kubesphere006 [10.26.31.119] node=10.26.31.119 INFO[14:07:04 CST] Complete initialization kubesphere007 [10.26.31.120] node=10.26.31.120 INFO[14:07:07 CST] Complete initialization kubesphere003 [10.26.31.42] node=10.26.31.42 INFO[14:07:11 CST] Complete initialization kubesphere004 [10.26.31.46] node=10.26.31.46 INFO[14:08:23 CST] Complete initialization kubesphere001 [10.26.31.34] node=10.26.31.34 INFO[14:10:57 CST] Complete initialization kubesphere008 [10.26.31.121] node=10.26.31.121 INFO[14:10:57 CST] Init operating system successful.部署
以上准备工作完成且再次检查配置文件无误后,执行安装。
./kk create cluster -f config-sample.yaml +-------------------------+------+------+---------+----------+-------+-------+-----------+--------+------------+-------------+------------------+--------------+ | name | sudo | curl | openssl | ebtables | socat | ipset | conntrack | docker | nfs client | ceph client | glusterfs client | time | +-------------------------+------+------+---------+----------+-------+-------+-----------+--------+------------+-------------+------------------+--------------+ | kubesphere005 | y | y | y | y | y | y | y | y | y | y | y | CST 14:16:55 | | kubesphere006 | y | y | y | y | y | y | y | y | y | y | y | CST 14:16:55 | | kubesphere007 | y | y | y | y | y | y | y | y | y | y | y | CST 14:16:55 | | kubesphere004 | y | y | y | y | y | y | y | y | y | y | y | CST 14:16:55 | | kubesphere001 | y | y | y | y | y | y | y | y | y | y | y | CST 14:16:55 | | kubesphere003 | y | y | y | y | y | y | y | y | y | y | y | CST 14:16:55 | | kubesphere002 | y | y | y | y | y | y | y | y | y | y | y | CST 14:16:55 | | kubesphere008 | y | y | y | y | y | y | y | y | y | y | y | CST 14:16:55 | +-------------------------+------+------+---------+----------+-------+-------+-----------+--------+------------+-------------+------------------+--------------+ This is a simple check of your environment. Before installation, you should ensure that your machines meet all requirements specified at https://github.com/kubesphere/kubekey#requirements-and-recommendations Continue this installation? [yes/no]: yes INFO[14:17:25 CST] Downloading Installation Files INFO[14:17:25 CST] Downloading kubeadm ... ************************************************** ##################################################### ### Welcome to KubeSphere! ### ##################################################### Console: http://10.26.31.34:30880 Account: admin Password: P@88w0rd NOTES: 1. After logging into the console, please check the monitoring status of service components in the "Cluster Management". If any service is not ready, please wait patiently until all components are ready. 2. Please modify the default password after login. ##################################################### https://kubesphere.io 2021-02-05 15:47:21 #####################################################至此kubesphere安装成功,可以通过浏览器访问http://10.26.31.34:30880 验证
验证
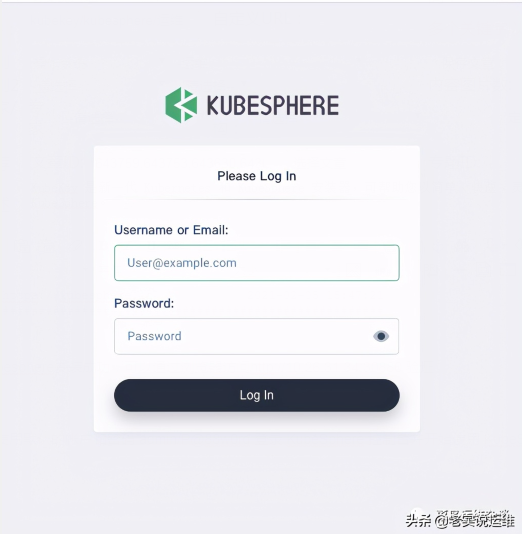
您可以使用默认的帐户和密码 admin/P@88w0rd 登录 KubeSphere 控制台并开始使用 KubeSphere。请在登录后修改默认密码。

登录后如下图

以上是“如何使用kubekey安装kubesphere”这篇文章的所有内容,感谢各位的阅读!相信大家都有了一定的了解,希望分享的内容对大家有所帮助,如果还想学习更多知识,欢迎关注亿速云行业资讯频道!
亿速云「云服务器」,即开即用、新一代英特尔至强铂金CPU、三副本存储NVMe SSD云盘,价格低至29元/月。点击查看>>
免责声明:本站发布的内容(图片、视频和文字)以原创、转载和分享为主,文章观点不代表本网站立场,如果涉及侵权请联系站长邮箱:is@yisu.com进行举报,并提供相关证据,一经查实,将立刻删除涉嫌侵权内容。
原文链接:https://www.toutiao.com/i6925719807790809603/