Python中Pytest如何使用,很多新手对此不是很清楚,为了帮助大家解决这个难题,下面小编将为大家详细讲解,有这方面需求的人可以来学习下,希望你能有所收获。
2、Pytest安装
    import pytest
    class Test_class:
        def test_001(self):
            print('用例001')
            assert 8 == 8
        def test_002(self):
            print('用例002')
            assert 6 == 6
        def test_003(self):
            print('用例003')
            assert 3 == 2
    if __name__ == "__main__":
    # 里面参数需要传list,多个参数放list就不会有警告了
# pytest.main('-q test_class.py')
pytest.main(['-q', 'test_class.py'])3、创建一个简单的test案例
    import pytest
    class Test_class:
        def test_001(self):
            print('用例001')
            assert 8 == 8
        def test_002(self):
            print('用例002')
            assert 6 == 6
        def test_003(self):
            print('用例003')
            assert 3 == 2
    if __name__ == "__main__":
    # 里面参数需要传list,多个参数放list就不会有警告了
# pytest.main('-q test_class.py')
pytest.main(['-q', 'test_class.py'])执行结果
pytest 中用例的检查点 直接用 Python 的 assert 断言。
assert 后面的表达式结果 为 True ,就是检查点通过,结果为False ,就是检查点不通过。
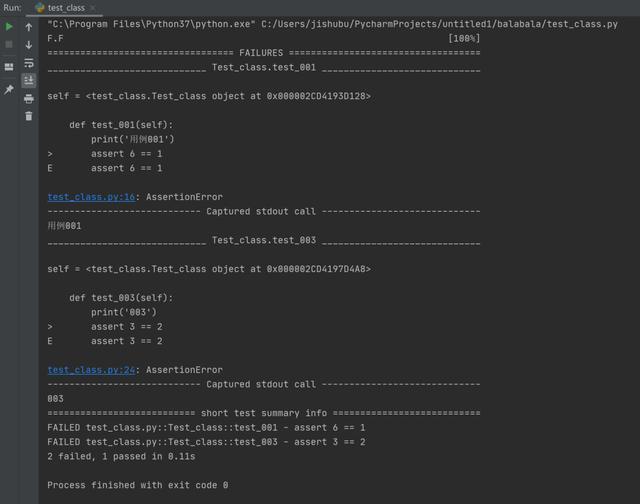
执行测试的时候,我们只需要在测试文件test_class所在的目录下,运行py.test即可。pytest会在当前的目录下,寻找以test开头的文件(即测试文件),找到测试文件之后,进入到测试文件中寻找test_开头的测试函数并执行。
4、Pycharm设置Pytest
#file->Setting->Tools->Python Integrated Tools->项目名称->Default test runner->选择py.test
#右键选择pytest运行或者直接运行.py文件执行结果
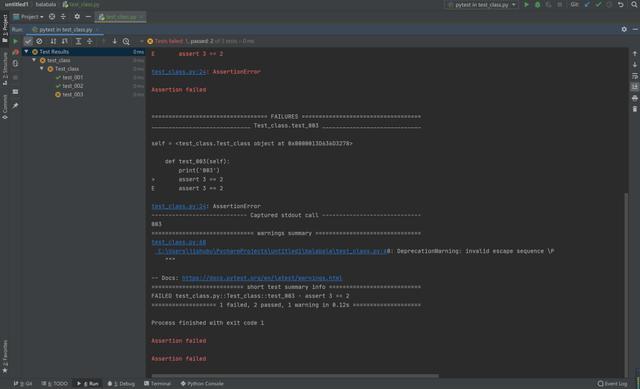
由上可见:Pytest是可以兼容UnitTest脚本的,之前写的UnitTest用例也能用Pytest框架去运行。
5、Pytest自动生成报告
    # 需预先装上pytest-html
    >>>pip install pytest_html

    # 生成html格式的报告
    >>>pytest -v test_1.py --html=Path

    # 生成xml格式的报告
    >>>pytest -v test_1.py --junitxml=Path

    # 生成txt格式的报告
>>>pytest -v test_1.py --resultlog=Path注意:检查运行指令时,路径(根目录)是否正确
参考地址:
https://docs.pytest.org/en/latest/warnings.html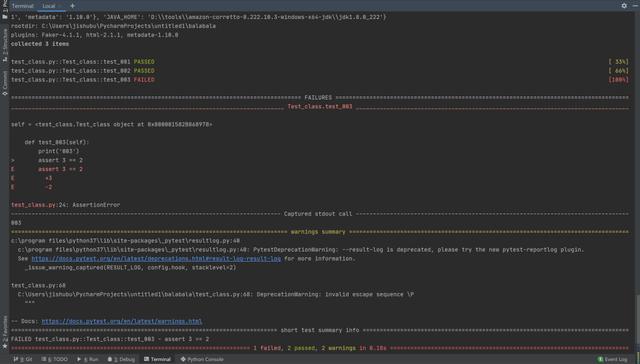
    生成报告
    .test_class.py::Test_class::test_001
    .test_class.py::Test_class::test_002
    F
    test_class.py::Test_class::test_003
    self = < test_class.Test_class object at 0x000001582B868978 >
    def test_003(self):
        print('用例003')
    > assert 3 == 2
    E
    assert 3 == 2
    E + 3
    E - 2
test_class.py: 24: AssertionError看完上述内容是否对您有帮助呢?如果还想对相关知识有进一步的了解或阅读更多相关文章,请关注亿速云行业资讯频道,感谢您对亿速云的支持。
亿速云「云服务器」,即开即用、新一代英特尔至强铂金CPU、三副本存储NVMe SSD云盘,价格低至29元/月。点击查看>>
免责声明:本站发布的内容(图片、视频和文字)以原创、转载和分享为主,文章观点不代表本网站立场,如果涉及侵权请联系站长邮箱:is@yisu.com进行举报,并提供相关证据,一经查实,将立刻删除涉嫌侵权内容。
原文链接:https://my.oschina.net/u/4848094/blog/4745880


 计算
计算 安全
安全 数据库
数据库 网络和加速
网络和加速 企业服务
企业服务


