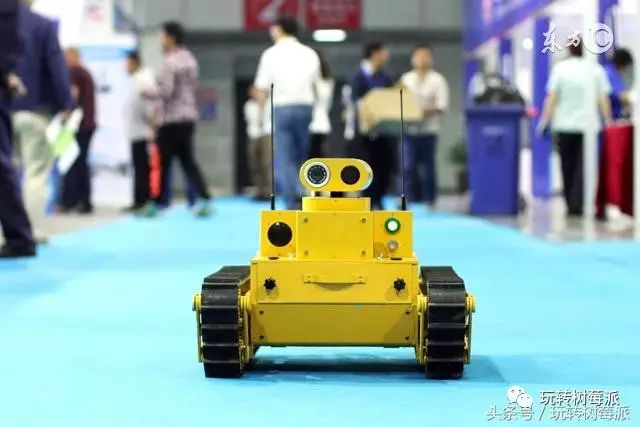
树莓派智能小车结合摄像头opencv进行物体追踪的示例分析,相信很多没有经验的人对此束手无策,为此本文总结了问题出现的原因和解决方法,通过这篇文章希望你能解决这个问题。
在几天的资料整理之后发现是利用opencv和python实现的。那么今天告诉大家如何安装opencv3.0和如何利用它实现我的小车追踪。
之前确实安装过几次opencv都倒在了cmake编译的路上,但有问题就得解决。翻了好几个帖子终于找到了一个靠谱的。用了一个下午的时间终于安装成功了。安装的教程篇幅过长且容易被头条认为成抄袭所以就在发到评论区吧。然后问题来了,opencv安装好了,怎么实现物体追踪呢。我开始在github上找案列,找啊找啊找,输入关键字 track car raspberry,找到一个,打开看看是树莓派加arduino做的。还好arduino只是用来控制步进电机的。我开始把树莓派gpio控制电机的部分移植到这个项目中。在一天的调试之后,改造版的树莓派物体追踪小车出炉了。怎么说呢,这只是个雏形,因为小车转向不够灵敏,追踪的功能需要进一步优化。个人水平有限,希望大家一起来研究。
来说说detect.py 小车物体追踪的源码。detect.py中物体追踪是怎么实现的呢,首先它需要捕捉一个frame边框并确定一个物体去追踪。在确定了所要追踪的物体之后,小车将保持对物体的追踪。源码中定义了前后左右和停止的动作。当被锁定的物体移动时,小车则根据物体的位置作出响应即追踪物体前进。
#导入一些必须的包
from picamera.array import PiRGBArray
from picamera import PiCamera
import cv2
import serial
import syslog
import time
import numpy as np
import RPi.GPIO as GPIO
# 定义捕捉的画面尺寸
width = 320
height = 240
tracking_width = 40
tracking_height = 40
auto_mode = 0
#如下定义小车前后左右的功能函数
def t_stop():
GPIO.output(11, False)
GPIO.output(12, False)
GPIO.output(15, False)
GPIO.output(16, False)
def t_up():
GPIO.output(11, True)
GPIO.output(12, False)
GPIO.output(15, True)
GPIO.output(16, False)
time.sleep(0.05)
GPIO.output(11, False)
GPIO.output(12, False)
GPIO.output(15, False)
GPIO.output(16, False)
time.sleep(0.3)
def t_down():
GPIO.output(11, False)
GPIO.output(12, True)
GPIO.output(15, False)
GPIO.output(16, True)
def t_left():
GPIO.output(11, False)
GPIO.output(12, True)
GPIO.output(15, True)
GPIO.output(16, False)
time.sleep(0.05)
GPIO.output(11, False)
GPIO.output(12, False)
GPIO.output(15, False)
GPIO.output(16, False)
time.sleep(0.3)
def t_right():
GPIO.output(11, True)
GPIO.output(12, False)
GPIO.output(15, False)
GPIO.output(16, True)
time.sleep(0.05)
GPIO.output(11, False)
GPIO.output(12, False)
GPIO.output(15, False)
GPIO.output(16, False)
time.sleep(0.3)
def t_open():
GPIO.setup(22,GPIO.OUT)
GPIO.output(22,GPIO.LOW)
def t_close():
GPIO.setup(22,GPIO.IN)
def check_for_direction(position_x):
GPIO.setmode(GPIO.BOARD)
GPIO.setwarnings(False)
GPIO.setup(11,GPIO.OUT)
GPIO.setup(12,GPIO.OUT)
GPIO.setup(15,GPIO.OUT)
GPIO.setup(16,GPIO.OUT)
GPIO.setup(38,GPIO.OUT)
if position_x == 0 or position_x == width:
print 'out of bound'
t_stop()
if position_x <= ((width-tracking_width)/2 - tracking_width):
print 'move right!'
t_right()
elif position_x >= ((width-tracking_width)/2 + tracking_width):
print 'move left!'
t_left()
else:
# print 'move front'
t_up()
# initialize the camera and grab a reference to the raw camera capture
camera = PiCamera()

图文无关
camera.resolution = (width, height)
camera.framerate = 32
rawCapture = PiRGBArray(camera, size=(width, height))
rawCapture2 = PiRGBArray(camera, size=(width, height))
# allow the camera to warmup
time.sleep(0.1)
# set the ROI (Region of Interest)
c,r,w,h = (width/2 - tracking_width/2), (height/2 - tracking_height/2), tracking_width, tracking_height
track_window = (c,r,w,h)
# capture single frame of tracking image
camera.capture(rawCapture2, format='bgr')
# create mask and normalized histogram
roi = rawCapture2.array[r:r+h, c:c+w]
hsv_roi = cv2.cvtColor(roi, cv2.COLOR_BGR2HSV)
mask = cv2.inRange(hsv_roi, np.array([0,30,32]), np.array([180,255,255]))
roi_hist = cv2.calcHist([hsv_roi], [0], mask, [180], [0,180])
cv2.normalize(roi_hist, roi_hist, 0, 255, cv2.NORM_MINMAX)
term_crit = (cv2.TERM_CRITERIA_EPS | cv2.TERM_CRITERIA_COUNT, 80, 1)
# capture frames from the camera
for frame in camera.capture_continuous(rawCapture, format='bgr', use_video_port=True):
# grab the raw NumPy array representing the image, then initialize the timestamp
# and occupied/unoccupied text
image = frame.array
# filtering for tracking algorithm
hsv = cv2.cvtColor(image, cv2.COLOR_BGR2HSV)
dst = cv2.calcBackProject([hsv], [0], roi_hist, [0,180], 1)
ret, track_window = cv2.meanShift(dst, track_window, term_crit)
x,y,w,h = track_window
cv2.rectangle(image, (x,y), (x+w,y+h), 255, 2)
cv2.putText(image, 'Tracked', (x-25, y-10), cv2.FONT_HERSHEY_SIMPLEX, 1, (255, 255, 255), 2)
# show the frame
cv2.imshow("Raspberry Pi RC Car", image)
key = cv2.waitKey(1) & 0xFF
check_for_direction(x)
time.sleep(0.01)
# clear the stream in preparation for the next frame
rawCapture.truncate(0)
看完上述内容,你们掌握树莓派智能小车结合摄像头opencv进行物体追踪的示例分析的方法了吗?如果还想学到更多技能或想了解更多相关内容,欢迎关注亿速云行业资讯频道,感谢各位的阅读!
亿速云「云服务器」,即开即用、新一代英特尔至强铂金CPU、三副本存储NVMe SSD云盘,价格低至29元/月。点击查看>>
免责声明:本站发布的内容(图片、视频和文字)以原创、转载和分享为主,文章观点不代表本网站立场,如果涉及侵权请联系站长邮箱:is@yisu.com进行举报,并提供相关证据,一经查实,将立刻删除涉嫌侵权内容。
原文链接:https://my.oschina.net/u/3067330/blog/4410667