本文小编为大家详细介绍“nginx怎么代理多个服务器”,内容详细,步骤清晰,细节处理妥当,希望这篇“nginx怎么代理多个服务器”文章能帮助大家解决疑惑,下面跟着小编的思路慢慢深入,一起来学习新知识吧。
首先修改配置文件:
#user nobody;
worker_processes 1;

#error_log logs/error.log;
#error_log logs/error.log notice;
#error_log logs/error.log info;

#pid  logs/nginx.pid;


events {
 worker_connections 1024;
}


http {
 include  mime.types;
 default_type application/octet-stream;

 #log_format main '$remote_addr - $remote_user [$time_local] "$request" '
 #     '$status $body_bytes_sent "$http_referer" '
 #     '"$http_user_agent" "$http_x_forwarded_for"';

 #access_log logs/access.log main;

 sendfile  on;
 #tcp_nopush  on;

 #keepalive_timeout 0;
 keepalive_timeout 65;

 #gzip on;

 server {
  listen  9922;
  server_name firstproxyserver;

  #charset koi8-r;

  #access_log logs/host.access.log main;

  #location / {
   #root html;
   #index index.html index.htm;
  #}
  location / {
   proxy_pass http://localhost:8989;
  }

  #error_page 404    /404.html;

  # redirect server error pages to the static page /50x.html
  #
  error_page 500 502 503 504 /50x.html;
  location = /50x.html {
   root html;
  }

  # proxy the php scripts to apache listening on 127.0.0.1:80
  #
  #location ~ \.php$ {
  # proxy_pass http://127.0.0.1;
  #}

  # pass the php scripts to fastcgi server listening on 127.0.0.1:9000
  #
  #location ~ \.php$ {
  # root   html;
  # fastcgi_pass 127.0.0.1:9000;
  # fastcgi_index index.php;
  # fastcgi_param script_filename /scripts$fastcgi_script_name;
  # include  fastcgi_params;
  #}

  # deny access to .htaccess files, if apache's document root
  # concurs with nginx's one
  #
  #location ~ /\.ht {
  # deny all;
  #}
 }

  server {
  listen  9977;
  server_name secondproxyserver;

  #charset koi8-r;

  #access_log logs/host.access.log main;

  #location / {
   #root html;
   #index index.html index.htm;
  #}
  location / {
   proxy_pass http://localhost:8080;
  }

  #error_page 404    /404.html;

  # redirect server error pages to the static page /50x.html
  #
  error_page 500 502 503 504 /50x.html;
  location = /50x.html {
   root html;
  }

  # proxy the php scripts to apache listening on 127.0.0.1:80
  #
  #location ~ \.php$ {
  # proxy_pass http://127.0.0.1;
  #}

  # pass the php scripts to fastcgi server listening on 127.0.0.1:9000
  #
  #location ~ \.php$ {
  # root   html;
  # fastcgi_pass 127.0.0.1:9000;
  # fastcgi_index index.php;
  # fastcgi_param script_filename /scripts$fastcgi_script_name;
  # include  fastcgi_params;
  #}

  # deny access to .htaccess files, if apache's document root
  # concurs with nginx's one
  #
  #location ~ /\.ht {
  # deny all;
  #}
 }

 # another virtual host using mix of ip-, name-, and port-based configuration
 #
 #server {
 # listen  8000;
 # listen  somename:8080;
 # server_name somename alias another.alias;

 # location / {
 #  root html;
 #  index index.html index.htm;
 # }
 #}


 # https server
 #
 #server {
 # listen  443 ssl;
 # server_name localhost;

 # ssl_certificate  cert.pem;
 # ssl_certificate_key cert.key;

 # ssl_session_cache shared:ssl:1m;
 # ssl_session_timeout 5m;

 # ssl_ciphers high:!anull:!md5;
 # ssl_prefer_server_ciphers on;

 # location / {
 #  root html;
 #  index index.html index.htm;
 # }
 #}

}其中主要的是有两个server,每个server对应的被代理的服务器的不同。从而实现了nginx代理多个服务器的目的。
下面是两个服务server的配置:
server {
  listen  9922;
  server_name firstproxyserver;

  #charset koi8-r;

  #access_log logs/host.access.log main;

  #location / {
   #root html;
   #index index.html index.htm;
  #}
  location / {
   proxy_pass http://localhost:8989;
  }

  #error_page 404    /404.html;

  # redirect server error pages to the static page /50x.html
  #
  error_page 500 502 503 504 /50x.html;
  location = /50x.html {
   root html;
  }

  # proxy the php scripts to apache listening on 127.0.0.1:80
  #
  #location ~ \.php$ {
  # proxy_pass http://127.0.0.1;
  #}

  # pass the php scripts to fastcgi server listening on 127.0.0.1:9000
  #
  #location ~ \.php$ {
  # root   html;
  # fastcgi_pass 127.0.0.1:9000;
  # fastcgi_index index.php;
  # fastcgi_param script_filename /scripts$fastcgi_script_name;
  # include  fastcgi_params;
  #}

  # deny access to .htaccess files, if apache's document root
  # concurs with nginx's one
  #
  #location ~ /\.ht {
  # deny all;
  #}
 }

  server {
  listen  9977;
  server_name secondproxyserver;

  #charset koi8-r;

  #access_log logs/host.access.log main;

  #location / {
   #root html;
   #index index.html index.htm;
  #}
  location / {
   proxy_pass http://localhost:8080;
  }

  #error_page 404    /404.html;

  # redirect server error pages to the static page /50x.html
  #
  error_page 500 502 503 504 /50x.html;
  location = /50x.html {
   root html;
  }

  # proxy the php scripts to apache listening on 127.0.0.1:80
  #
  #location ~ \.php$ {
  # proxy_pass http://127.0.0.1;
  #}

  # pass the php scripts to fastcgi server listening on 127.0.0.1:9000
  #
  #location ~ \.php$ {
  # root   html;
  # fastcgi_pass 127.0.0.1:9000;
  # fastcgi_index index.php;
  # fastcgi_param script_filename /scripts$fastcgi_script_name;
  # include  fastcgi_params;
  #}

  # deny access to .htaccess files, if apache's document root
  # concurs with nginx's one
  #
  #location ~ /\.ht {
  # deny all;
  #}
}下面是测试的结果:
首先两个tomcat中部署两个服务器:

然后启动nginx。
cmd下:start nginx
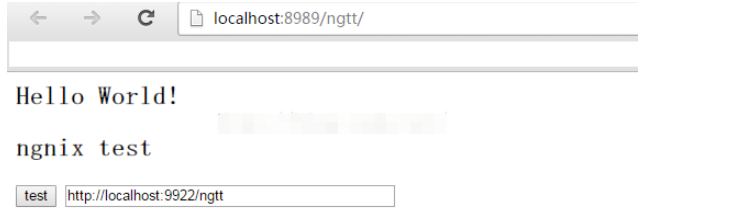
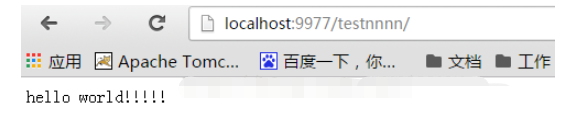
分别访问这两个server:
http://localhost:9922/ngtt/
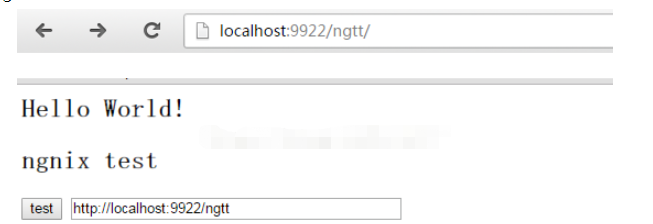
http://localhost:9977/testnnnn/
读到这里,这篇“nginx怎么代理多个服务器”文章已经介绍完毕,想要掌握这篇文章的知识点还需要大家自己动手实践使用过才能领会,如果想了解更多相关内容的文章,欢迎关注亿速云行业资讯频道。
亿速云「云服务器」,即开即用、新一代英特尔至强铂金CPU、三副本存储NVMe SSD云盘,价格低至29元/月。点击查看>>
免责声明:本站发布的内容(图片、视频和文字)以原创、转载和分享为主,文章观点不代表本网站立场,如果涉及侵权请联系站长邮箱:is@yisu.com进行举报,并提供相关证据,一经查实,将立刻删除涉嫌侵权内容。
原文链接:https://my.oschina.net/u/3699111/blog/4380975


 计算
计算 安全
安全 数据库
数据库 网络和加速
网络和加速 企业服务
企业服务


