这篇文章主要介绍“nginx+redis怎么实现session共享”,在日常操作中,相信很多人在nginx+redis怎么实现session共享问题上存在疑惑,小编查阅了各式资料,整理出简单好用的操作方法,希望对大家解答”nginx+redis怎么实现session共享”的疑惑有所帮助!接下来,请跟着小编一起来学习吧!
1.第一步是安装redis,我的服务器是windows的,下载的是免安装版本,解压以后就可以了,其目录如下。一开始redis是默认不需要密码,如果想要设置密码,可以进入redis.windows.conf文件下找到requirepass,删除前面的#号,在其后面便可以设置密码。

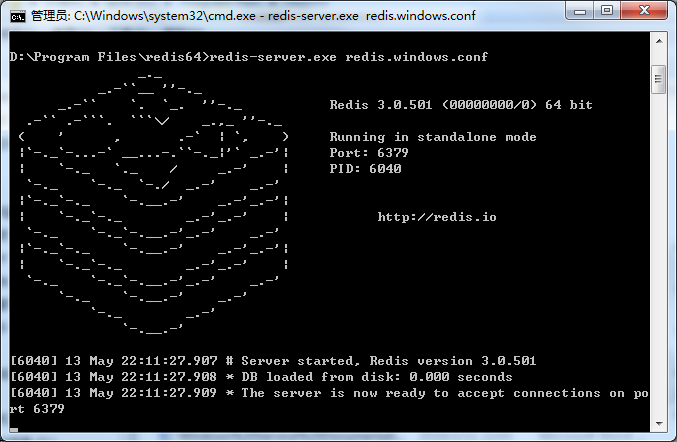
2.从cmd进入redis的根目录,键入如下指令:redis-server.exeredis.windows.conf。这样就可以启动redis了,如果启动成功,则会出现下面画面。当然还可以修改conf文件,加上密码。requirepass xxxxx
3.接下来我们就可以做一些配置工作,来实现session数据的全局缓存。
1)首先是添加jar包,如果你是maven项目,需要在pom.xml加入下面代码
<!-- redis -->
 <dependency>
  <groupid>org.springframework.session</groupid>
  <artifactid>spring-session-data-redis</artifactid>
  <version>1.3.1.release</version>
  <type>pom</type>
 </dependency>
如果不是maven项目,你需要加入下面这些jar包。

2)编写redis.properties,代码如下
redis_isopen:yes
#主机地址
redis_hostname=xxx.xxx.xxx.xxx
#端口
redis_port=6379
#密码
redis_password=xxxxxxxx
#连接超时时间
redis_timeout=200000
redis_maxidle:300
redis_maxactive:600
redis_maxwait:100000
redis_testonborrow:true
基本上与我们配置数据库的连接语句类似。
3)编写spring-redis.xml配置文件,这个文件配置关于redis的一些基本信息。
<?xml version="1.0" encoding="utf-8" standalone="no"?>
<beans xmlns="http://www.springframework.org/schema/beans"
 xmlns:context="http://www.springframework.org/schema/context" xmlns:tx="http://www.springframework.org/schema/tx"
 xmlns:util="http://www.springframework.org/schema/util" xmlns:xsi="http://www.w3.org/2001/xmlschema-instance"
 xsi:schemalocation="http://www.springframework.org/schema/beans http://www.springframework.org/schema/beans/spring-beans.xsd http://www.springframework.org/schema/context http://www.springframework.org/schema/context/spring-context.xsd http://www.springframework.org/schema/tx http://www.springframework.org/schema/tx/spring-tx.xsd http://www.springframework.org/schema/util http://www.springframework.org/schema/util/spring-util.xsd ">
 <!-- session设置 maxinactiveintervalinseconds为session的失效时间,单位为秒-->
 <bean
 class="org.springframework.session.data.redis.config.annotation.web.http.redishttpsessionconfiguration">
 <property name="maxinactiveintervalinseconds" value="3600"></property>
 </bean>
 <!-- redis连接池 -->
 <bean id="poolconfig" class="redis.clients.jedis.jedispoolconfig">
 <property name="maxidle" value="${redis_maxidle}" />
 <property name="testonborrow" value="${redis_testonborrow}" />
 </bean>
 <!-- redis连接工厂 -->
 <bean id="connectionfactory"
 class="org.springframework.data.redis.connection.jedis.jedisconnectionfactory">
 <property name="hostname" value="${redis_hostname}" />
 <property name="port" value="${redis_port}" />
 <property name="password" value="${redis_password}" />
 <property name="timeout" value="${redis_timeout}" />
 <property name="poolconfig" ref="poolconfig"></property>
 </bean>
</beans>
4)在application.xml(spring的主配置文件)需要加入redis.properties配置文件的扫描,如下。
<!-- 读取redis参数配置 -->
 <bean id="propertyconfigurer"
 class="org.springframework.beans.factory.config.propertyplaceholderconfigurer">
 <property name="locations">
  <list>
  <value>/web-inf/classes/redis.properties</value>
  </list>
 </property>
 </bean>
5)在主配置文件中引入spring-redis.xml,如下。
<import resource="spring-redis.xml" />
6)在web.xml中,加入关于session的过滤器,只有这样session才会被redis所操纵。
<filter>
 <filter-name>springsessionrepositoryfilter</filter-name>
 <filter-class>org.springframework.web.filter.delegatingfilterproxy</filter-class>
 </filter>
 <filter-mapping>
 <filter-name>springsessionrepositoryfilter</filter-name>
 <url-pattern>/*</url-pattern>
 </filter-mapping>
这样以后,我们就实现了redis对session的管理。
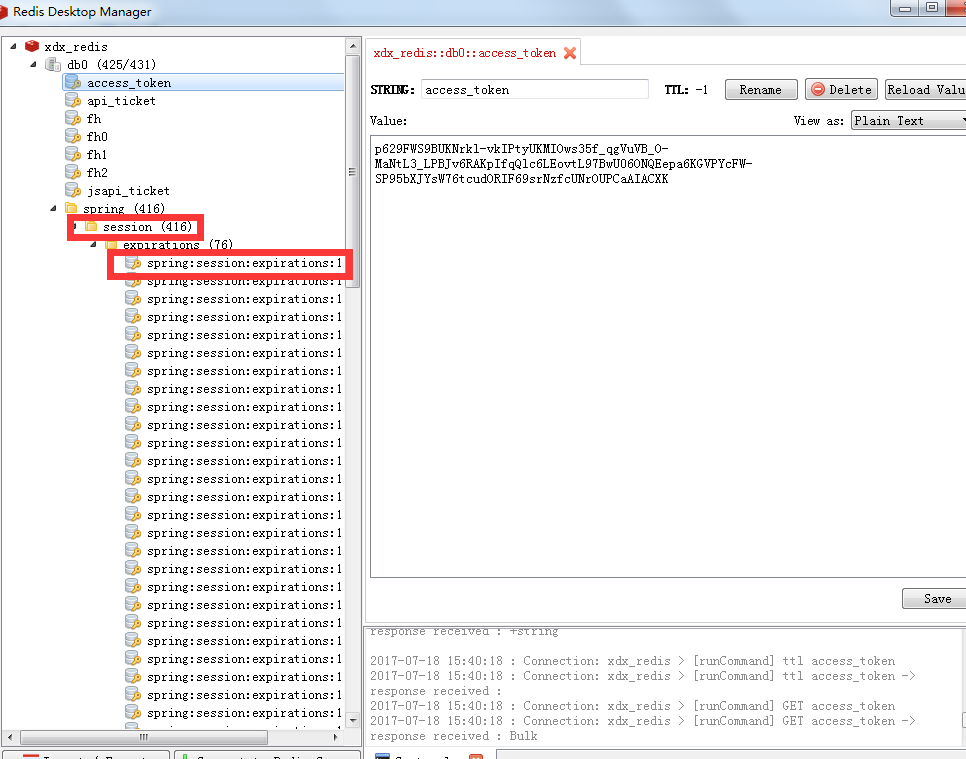
7)我们可以安装一个redis的客户端来查看里面的数据,叫做redis desktop manager。如下图,很好用,可以看到redis数据库中的数据。
ps.再退出的时候,需要这样写才不会出错。(ssh项目)
public string yipinexit(){
 iterator<string>keys=session.keyset().iterator();
 while(keys.hasnext()){
  string key=keys.next();
  session.remove(key);
 }
 return "yipinexit";
 }
到此,关于“nginx+redis怎么实现session共享”的学习就结束了,希望能够解决大家的疑惑。理论与实践的搭配能更好的帮助大家学习,快去试试吧!若想继续学习更多相关知识,请继续关注亿速云网站,小编会继续努力为大家带来更多实用的文章!
免责声明:本站发布的内容(图片、视频和文字)以原创、转载和分享为主,文章观点不代表本网站立场,如果涉及侵权请联系站长邮箱:is@yisu.com进行举报,并提供相关证据,一经查实,将立刻删除涉嫌侵权内容。


