这篇文章主要介绍“SpringCloud Config的使用和配置方法”,在日常操作中,相信很多人在SpringCloud Config的使用和配置方法问题上存在疑惑,小编查阅了各式资料,整理出简单好用的操作方法,希望对大家解答”SpringCloud Config的使用和配置方法”的疑惑有所帮助!接下来,请跟着小编一起来学习吧!
Spring Cloud Config项目是一个解决分布式系统的配置管理方案。它包含了Client和Server两个部分,server提供配置文件的存储、以接口的形式将配置文件的内容提供出去,client通过接口获取数据、并依据此数据初始化自己的应用。
配置中心服务端配置
新建一个配置中心模块,且注册到eureka中,在其他服务的基础上增加如下配置
pom文件增加配置服务端设置
  <!--config配置中⼼服务端-->
        <dependency>
            <groupId>org.springframework.cloud</groupId>
            <artifactId>spring-cloud-config-server</artifactId>
</dependency>配置需要增加如下配置
spring:
  application:
    name: zhao-service-config
  cloud:
    config:
      server:
        git:
          username: xxx@qq.com
          password: xxx
          search-paths:
             - zhao-config-repo
          uri: https://gitee.com/kylezhen/zhao-config-repo.git
      label: main
management:
  endpoints:
    web:
      exposure:
        include: "*"
  endpoint:
    health:
show-details: always需要注意的是我们尽量还是使用gitee作为远程配置中心的拉取地址,否则会因为github网络不畅出现各种问题。配置完成之后我们在启动类加入@EnableConfigServer
@SpringBootApplication
@EnableConfigServer
@EnableDiscoveryClient
public class ConfigApplication9007 {
    public static void main(String[] args) {
        SpringApplication.run(ConfigApplication9007.class,args);
    }
}即完成配置中心服务端配置,通过服务端直接访问配置文件

配置中心客户端配置以及手动刷新
pom文件添加
   <dependency>
            <groupId>org.springframework.cloud</groupId>
            <artifactId>spring-cloud-config-client</artifactId>
</dependency>配置文件重命名为bootstrap.yml之后增加对配置中心的使用。bootstrap.yml是系统级别的,优先级⽐application.yml⾼,应⽤启动时会检查这个配置⽂件,在这个配置⽂件中指定配置中⼼的服务地址,会⾃动拉取所有应⽤配置并且启⽤。配置暴露健康检查等端点接⼝,以更新配置
spring
  cloud:
    config:
      name: zhao-service-resume
      profile: dev
      label: main
      uri: http://localhost:9007
management:
  endpoints:
    web:
      exposure:
include: "*"经过配置之后增加配置访问的内容
@RestController
@RequestMapping("/config")
public class ConfigController {

    // 和取本地配置信息一样
    @Value("${zhao.name}")
    private String name;
//    @Value("${mysql.url}")
//    private String mysqlUrl;


    // 内存级别的配置信息
    // 数据库,redis配置信息

    @GetMapping("/viewconfig")
    public String viewconfig() {
        return "zhaoname==>" + name;
    }
}访问改获取配置的接口

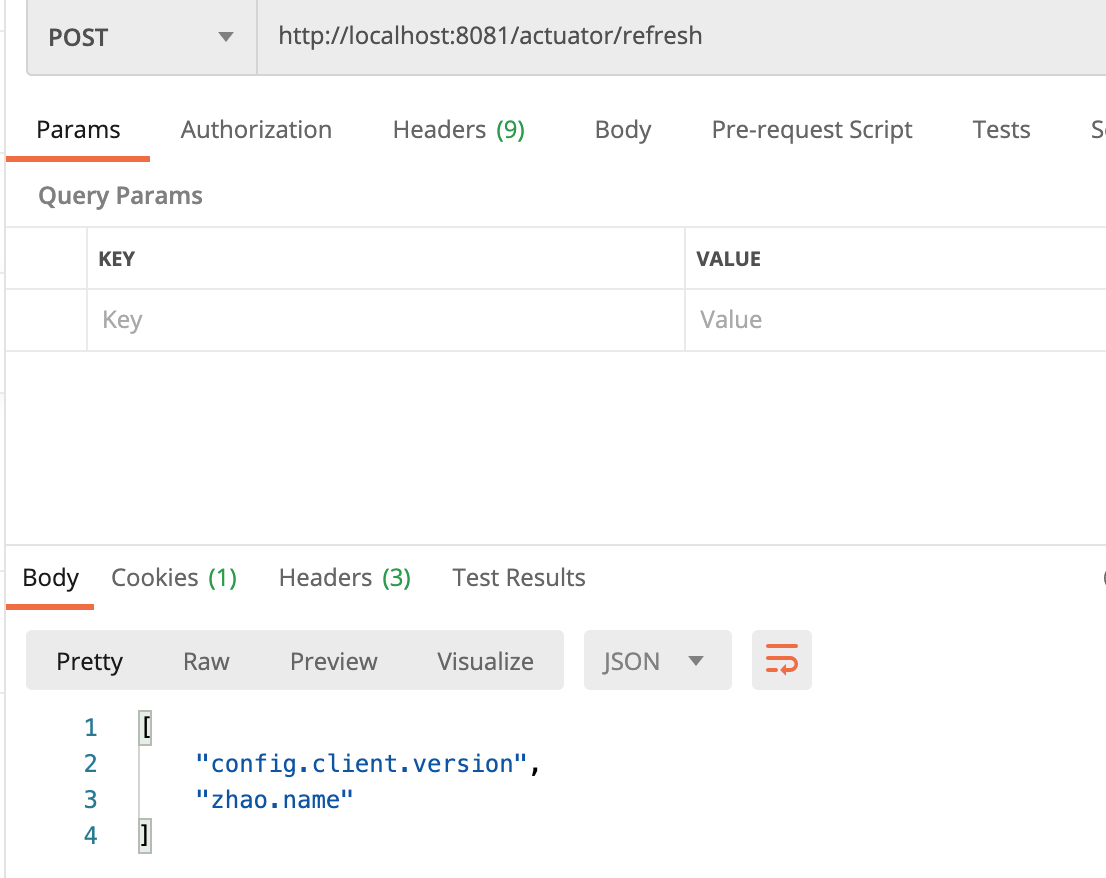
但是这样无法获取最新配置,我们需要在获取配置的配置类上加入@RefreshScope注解。并且在更改后手动向使用配置文件的服务健康检查接口发送POST请求才能更新

返回为空表示无变更数据,上述为正常获取到配置文件变更
借助Spring Cloud Bus动态刷新配置
网上的教程多以官方支持的Rabbitmq和kafka作为基础来实现,我这里以阿里自己的Rocketmq为例来进行操作
   <dependency>
            <groupId>com.alibaba.cloud</groupId>
            <artifactId>spring-cloud-starter-bus-rocketmq</artifactId>
            <version>2.1.0.RELEASE</version>
</dependency>在配置中心的服务端和客户端中进行相应的配置
spring:
  application:
    name: zhao-service-config
  cloud:
    config:
      server:
        git:
          username: @qq.com
          password: xxx
          search-paths:
             - zhao-config-repo
          uri: https://gitee.com/kylezhen/zhao-config-repo.git
      label: main
    bus:
      enabled: true

rocketmq:
name-server: 127.0.0.1:9876通过访问http://localhost:9007/actuator/bus-refresh 即可将配置改变推送到配置
到此,关于“SpringCloud Config的使用和配置方法”的学习就结束了,希望能够解决大家的疑惑。理论与实践的搭配能更好的帮助大家学习,快去试试吧!若想继续学习更多相关知识,请继续关注亿速云网站,小编会继续努力为大家带来更多实用的文章!
亿速云「云服务器」,即开即用、新一代英特尔至强铂金CPU、三副本存储NVMe SSD云盘,价格低至29元/月。点击查看>>
免责声明:本站发布的内容(图片、视频和文字)以原创、转载和分享为主,文章观点不代表本网站立场,如果涉及侵权请联系站长邮箱:is@yisu.com进行举报,并提供相关证据,一经查实,将立刻删除涉嫌侵权内容。