这篇文章主要为大家展示了“Vue如何实现可拖拽组件”,内容简而易懂,条理清晰,希望能够帮助大家解决疑惑,下面让小编带领大家一起研究并学习一下“Vue如何实现可拖拽组件”这篇文章吧。
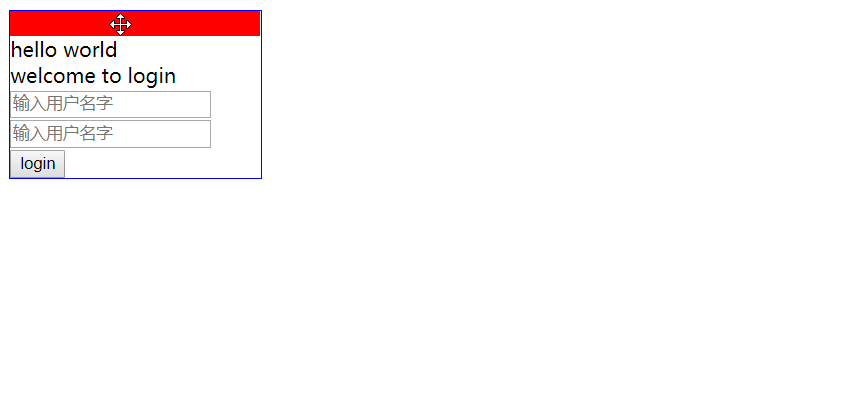
组件仅封装拖拽功能,内容通过#header、#default、#footer插槽 自定义
<template>
  <div
    ref="wrapper"
    class="drag-bar-wrapper"
  >
    <div
      ref="header"
      class="drag-bar-header"
    >
      <!-- 头部区域 -->
      <slot name="header" />
    </div>
    <div class="drag-bar-content">
      <!-- 主内容区域 -->
      <slot name="default" />
    </div>
    <div class="drag-bar-footer">
      <!-- 底部区域 -->
      <slot name="footer" />
    </div>
  </div>
</template>

<script>
export default {
  data() {
    return {
      wrapperDom: null,
      headerDom: null,

      disX: 0,
      disY: 0,

      minLeft: 0,
      maxLeft: 0,

      minTop: 0,
      maxTop: 0,

      prevLeft: 0,
      prevTop: 0,
    };
  },
  methods: {
    initDrag() {
      this.wrapperDom = this.$refs.wrapper;
      this.headerDom = this.$refs.header;
      this.headerDom.addEventListener('mousedown', this.onMousedown, false);//点击头部区域拖拽
    },
    onMousedown(e) {
      this.disX = e.clientX - this.headerDom.offsetLeft;
      this.disY = e.clientY - this.headerDom.offsetTop;

      this.minLeft = this.wrapperDom.offsetLeft;
      this.minTop = this.wrapperDom.offsetTop;

      this.maxLeft =
        window.innerWidth - this.minLeft - this.wrapperDom.offsetWidth;
      this.maxTop =
        window.innerHeight - this.minTop - this.wrapperDom.offsetHeight;

      const { left, top } = getComputedStyle(this.wrapperDom, false);
      this.prevLeft = parseFloat(left);
      this.prevTop = parseFloat(top);

      document.addEventListener('mousemove', this.onMousemove, false);
      document.addEventListener('mouseup', this.onMouseup, false);
      document.body.style.userSelect = 'none'; //消除拖拽中选中文本干扰
    },
    onMousemove(e) {
      let left = e.clientX - this.disX;
      let top = e.clientY - this.disY;

      if (-left > this.minLeft) {
        left = -this.minLeft;
      } else if (left > this.maxLeft) {
        left = this.maxLeft;
      }

      if (-top > this.minTop) {
        top = -this.minTop;
      } else if (top > this.maxTop) {
        top = this.maxTop;
      }

      this.wrapperDom.style.left = this.prevLeft + left + 'px';
      this.wrapperDom.style.top = this.prevTop + top + 'px';
    },
    onMouseup() {
      document.removeEventListener('mousemove', this.onMousemove, false);
      document.removeEventListener('mouseup', this.onMouseup, false);
      document.body.style.userSelect = 'auto'; //恢复文本可选中
    },
  },
  mounted() {
    this.initDrag();
  }
};
</script>

<style scoped>
.drag-bar-wrapper {
  position: fixed;
  z-index: 2;
  top: 50%;
  left: 50%;
  transform: translate(-50%, -50%);
  display: flex;
  flex-direction: column;
}
.drag-bar-header {
  background-color: #eee;
  cursor: move; /*拖拽鼠标样式*/
}
.drag-bar-content {
  background-color: #fff;
}
.drag-bar-footer {
  background-color: #fff;
}
</style>
以上是“Vue如何实现可拖拽组件”这篇文章的所有内容,感谢各位的阅读!相信大家都有了一定的了解,希望分享的内容对大家有所帮助,如果还想学习更多知识,欢迎关注亿速云行业资讯频道!
免责声明:本站发布的内容(图片、视频和文字)以原创、转载和分享为主,文章观点不代表本网站立场,如果涉及侵权请联系站长邮箱:is@yisu.com进行举报,并提供相关证据,一经查实,将立刻删除涉嫌侵权内容。


