这篇文章给大家分享的是有关vue如何实现表单验证小功能的内容。小编觉得挺实用的,因此分享给大家做个参考,一起跟随小编过来看看吧。
具体内容如下
先点开Vue项目中src目录配置router文件然后用import暴露你的表单页名称并在你的Router实例中中注册路由表代码如下
import Create from "@/views/create/create.vue";

//前面是暴露的名字,首字母要用大写。后面是你的表单页所在目录@是..的简写即返回上一层


const router=new Router({
mode:"history"//这里是写路由是什么模式
routes:[
{
      path: "/create",//默认为/多个的话就是/加上路径
      name: "create",
      component: Create,
      title: "表单",
    },
]
})路由表配置完成之后记得将home页中的自己router-link标签的to选项配置一下
<router-link :to="{ name: 'create' }" class="collection">表单</router-link>随后就是表单页
效果图
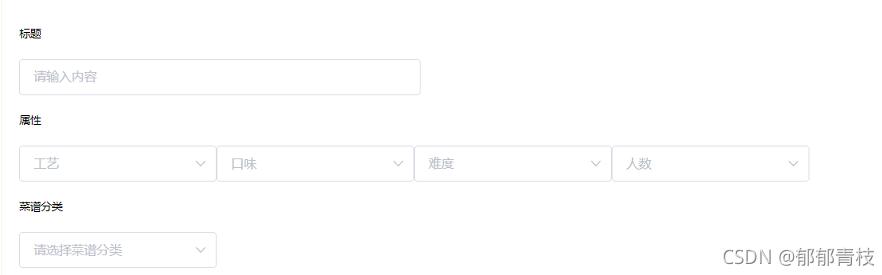
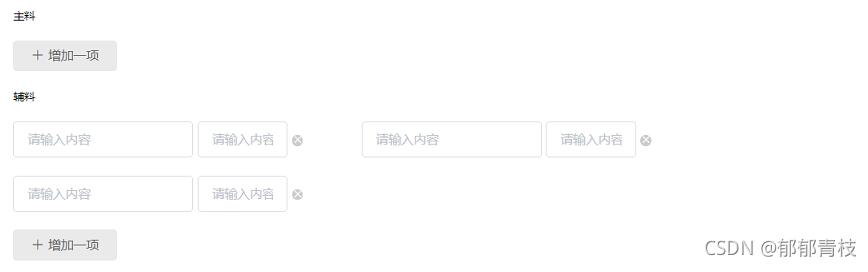
功能实现代码如下
插件用的是element.ui可以在终端中使用npm i element-ui 安装成功之后在package.json中查看并在main.js中引用
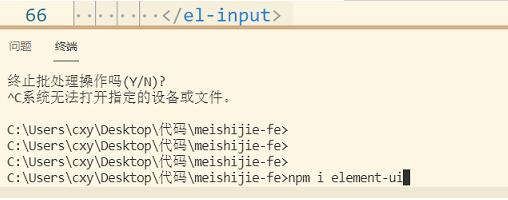
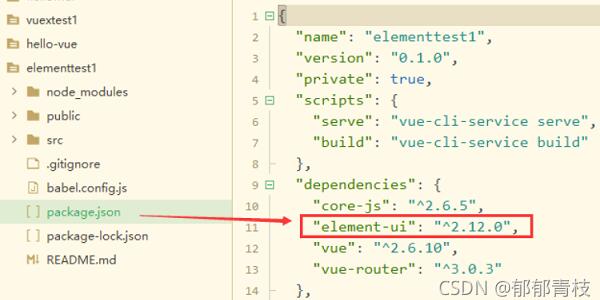
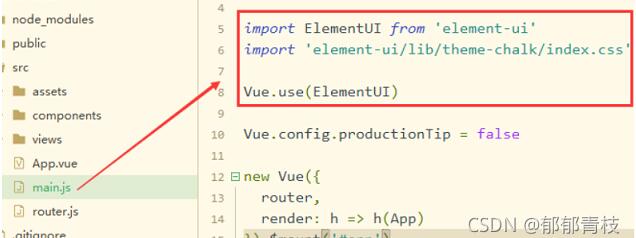
安装完成后就可以使用啦。
<template>
  <div class="create">
    <h3>欢迎发布新菜谱,先介绍一下你的大作!</h3>
    <section class="create-introduce">
      <h6>标题</h6>

      <el-input
        v-model="backData.title"
        class="create-input"
        placeholder="请输入内容"
      ></el-input>
      <h6>属性</h6>
      <div>
        <el-select
          v-for="item in propertyies"
          :key="item.parent_name"
          :placeholder="item.parent_name"
          v-model="backData.property[item.title]"
        >
          <el-option
            v-for="option in item.list"
            :key="option.type"
            :label="option.name"
            :value="option.type"
          >
          </el-option>
        </el-select>
      </div>
      <h6>菜谱分类</h6>
      <div>
        <el-select placeholder="请选择菜谱分类" v-model="backData.classify">
          <el-option-group
            v-for="group in classifies"
            :key="group.parent_type"
            :label="group.parent_name"
          >
            <el-option
              v-for="item in group.list"
              :key="item.type"
              :label="item.name"
              :value="item.type"
            >
            </el-option>
          </el-option-group>
        </el-select>
      </div>
      <h6>成品图 (328*440)</h6>
      <div class="upload-img-box clearfix">
        <div class="upload-img">
          <upload-img
            action="/api/upload?type=product"
            :img-url="backData.product_pic_url"
            @res-url="
              (data) => {
                backData, (product_pic_url = data.res);
              }
            "
          ></upload-img>
        </div>
        <el-input
          class="introduce-text"
          type="textarea"
          :rows="10"
          placeholder="请输入内容"
        >
        </el-input>
      </div>
    </section>

    <h3>记录所有原材料</h3>
    <section class="create-introduce">
      <h6>主料</h6>
      <!--[ { "name": "", "specs": "" }, { "name": "", "specs": "" }, { "name": "", "specs": "" } ]-->
      <Stuff v-model="backData.raw_material.main_material"></Stuff>
      <h6>辅料</h6>
      <Stuff v-model="backData.raw_material.accessories_material"></Stuff>
    </section>

    <h3>开始写步骤了!能否简单易学就看你怎么写了,加油!</h3>
    <section class="create-introduce">
      <Upload v-for="(item, index) in 3" :key="index"></Upload>
      <el-button
        class="eaeaea add-step-button"
        type="primary"
        size="medium"
        icon="el-icon-plus"
        @click="add"
        >增加一步</el-button
      >
      <h6>烹饪小技巧</h6>
      <el-input
        class="introduce-text"
        type="textarea"
        :rows="8"
        placeholder="分享下你做这道菜的过程中的心得和小技巧吧!"
      >
      </el-input>
    </section>

    <el-button class="send" type="primary" size="medium" :icon="icon"
      >搞定,提交审核</el-button
    >
  </div>
</template>
<script>
import Stuff from "./stuff";
import Upload from "./step-upload";
import UploadImg from "@/components/upload-img";
import { getProperty, getClassify, publish } from "@/service/api";

const raw_materia_struct = {
  name: "",
  specs: "",
};
export default {
  name: "create",
  components: { Stuff, Upload, UploadImg },
  data() {
    return {
      backData: {
        title: "",
        property: {},
        classify: "",
        product_pic_url: "",
        product_story: "",
        raw_material: {
          raw_material: Array(3)
            .fill(1)
            .map(() => ({ ...raw_materia_struct })),
          accessories_material: Array(3)
            .fill(1)
            .map(() => ({ ...raw_materia_struct })),
        },
      },
      propertyies: [],
      classifies: [],
    };
  },
  mounted() {
    getProperty().then(({ data }) => {
      console.log(data);
      this.propertyies = data;
      this.backData.property = data.reduce((o, item) => {
        o[item.title] = "";
        return o;
      }, {});
      //  console.log(data);
      //  console.log(this.backData.property)
    });
    getClassify().then(({ data }) => {
      console.log(data);
      this.classifies = data;
    });
  },
  methods: {
    add() {
      console.log(1);
    },
  },
};
</script>
<style lang="stylus">


.create-introduce
  background-color #fff
  padding 20px


  .add-step-button
    margin-left 100px


.create
  width 100%
  h3
    text-align center
    margin 20px 0
  .send
    // ff3232()
    height: 70px;
    width: 220px;
    background #ff3232
    color #fff
    border none
    margin 20px auto
    display block

  h6
    margin 20px 0


.create-input input
  width 446px
  line-height 22px
.upload-img-box
  .upload-img
    float left
  .introduce-text
    float left
  .el-textarea
    width 60%
    margin-left 10px
</style>感谢各位的阅读!关于“vue如何实现表单验证小功能”这篇文章就分享到这里了,希望以上内容可以对大家有一定的帮助,让大家可以学到更多知识,如果觉得文章不错,可以把它分享出去让更多的人看到吧!
亿速云「云服务器」,即开即用、新一代英特尔至强铂金CPU、三副本存储NVMe SSD云盘,价格低至29元/月。点击查看>>
免责声明:本站发布的内容(图片、视频和文字)以原创、转载和分享为主,文章观点不代表本网站立场,如果涉及侵权请联系站长邮箱:is@yisu.com进行举报,并提供相关证据,一经查实,将立刻删除涉嫌侵权内容。


 计算
计算 安全
安全 数据库
数据库 网络和加速
网络和加速 企业服务
企业服务


