这篇文章将为大家详细讲解有关Java中Swagger技术怎么用,小编觉得挺实用的,因此分享给大家做个参考,希望大家阅读完这篇文章后可以有所收获。
在前后端分离时代,我们需要实时自动更新接口信息,和测试接口,实现前后端分离式开发,swagger因此产生
以下以3.0.0依赖为例
 <!--swagger 相关组件-->
        <dependency>
            <groupId>io.springfox</groupId>
            <artifactId>springfox-swagger2</artifactId>
            <version>3.0.0</version>
        </dependency>
        <dependency>
            <groupId>io.springfox</groupId>
            <artifactId>springfox-swagger-ui</artifactId>
            <version>3.0.0</version>
        </dependency>
          <dependency>
           <groupId>io.springfox</groupId>
           <artifactId>springfox-boot-starter</artifactId>
           <version>3.0.0</version>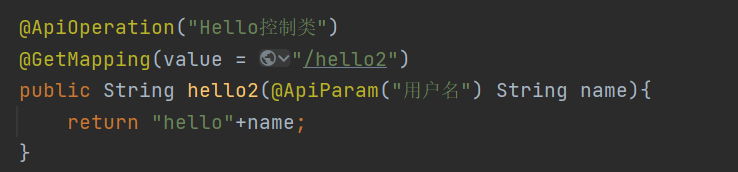
</dependency>@RestController
public class HelloController {
@RequestMapping(value = "/hello")
public String hello(){
return "hello";
}
}@Configuration
@EnableSwagger2 //开启swagger2
public class SwaggerConfig {
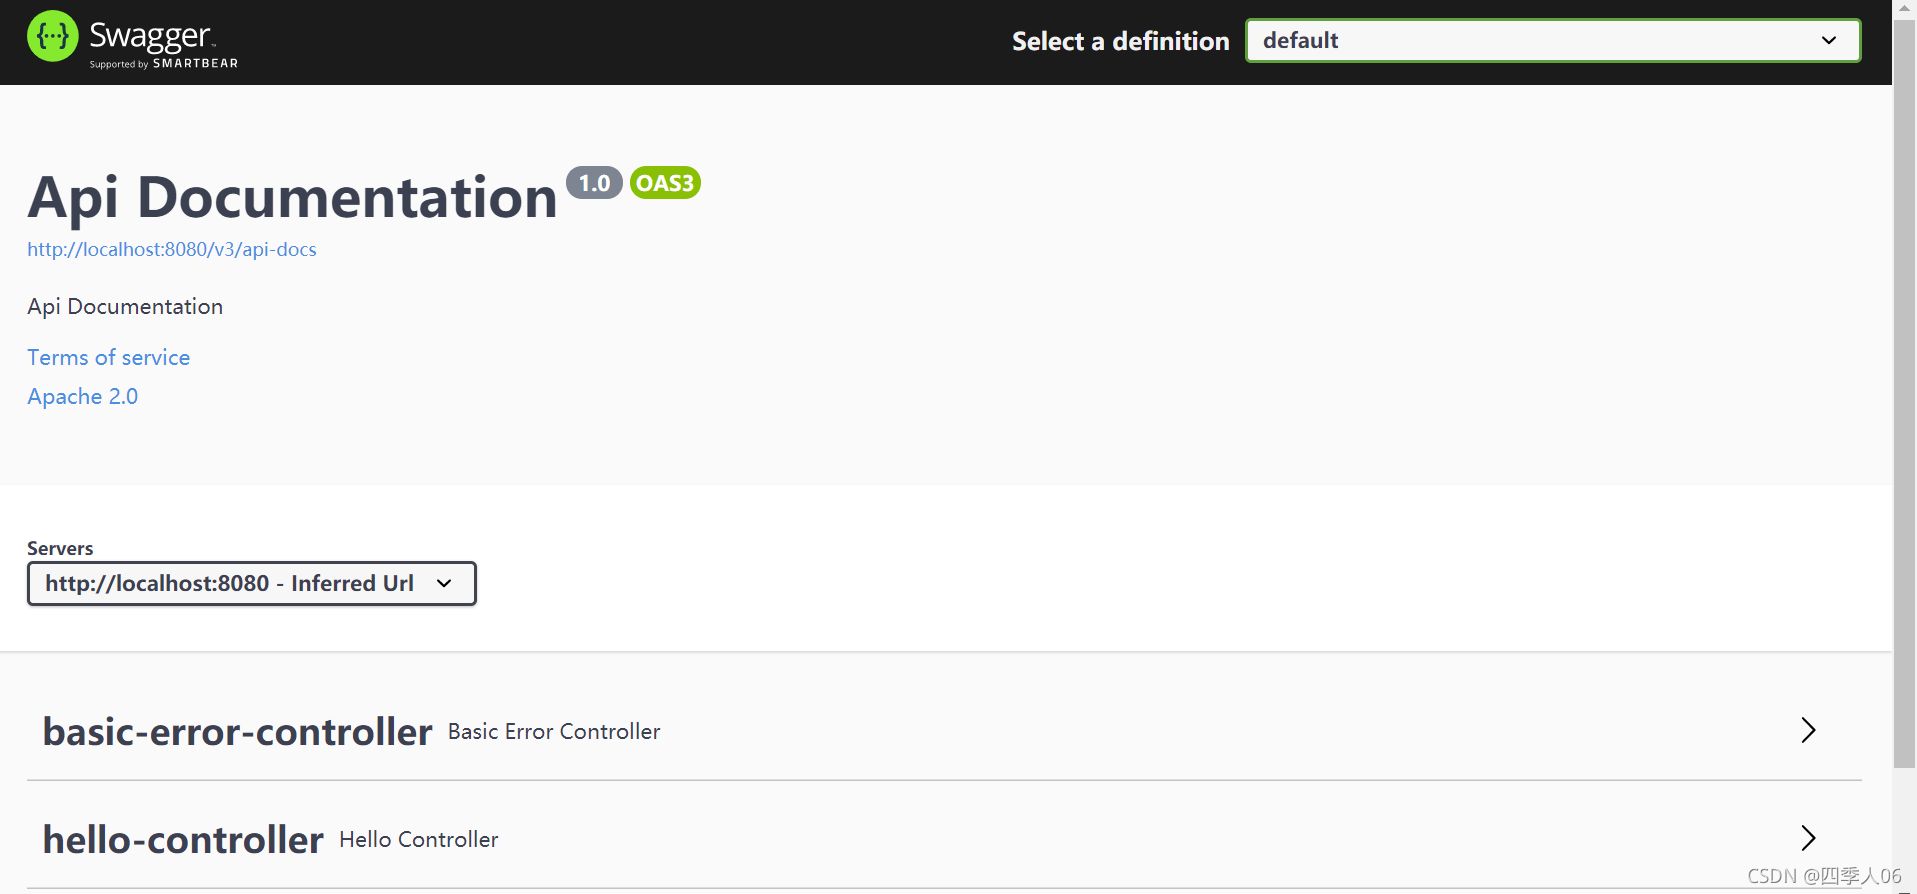
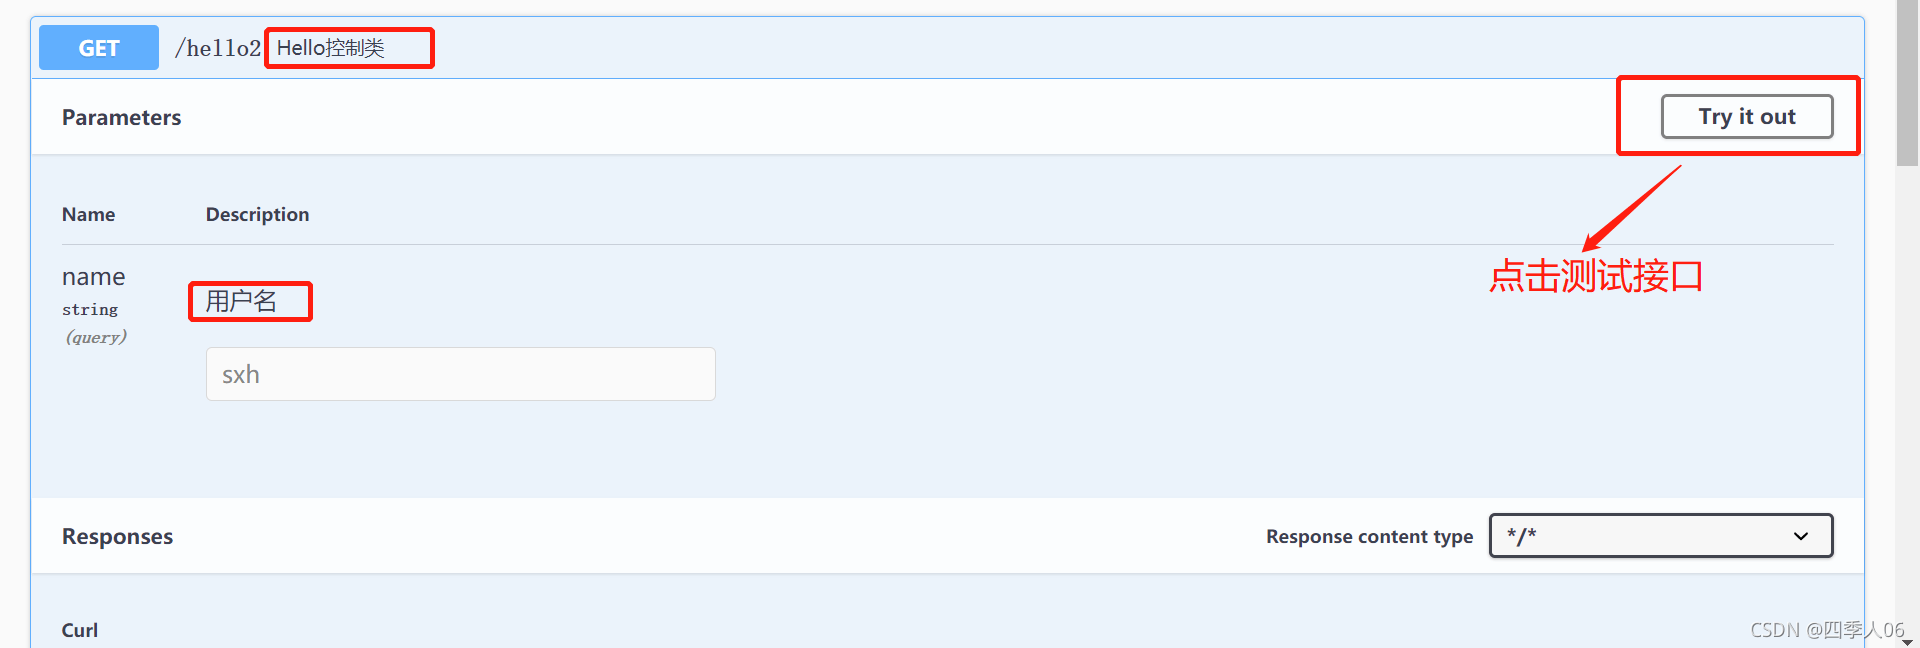
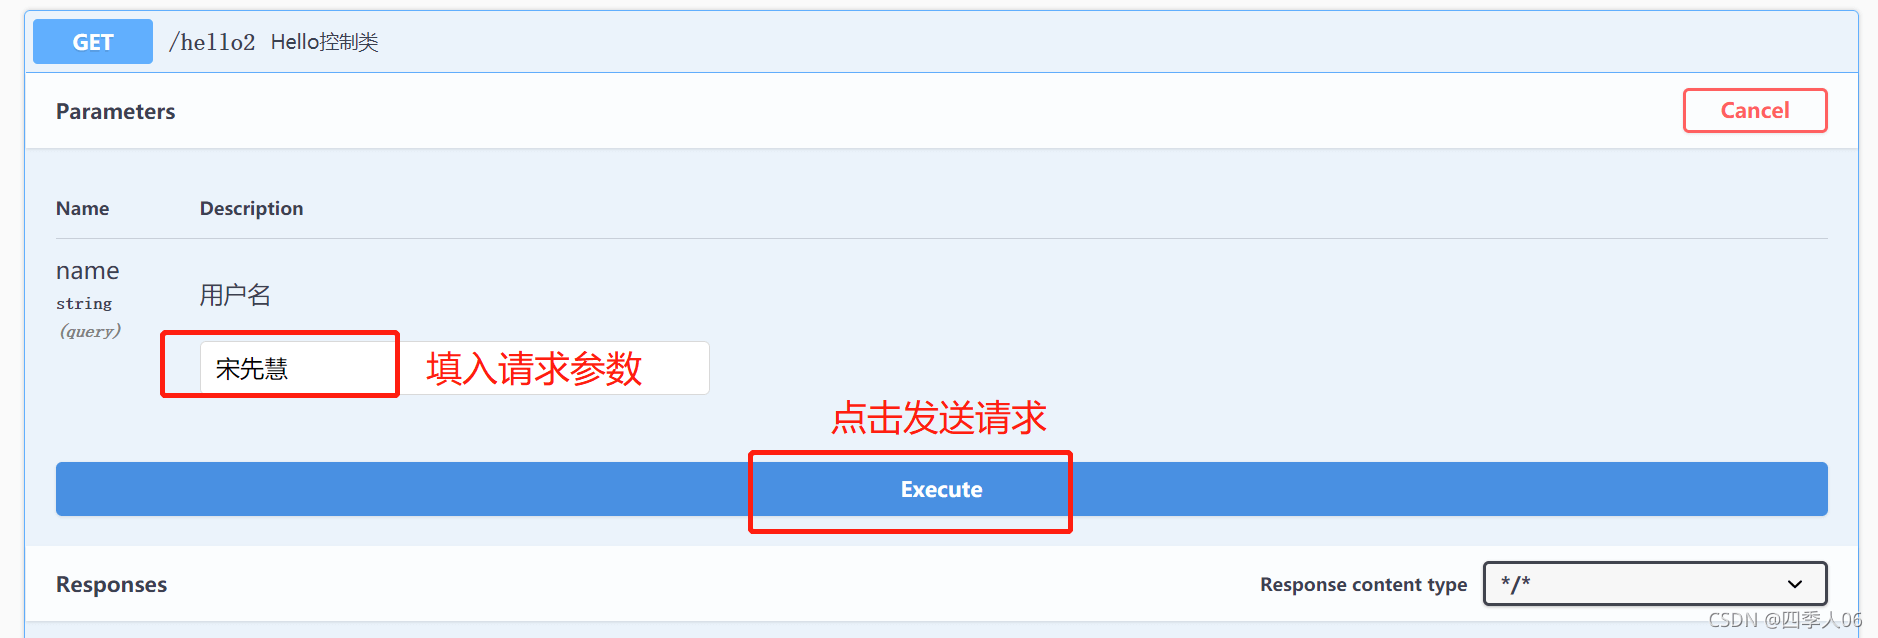
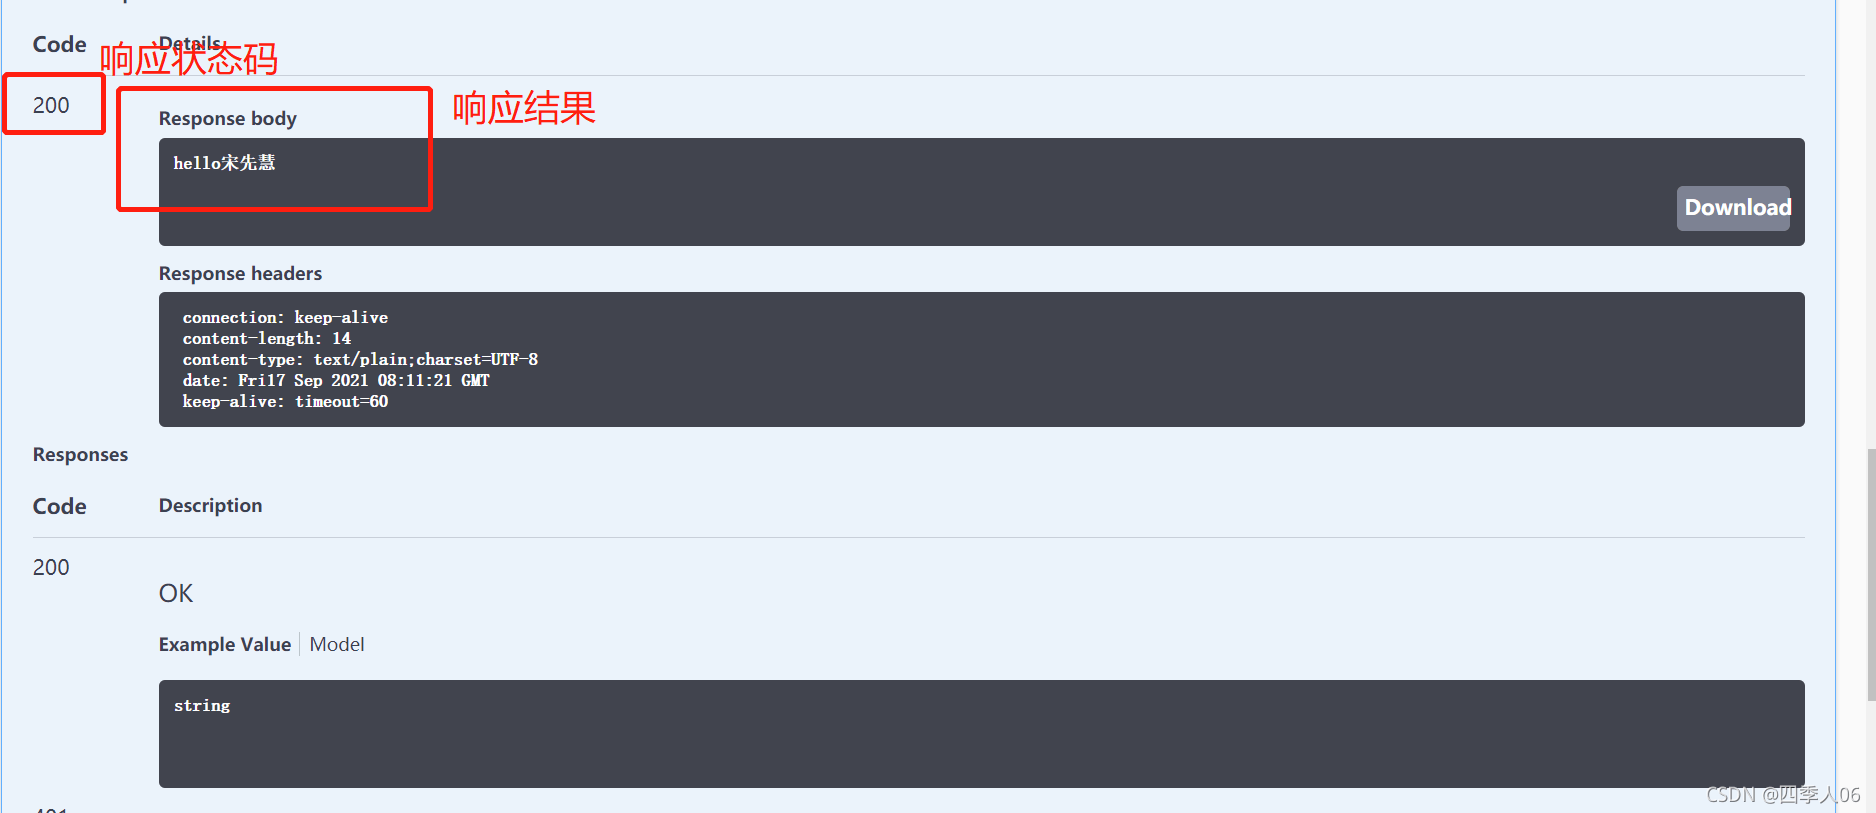
}然后访问http://localhost:8080/swagger-ui/index.html
你就能看到如下界面,为swagger文档
先来看看底层的代码,了解一下

@Configuration
@EnableSwagger2 //开启swagger2
public class SwaggerConfig {
@Bean
public Docket docket(){
return new Docket(DocumentationType.SWAGGER_2).apiInfo(apiInfo());
}
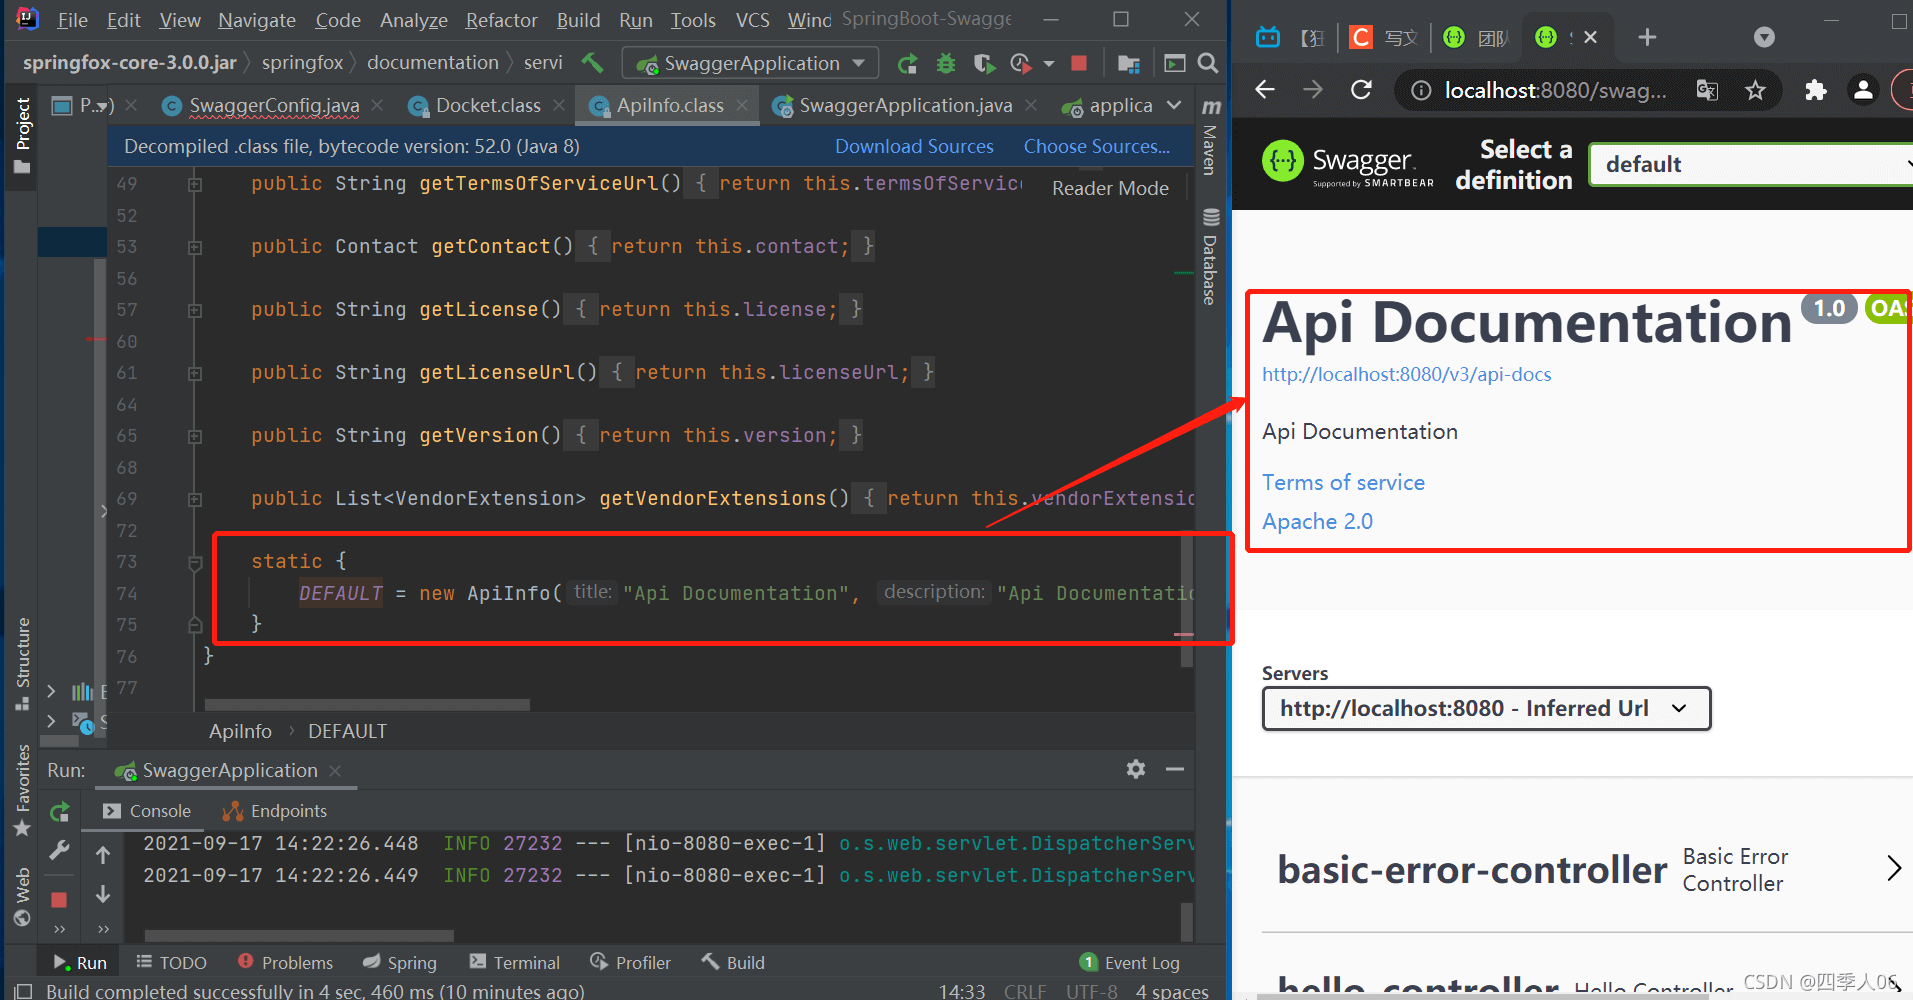
//配置swagger信息apiInfo
private ApiInfo apiInfo(){
//作者信息
Contact contact = new Contact("宋先慧", "https://blog.csdn.net/sxh06", "xianhuisong@yeah.net");
return new ApiInfo(
"宋先慧的Api Documentation",
"学习swagger没有尽头",
"1.0",
"urn:tos",
contact,
"Apache 2.0",
"http://www.apache.org/licenses/LICENSE-2.0",
new ArrayList());
}
}@Configuration
@EnableSwagger2 //开启swagger2
public class SwaggerConfig {
// @Bean
// public Docket docket1(){
// return new Docket(DocumentationType.SWAGGER_2).groupName("分组二");
// }
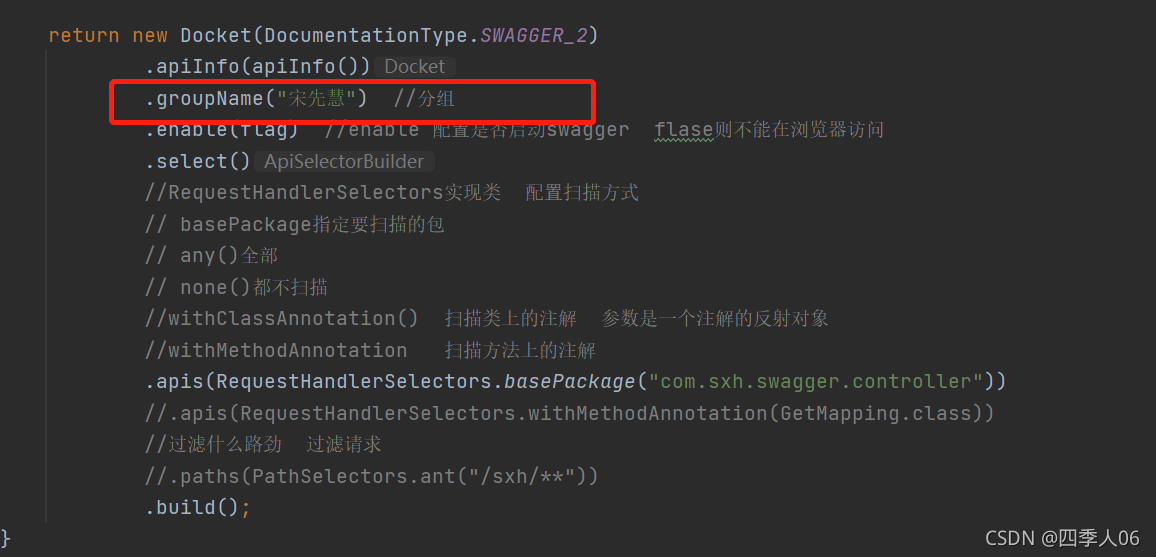
@Bean
public Docket docket(Environment environment){
Profiles profiles=Profiles.of("dev");
//获取项目的环境
boolean flag=environment.acceptsProfiles(profiles);
return new Docket(DocumentationType.SWAGGER_2)
.apiInfo(apiInfo())
.groupName("宋先慧") //分组
.enable(flag) //enable 配置是否启动swagger flase则不能在浏览器访问
.select()
//RequestHandlerSelectors实现类 配置扫描方式
// basePackage指定要扫描的包
// any()全部
// none()都不扫描
//withClassAnnotation() 扫描类上的注解 参数是一个注解的反射对象
//withMethodAnnotation 扫描方法上的注解
.apis(RequestHandlerSelectors.basePackage("com.sxh.swagger.controller"))
//.apis(RequestHandlerSelectors.withMethodAnnotation(GetMapping.class))
//过滤什么路劲 过滤请求
//.paths(PathSelectors.ant("/sxh/**"))
.build();
}
//配置swagger信息apiInfo
private ApiInfo apiInfo(){
//作者信息
Contact contact = new Contact("宋先慧", "https://blog.csdn.net/sxh06", "xianhuisong@yeah.net");
return new ApiInfo(
"宋先慧的Api Documentation",
"学习swagger没有尽头",
"1.0",
"urn:tos",
contact,
"Apache 2.0",
"http://www.apache.org/licenses/LICENSE-2.0",
new ArrayList());
}
}如果我只希望在生成环境使用swagger,在正式环境不使用swagger怎么解决?(enable=false|true)
配置多个Docket 实例即可
 @Bean
    public Docket docket1(){
        return new Docket(DocumentationType.SWAGGER_2).groupName("分组一");
    }

 @Bean
    public Docket docket2(){
        return new Docket(DocumentationType.SWAGGER_2).groupName("分组二");
    }`
关于“Java中Swagger技术怎么用”这篇文章就分享到这里了,希望以上内容可以对大家有一定的帮助,使各位可以学到更多知识,如果觉得文章不错,请把它分享出去让更多的人看到。
亿速云「云服务器」,即开即用、新一代英特尔至强铂金CPU、三副本存储NVMe SSD云盘,价格低至29元/月。点击查看>>
免责声明:本站发布的内容(图片、视频和文字)以原创、转载和分享为主,文章观点不代表本网站立场,如果涉及侵权请联系站长邮箱:is@yisu.com进行举报,并提供相关证据,一经查实,将立刻删除涉嫌侵权内容。


 计算
计算 安全
安全 数据库
数据库 网络和加速
网络和加速 企业服务
企业服务


