这篇文章将为大家详细讲解有关Python如何实现C#代码生成器应用服务于Unity,小编觉得挺实用的,因此分享给大家做个参考,希望大家阅读完这篇文章后可以有所收获。
本项目是从json中读取角色场景等信息,因此为了更好地判断所用属性是否需要,设置为bool类型,False表示在c#代码中注释掉该类属性,True代表使用该属性(属性暂时设置为)
Timer = True # 计时器
    speed = False # 速度
    IsTrigger = True # 触发器
    start_point = True # 起始位置
localScale = True # 起始大小from string import Template
class BuildData:
def Init(self):
# 初始化各类$
Timer = True
speed = False
IsTrigger = True
start_point = True
localScale = True
# 输出a.cs文件
filePath = 'a.cs'
class_file = open(filePath, 'w')
# mycode用来存放生成的代码
mycode = []
# 加载模板文件
template_file = open('TMPL1.tmpl', 'rb')
template_file = template_file.read().decode('utf-8')
tmpl = Template(template_file)
## 模板替换
# 1.需要判断是否使用的模板,不使用的给他注释掉
if(Timer):
TimerContent = ' '
else:
TimerContent = '///'
if (speed):
speedContent = ' '
else:
speedContent = '///'
if (IsTrigger):
IsTriggerContent =' '
else:
IsTriggerContent ='///'
if (start_point):
start_pointcontent= ' '
else:
start_pointcontent= '///'
if (localScale):
localScalecontent = ' '
else:
localScalecontent='///'
# 2.固定的模板值更替
mycode.append(tmpl.safe_substitute(
TimerContent=TimerContent,
speedContent=speedContent,
IsTriggerContent=IsTriggerContent,
start_pointcontent=start_pointcontent,
localScalecontent=localScalecontent,
role='Small_red_hat',
x_start_point='12',
y_start_point='-2',
z_start_point='0',
x_scale='0.45f',
y_scale='0.5f',
z_scale='1'
))
# 将代码写入文件
class_file.writelines(mycode)
class_file.close()
print('代码已生成')
if __name__ == '__main__':
build = BuildData()
build.Init()using System.Collections;
using System.Collections.Generic;
using UnityEngine;
public class ${role} : MonoBehaviour
{
${TimerContent} public float Timer; //set a Timer
${speedContent} public float speed; //speed
${IsTriggerContent} public bool IsTrigger; //set a trigger
void Start()
{
//the start_point of ${role}
${start_pointcontent}transform.position = new Vector3(${x_start_point}, ${y_start_point}, ${z_start_point});
//the scale of ${role}
${localScalecontent}transform.localScale = new Vector3(${x_scale},${y_scale}, ${z_scale});
}
void Update()
{
//Timer countdown
${TimerContent} Timer += Time.deltaTime;
//when to move
${TimerContent} if (Timer >= 2f && Timer <= 4f) { IsTrigger = true;}
//when to stop
${TimerContent} else if (Timer > 3.5f){ IsTrigger = false;}
//the speed of ${role}
${IsTriggerContent}if(IsTrigger){ transform.Translate(-0.04f, 0, 0);}
}
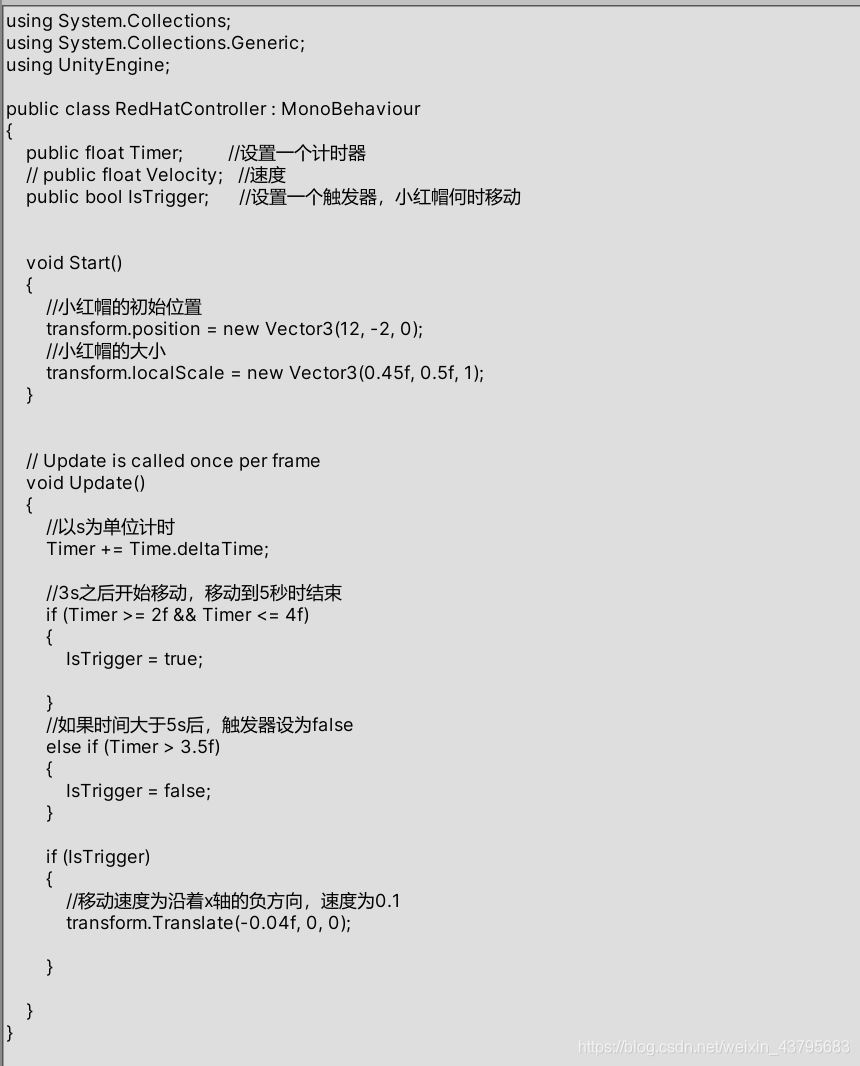
}using System.Collections;
using System.Collections.Generic;
using UnityEngine;
public class Small_red_hat : MonoBehaviour
{
public float Timer; //set a Timer
/// public float speed; //speed
public bool IsTrigger; //set a trigger
void Start()
{
//the start_point of Small_red_hat
transform.position = new Vector3(12, -2, 0);
//the scale of Small_red_hat
transform.localScale = new Vector3(0.45f,0.5f, 1);
}
void Update()
{
//Timer countdown
Timer += Time.deltaTime;
//when to move
if (Timer >= 2f && Timer <= 4f) { IsTrigger = true;}
//when to stop
else if (Timer > 3.5f){ IsTrigger = false;}
//the speed of Small_red_hat
if (IsTrigger){ transform.Translate(-0.04f, 0, 0);}
}
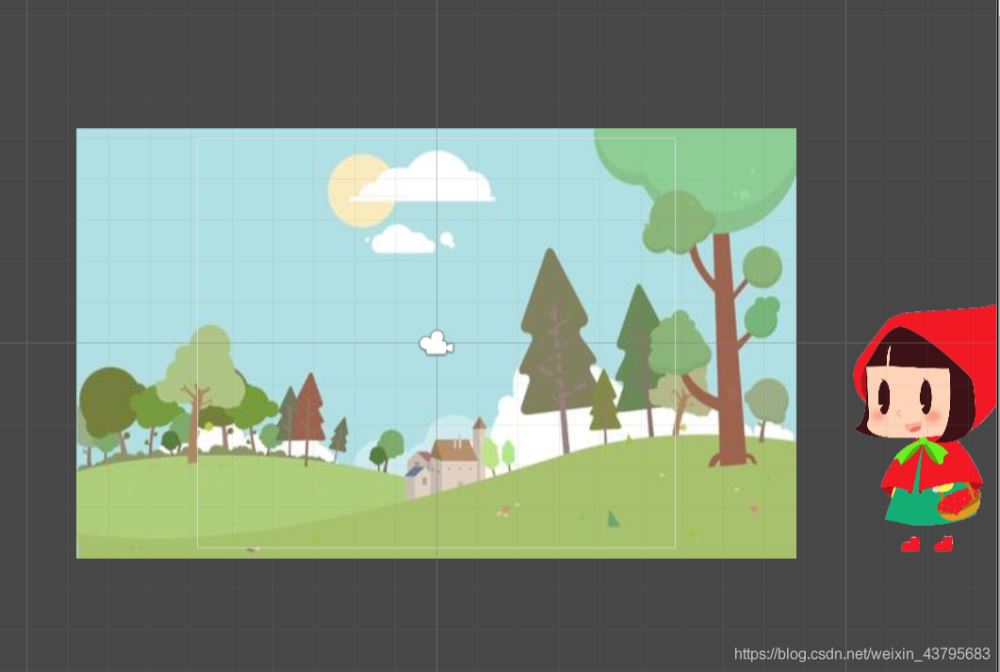
}仔细观察生成的结果,代码与目标生成的代码基本一致,(注释暂时只能使用英文编辑。) 随即把生成的代码放在unity中,观察运行情况。
运行前:
运行后:

关于“Python如何实现C#代码生成器应用服务于Unity”这篇文章就分享到这里了,希望以上内容可以对大家有一定的帮助,使各位可以学到更多知识,如果觉得文章不错,请把它分享出去让更多的人看到。
亿速云「云服务器」,即开即用、新一代英特尔至强铂金CPU、三副本存储NVMe SSD云盘,价格低至29元/月。点击查看>>
免责声明:本站发布的内容(图片、视频和文字)以原创、转载和分享为主,文章观点不代表本网站立场,如果涉及侵权请联系站长邮箱:is@yisu.com进行举报,并提供相关证据,一经查实,将立刻删除涉嫌侵权内容。


 计算
计算 安全
安全 数据库
数据库 网络和加速
网络和加速 企业服务
企业服务


