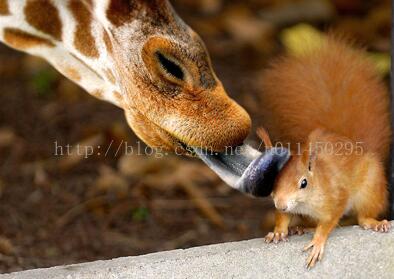
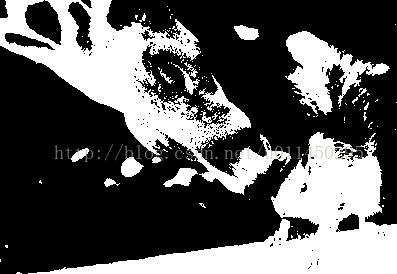
这篇文章将为大家详细讲解有关C语言如何实现24位彩色图像二值化,小编觉得挺实用的,因此分享给大家做个参考,希望大家阅读完这篇文章后可以有所收获。
具体内容如下
// huiduhua.cpp : 定义控制台应用程序的入口点。
//

#include "stdafx.h"
#include<stdio.h>
#include<windows.h>

int _tmain(int argc, _TCHAR* argv[])
{

 BITMAPFILEHEADER bfhead;
 BITMAPINFOHEADER bihead;
 RGBQUAD *pColorTable;
 unsigned char *pBmpBuf;
 FILE *fp1=fopen("鼠.bmp","rb");
 if(fp1==0)
  return 0;
 fread(&bfhead,14,1,fp1);   //将文件头读入内存
 fread(&bihead,40,1,fp1);   //将信息头读入内存
 int LineByte=(bihead.biWidth*24/8+3)/4*4; //保证每行字节数为4的整数倍

 pBmpBuf=new unsigned char[LineByte*bihead.biHeight]; //为数据区分配内存空间
 fread(pBmpBuf,LineByte*bihead.biHeight,1,fp1);       //将bmp数据区读入内存
 fclose(fp1);

 printf("Width:%d, Height: %d,biBitCount:%d\n",bihead.biWidth,bihead.biHeight,bihead.biBitCount);


 //现将真彩图灰度化
 int LineByte1=(bihead.biWidth*8/8+3)/4*4;  //由于灰度化后每像素位数变为8,所以每行字节数发生改变,但仍要求为4的整数倍
 FILE *fp2=fopen("鼠2.bmp","wb");
 if(fp2==0)
  return 0;
 //更改文件头,并将其保存
 bfhead.bfSize=14+40+sizeof(RGBQUAD)*256+LineByte1*bihead.biHeight;   //更改文件大小
 bfhead.bfOffBits=14+40+sizeof(RGBQUAD)*256;   //更改偏移值
 fwrite(&bfhead,14,1,fp2);

 //更改信息头并将其保存
 bihead.biBitCount=8;    //更改每像素位数
 bihead.biSizeImage=LineByte1*bihead.biHeight;  //更改数据区大小
 fwrite(&bihead,40,1,fp2);

 //因为灰度化图像有颜色表,所以创建颜色表并保存
 pColorTable=new RGBQUAD[256];
 for(int i=0;i<256;i++)
  pColorTable[i].rgbRed = pColorTable[i].rgbGreen = pColorTable[i].rgbBlue = i;//使颜色表中每种颜色的R,G,B分量相等且等于索引值
 fwrite(pColorTable,sizeof(RGBQUAD),256,fp2);

 //改变数据区
 unsigned char *pBmpBuf1;
 pBmpBuf1=new unsigned char[LineByte1*bihead.biHeight];
 for(int i=0;i<bihead.biHeight;i++)
  for(int j=0;j<bihead.biWidth;j++)
  {
   unsigned char *pb1,*pb2;
   pb1=pBmpBuf+i*LineByte+j*3;
   int y=*(pb1)*0.299+*(pb1+1)*0.587+*(pb1+2)*0.114;
   pb2=pBmpBuf1+i*LineByte1+j;
   *pb2=y;
  }
  //二值化方法一:阈值设为127,灰度值小于127的置零,其他的置为255;

 //for(int i=0;i<bihead.biHeight;i++)
 // for(int j=0;j<bihead.biWidth;j++)
 // {
 //  unsigned char *pb;
 //  pb=pBmpBuf1+i*LineByte1+j;
 //  if(*pb<127)   //将每个像素值与127比较
 //   *pb=0;
 //  else
 //   *pb=255;
 // }
 //方法二:计算像素的平均值K,扫描图像的每个像素值如像素值大于K像素值设为255(白色),值小于等于K像素值设为0(黑色)
 int y=0;//像素和
 int k=0;//像素个数
 for(int i=0;i<bihead.biHeight;i++)
  for(int j=0;j<bihead.biWidth;j++)
  {
   unsigned char *pb;
   pb=pBmpBuf1+i*LineByte1+j;
   y=y+*pb;  //计算所有像素灰度值之和
   k++;      //统计像素个数
  }
 y=y/k; //求像素平均值
 for(int i=0;i<bihead.biHeight;i++)
  for(int j=0;j<bihead.biWidth;j++)
  {
   unsigned char *pb1;
   pb1=pBmpBuf1+i*LineByte1+j;
   if(*pb1<y)         //将每个像素值与平均值作比较
    *pb1=0;
   else
    *pb1=255;
  }

 fwrite(pBmpBuf1,LineByte1*bihead.biHeight,1,fp2);
 fclose(fp2);

 system("pause");
 return 0;
}
关于“C语言如何实现24位彩色图像二值化”这篇文章就分享到这里了,希望以上内容可以对大家有一定的帮助,使各位可以学到更多知识,如果觉得文章不错,请把它分享出去让更多的人看到。
亿速云「云服务器」,即开即用、新一代英特尔至强铂金CPU、三副本存储NVMe SSD云盘,价格低至29元/月。点击查看>>
免责声明:本站发布的内容(图片、视频和文字)以原创、转载和分享为主,文章观点不代表本网站立场,如果涉及侵权请联系站长邮箱:is@yisu.com进行举报,并提供相关证据,一经查实,将立刻删除涉嫌侵权内容。


 计算
计算 安全
安全 数据库
数据库 网络和加速
网络和加速 企业服务
企业服务


