这篇文章主要讲解了“pyqt5怎么使用QGraphicsScene及QGraphicsView”,文中的讲解内容简单清晰,易于学习与理解,下面请大家跟着小编的思路慢慢深入,一起来研究和学习“pyqt5怎么使用QGraphicsScene及QGraphicsView”吧!
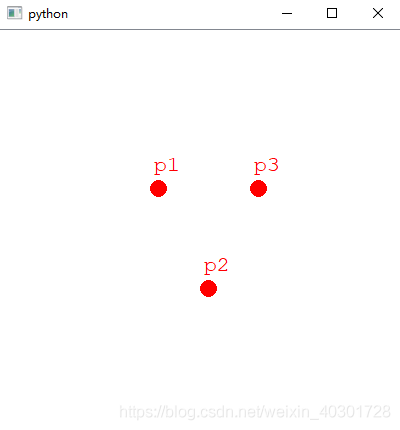
效果图:

from PyQt5.QtCore import Qt, QRectF
from PyQt5.QtGui import QColor, QPen, QBrush, QFont
from PyQt5.QtWidgets import (QGraphicsView, QGraphicsScene, QApplication)
class MainWindow(QGraphicsView):
    def __init__(self, parent=None):
        super(MainWindow, self).__init__(parent)
        # 创建场景
        self.scene = MyGraphScene(self)
        # 在场景中添加文字
        self.addPoint(0, 0, "p1")
        self.addPoint(50, 100, "p2")
        self.addPoint(100, 0, "p3")
        self.setSceneRect(QRectF(-150, -150, 400, 400))
        self.scale(2, 2)
        # 将场景加载到窗口
        self.setScene(self.scene)
    def addPoint(self, x, y, name):
        self.scene.addEllipse(x, y, 16, 16, QPen(QColor(Qt.red)), QBrush(QColor(Qt.red)))
        text = self.scene.addText(name)
        text.setDefaultTextColor(QColor(Qt.red))
        text.setFont(QFont("Courier New", 16))
        text.setPos(x, y - 30)
class MyGraphScene(QGraphicsScene):
    def __init__(self, parent=None):
        super(MyGraphScene, self).__init__(parent)
    def drawBackground(self, painter, rect):
    	# 在这里可以绘制底板,比如网格
        pass
if __name__ == '__main__':
    import sys
    # 每个PyQt程序必须创建一个application对象,sys.argv 参数是命令行中的一组参数
    # 注意:application在 PyQt5.QtWidgets 模块中
    # 注意:application在 PyQt4.QtGui 模块中
    app = QApplication(sys.argv)
    # 创建桌面窗口
    mainWindow = MainWindow()
    # 显示桌面窗口
    mainWindow.show()
    sys.exit(app.exec_())
使用概要:
1、创建继承自QGraphicsView的窗口
2、创建继承自QGraphicsScene的画布
3、将画布设置给View窗口QGraphicsView::setScene(self.scene)
4、自由的在画布上添加元素:
①通过已经封装好的方法,如前面代码使用的
②自定义item,继承自QGraphicsItem该类,并通过QGraphicsScene::addItem(item)的方法将item添加到画布
QGraphicsView的API
QGraphicsScene的API
感谢各位的阅读,以上就是“pyqt5怎么使用QGraphicsScene及QGraphicsView”的内容了,经过本文的学习后,相信大家对pyqt5怎么使用QGraphicsScene及QGraphicsView这一问题有了更深刻的体会,具体使用情况还需要大家实践验证。这里是亿速云,小编将为大家推送更多相关知识点的文章,欢迎关注!
免责声明:本站发布的内容(图片、视频和文字)以原创、转载和分享为主,文章观点不代表本网站立场,如果涉及侵权请联系站长邮箱:is@yisu.com进行举报,并提供相关证据,一经查实,将立刻删除涉嫌侵权内容。