这篇文章主要讲解了“Android的fitsSystemWindows属性如何使用”,文中的讲解内容简单清晰,易于学习与理解,下面请大家跟着小编的思路慢慢深入,一起来研究和学习“Android的fitsSystemWindows属性如何使用”吧!
Android手机顶部用于显示各种通知和状态信息的这个栏叫做状态栏。
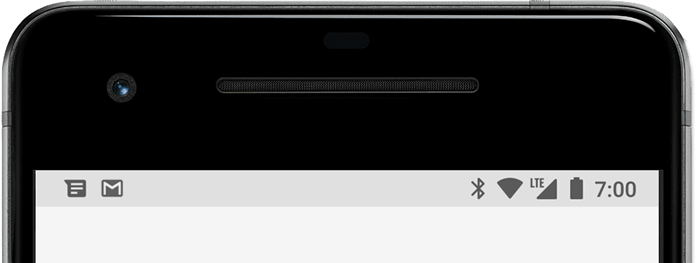
通常情况下,我们应用程序的内容都是显示在状态栏下方的。但有时为了实现更好的视觉效果,我们希望将应用程序的内容延伸到状态栏的背后,这种就可以称之为沉浸式状态栏。
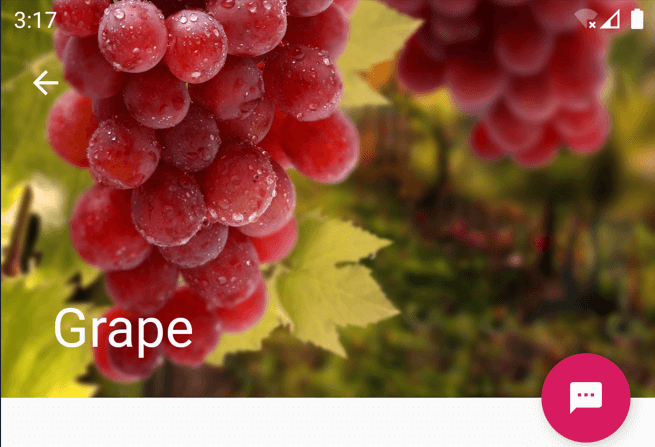
那么借助android:fitsSystemWindows属性是如何实现沉浸式状态栏效果的呢?这个属性为什么又总是时灵时不灵呢?接下来我们就来一步步学习和揭秘。
我相信按照绝大多数人的美好设想,android:fitsSystemWindows属性就应该像是一个开关一样,设置成true就可以打开沉浸式状态栏效果,设置成false就可以关闭沉浸式状态栏效果。但现实并非如此。
下面我们通过代码示例来演示一下。首先为了验证沉浸式状态栏的效果,需要将系统的状态栏改成透明色,代码如下所示:
class MainActivity : AppCompatActivity() {

    override fun onCreate(savedInstanceState: Bundle?) {
        super.onCreate(savedInstanceState)
        setContentView(R.layout.activity_main)
        window.statusBarColor = Color.TRANSPARENT
    }

}接下来,我们给activity_main.xml的根布局加上android:fitsSystemWindows属性,并且给该布局设置了一个背景色用于观察效果:
<?xml version="1.0" encoding="utf-8"?>
<FrameLayout
    xmlns:android="http://schemas.android.com/apk/res/android"
    android:layout_width="match_parent"
    android:layout_height="match_parent"
    android:background="#ff66ff"
    android:fitsSystemWindows="true">

</FrameLayout>运行一下代码,效果如下图所示:
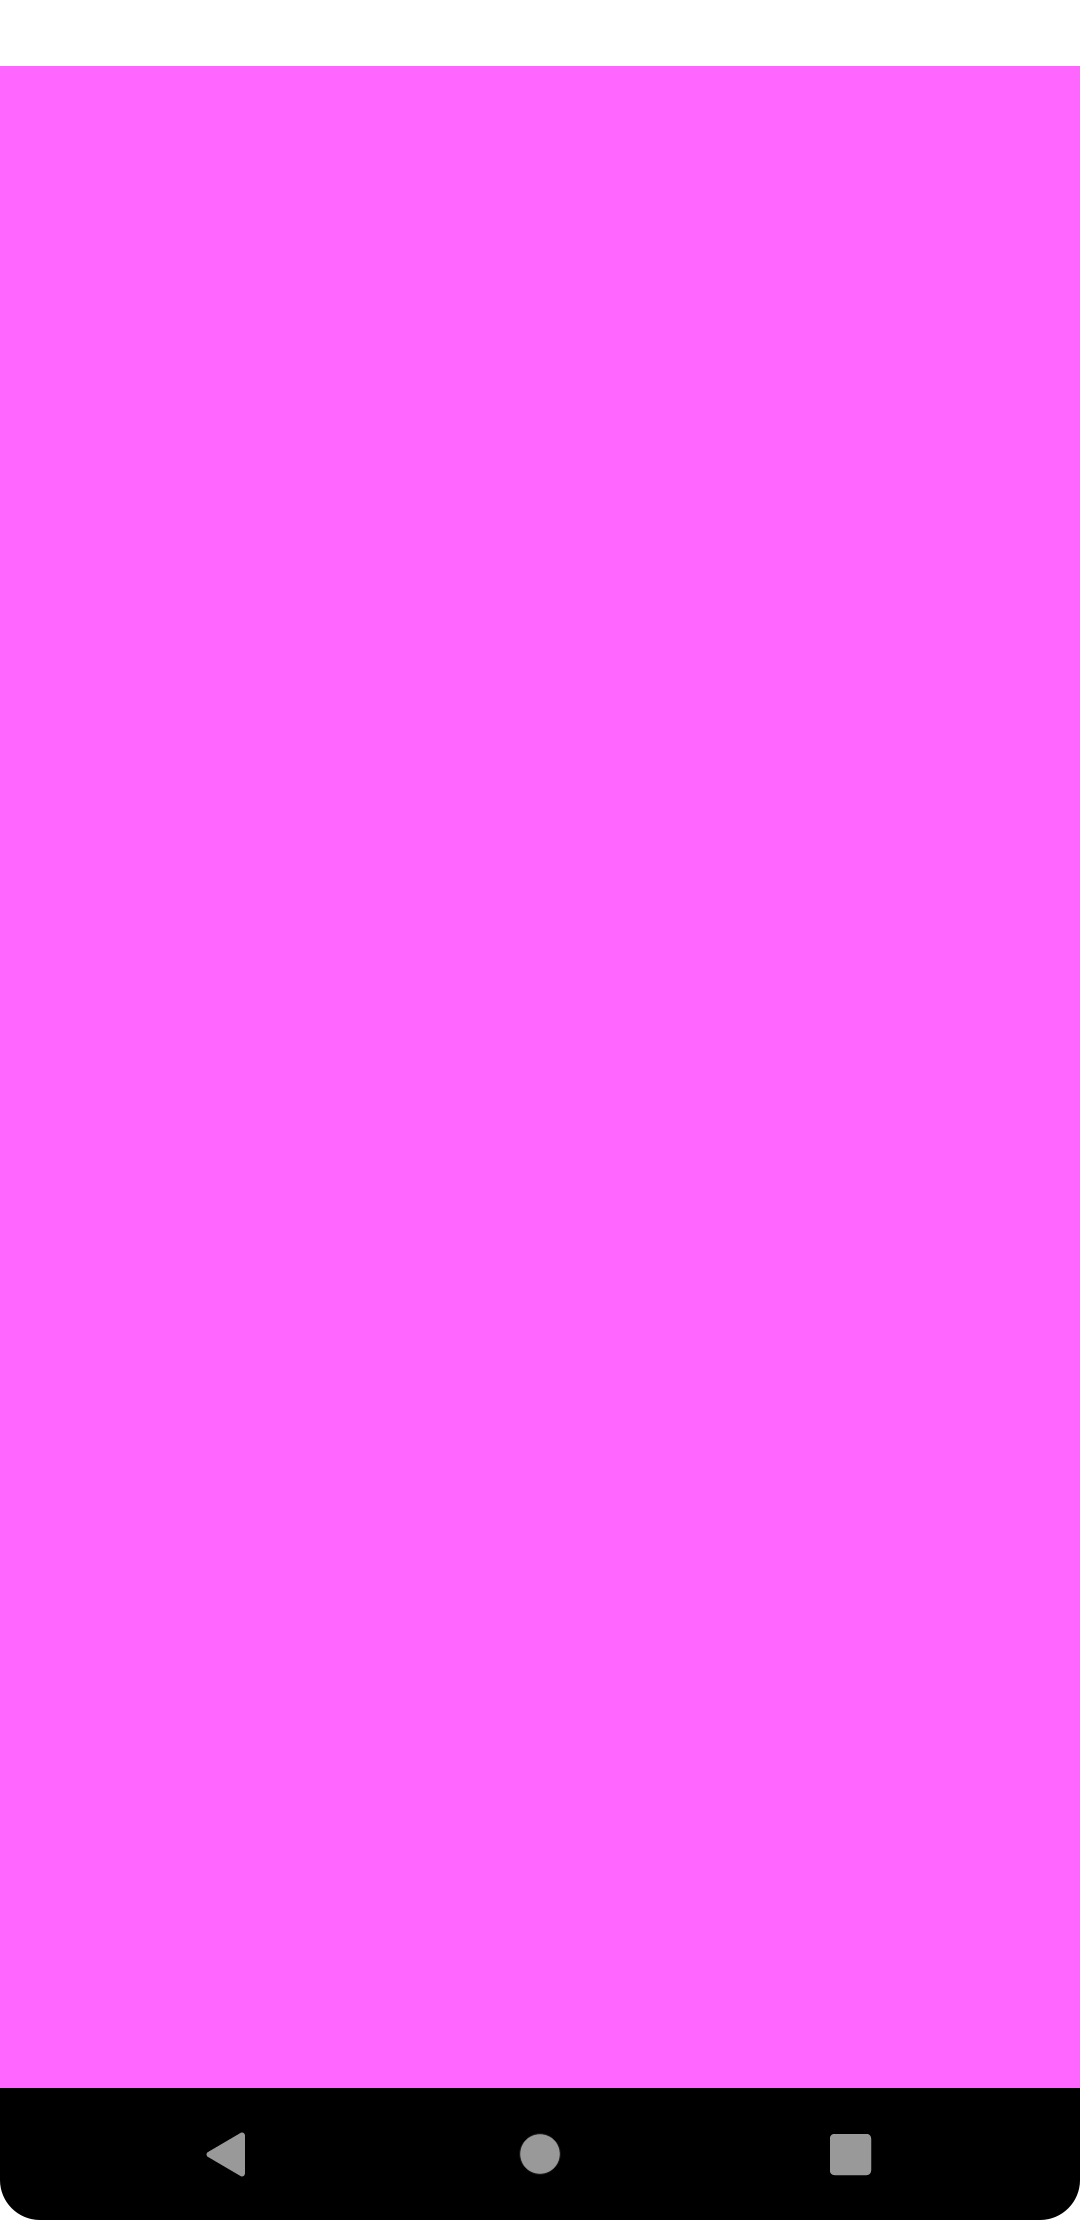
通过布局的背景色我们可以看出,该布局的内容并没有延伸到系统状态栏的背后。也就是说,即使设置了android:fitsSystemWindows属性,我们也没有实现沉浸式状态栏效果。
但是不要着急,接下我们只需要做出一点小修改,如下所示:
<?xml version="1.0" encoding="utf-8"?>
<androidx.coordinatorlayout.widget.CoordinatorLayout
    xmlns:android="http://schemas.android.com/apk/res/android"
    android:layout_width="match_parent"
    android:layout_height="match_parent"
    android:background="#ff66ff"
    android:fitsSystemWindows="true">

</androidx.coordinatorlayout.widget.CoordinatorLayout>可以看到,这里只是将根布局从FrameLayout修改成了CoordinatorLayout,其他都没有任何变化。然后重新运行程序。效果如下图所示:
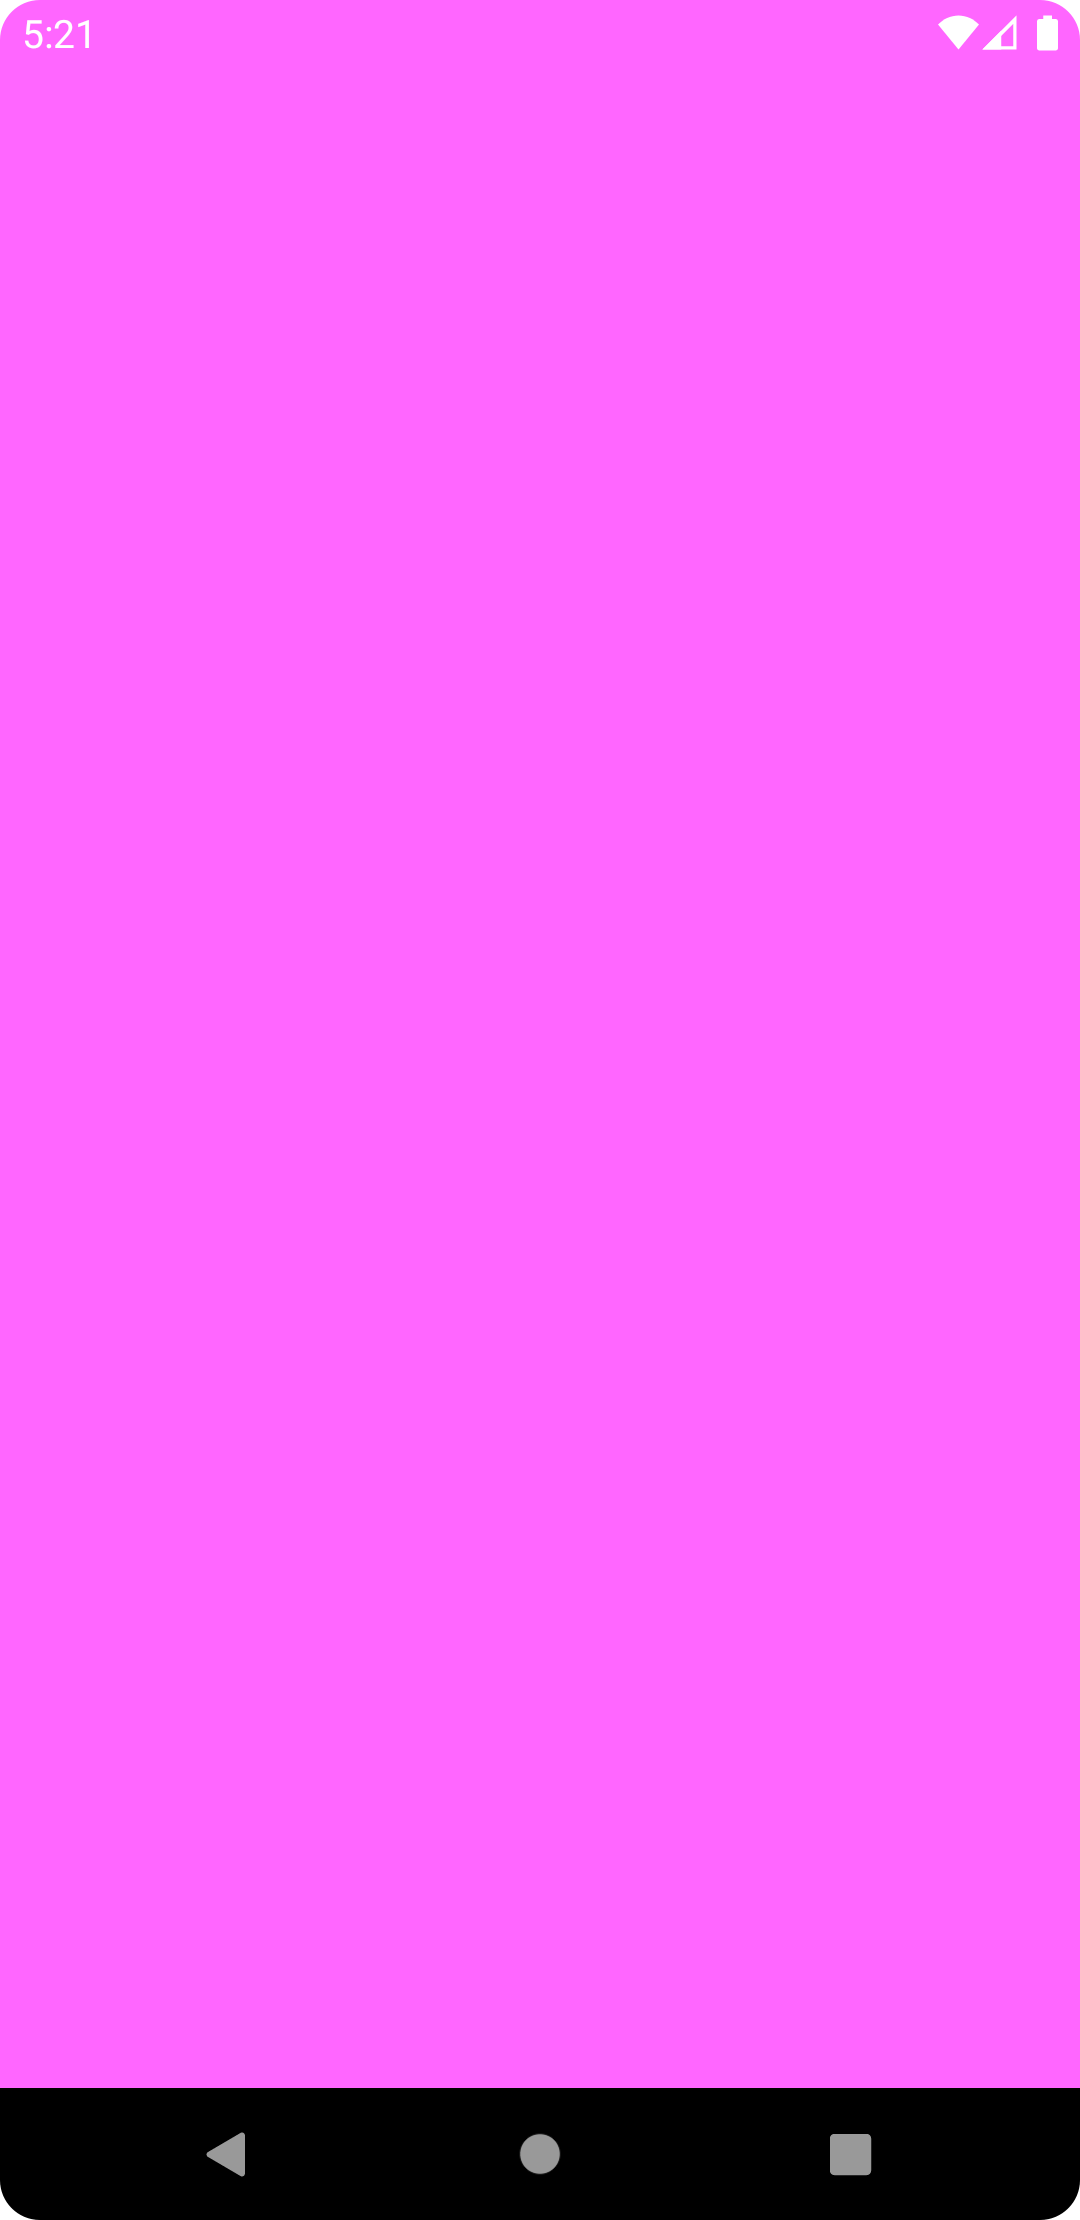
这样就可以成功实现沉浸式状态栏效果了。
话说为什么android:fitsSystemWindows属性,设置在CoordinatorLayout布局上就能生效,设置在FrameLayout布局上就没有效果呢?
这是因为,xml中的配置毕竟只是一个标记,如果想要在应用程序当中产生具体的效果,那还是要看代码中是如何处理这些标记的。
很明显,FrameLayout对于android:fitsSystemWindows属性是没有进行处理的,所以不管设不设置都不会产生什么变化。
而CoordinatorLayout则不同,我们可以观察它的源码,如下所示:
private void setupForInsets() {
    if (Build.VERSION.SDK_INT < 21) {
        return;
    }

    if (ViewCompat.getFitsSystemWindows(this)) {
        if (mApplyWindowInsetsListener == null) {
            mApplyWindowInsetsListener =
                    new androidx.core.view.OnApplyWindowInsetsListener() {
                        @Override
                        public WindowInsetsCompat onApplyWindowInsets(View v,
                                WindowInsetsCompat insets) {
                            return setWindowInsets(insets);
                        }
                    };
        }
        // First apply the insets listener
        ViewCompat.setOnApplyWindowInsetsListener(this, mApplyWindowInsetsListener);

        // Now set the sys ui flags to enable us to lay out in the window insets
        setSystemUiVisibility(View.SYSTEM_UI_FLAG_LAYOUT_STABLE
                | View.SYSTEM_UI_FLAG_LAYOUT_FULLSCREEN);
    } else {
        ViewCompat.setOnApplyWindowInsetsListener(this, null);
    }
}可以看到,这里当发现CoordinatorLayout设置了android:fitsSystemWindows属性时,会对当前布局的insets做一些处理,并且调用了下面一行代码:
setSystemUiVisibility(View.SYSTEM_UI_FLAG_LAYOUT_STABLE
| View.SYSTEM_UI_FLAG_LAYOUT_FULLSCREEN);这行代码是一切的关键所在。准确来讲,就是因为执行了这行代码,我们才能将布局的内容延伸到系统状态栏区域。
是不是感觉解密了?但事实上CoordinatorLayout所做的事情还远不止这些。
因为沉浸式状态栏其实会带来很多问题。让布局的内容延伸到状态栏的背后,如果一些可交互的控件被状态栏遮挡了怎么办?这样这些控件可能就无法点击和交互了。
CoordinatorLayout为了解决这个问题,会对所有内部的子View都进行一定程度的偏移,保证它们不会被状态栏遮挡住。
比如我们在CoordinatorLayout当中再添加一个按钮:
<?xml version="1.0" encoding="utf-8"?>
<androidx.coordinatorlayout.widget.CoordinatorLayout xmlns:android="http://schemas.android.com/apk/res/android"
    android:layout_width="match_parent"
    android:layout_height="match_parent"
    android:background="#ff66ff"
    android:fitsSystemWindows="true">

    <Button
        android:layout_width="wrap_content"
        android:layout_height="wrap_content"
        android:text="Button"
        />

</androidx.coordinatorlayout.widget.CoordinatorLayout>运行一下程序,效果如下图所示:

可以看到,虽然CoordinatorLayout延伸到了状态栏区域,但是它所包含的按钮是不会进入状态栏区域的,这样就避免了可交互控件被遮挡的情况出现。
但有的朋友会说,如果有些子控件我就是想要让它也延伸到状态栏区域内呢?比如我在CoordinatorLayout内放了一张图片,按照这个规则,图片也是不会显示在状态栏背后的,这样就达不到想要的效果了。
我们可以来试一下这种场景。比如在CoordinatorLayout中再添加一个ImageView,代码如下所示:
<?xml version="1.0" encoding="utf-8"?>
<androidx.coordinatorlayout.widget.CoordinatorLayout xmlns:android="http://schemas.android.com/apk/res/android"
    android:layout_width="match_parent"
    android:layout_height="match_parent"
    android:background="#ff66ff"
    android:fitsSystemWindows="true">

    <ImageView
        android:layout_width="match_parent"
        android:layout_height="match_parent"
        android:scaleType="centerCrop"
        android:src="@drawable/bg"
        />

    <Button
        android:layout_width="wrap_content"
        android:layout_height="wrap_content"
        android:text="Button"
        />

</androidx.coordinatorlayout.widget.CoordinatorLayout>现在运行一下程序,效果如下图所示:
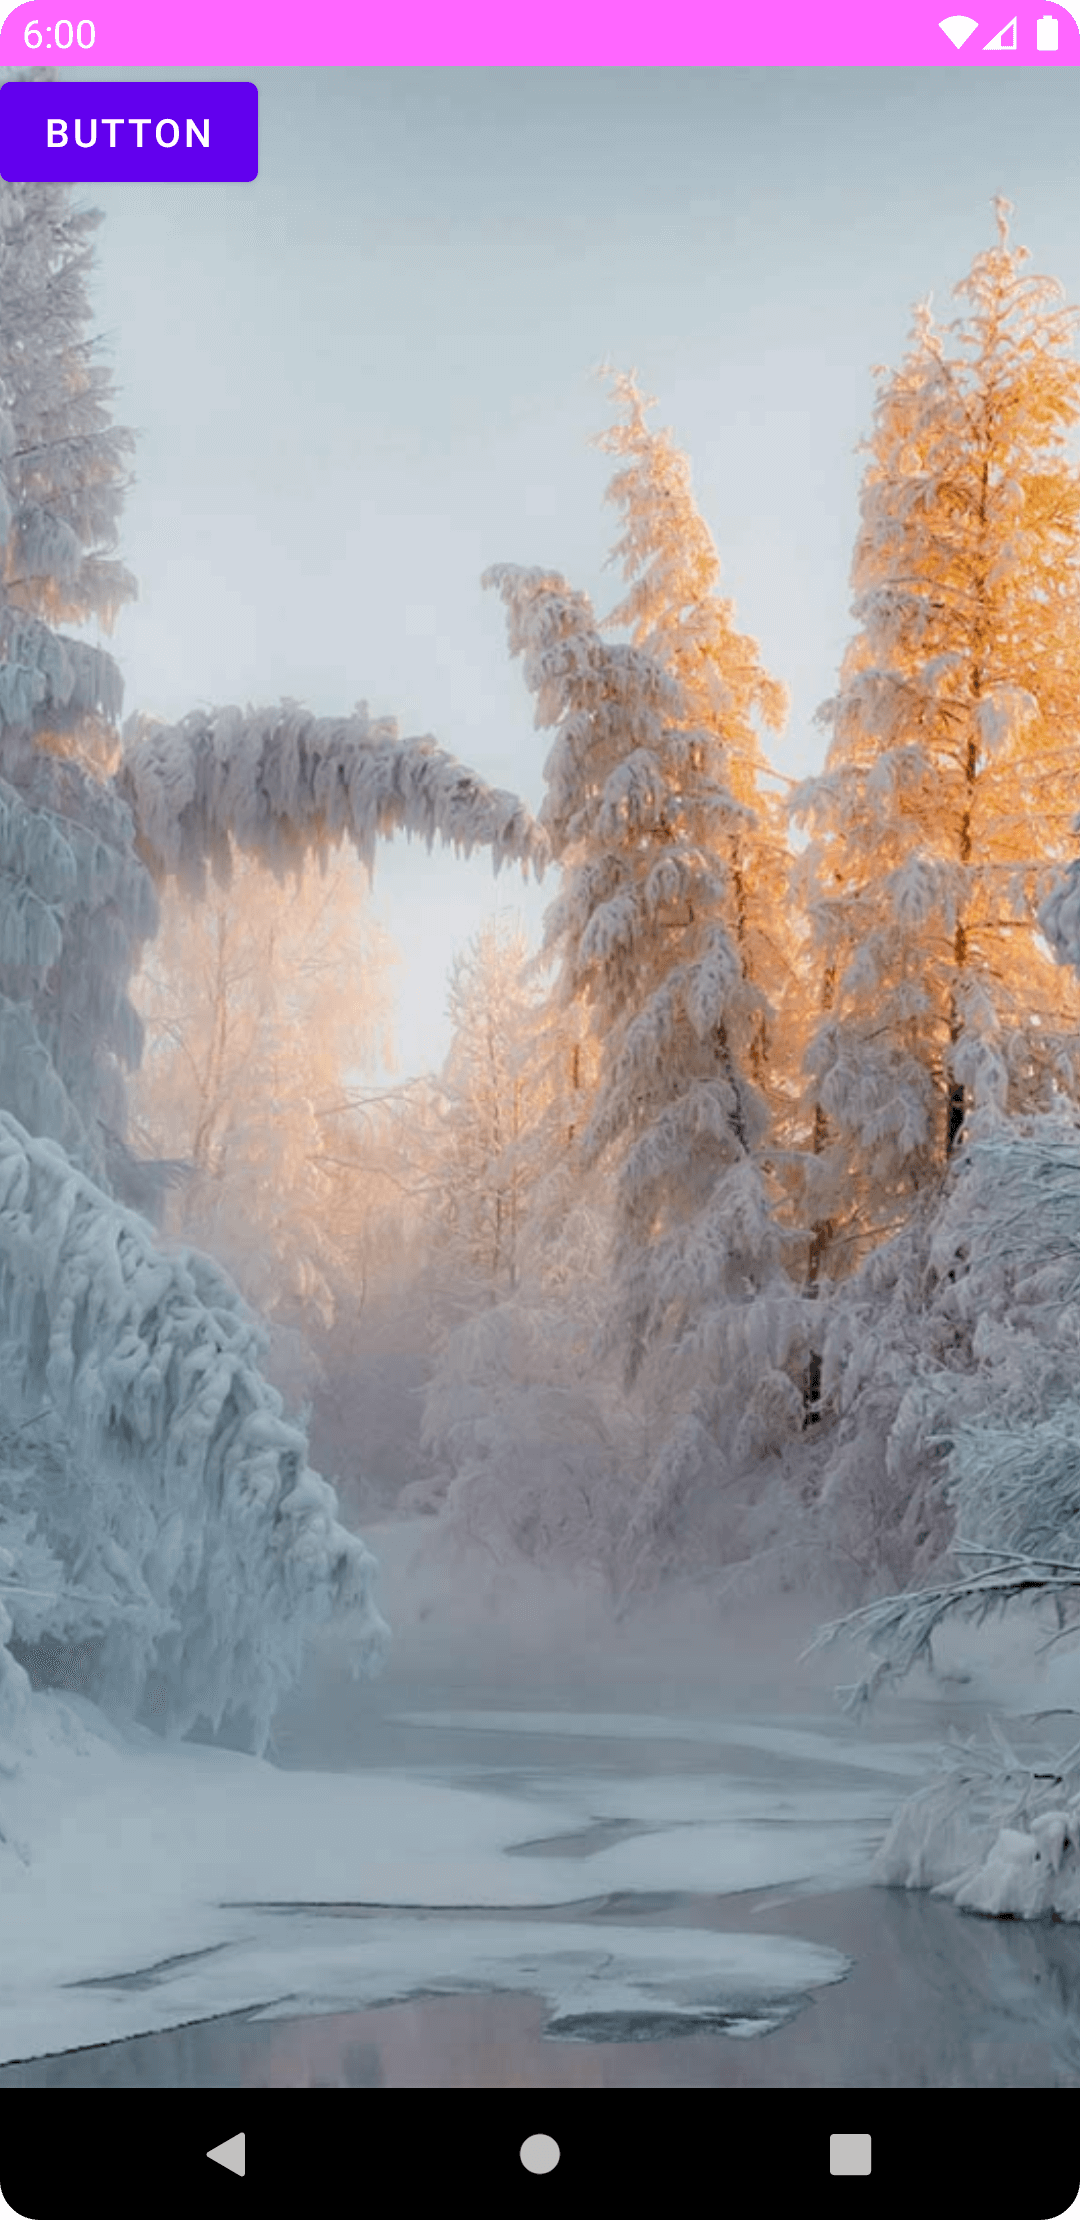
确实,图片是不会进入状态栏区域的,和我们之前所解释的理论相符合。
但是很明显,这并不是我们想要的效果,那么有什么办法可以解决呢?
这里我们可以借助其他布局来实现。在Google提供的诸多布局当中,并不是只有CoordinatorLayout会处理android:fitsSystemWindows属性,像CollapsingToolbarLayout、DrawerLayout也是会对这个属性做处理的。
现在对activity_main.xml进行如下修改:
<?xml version="1.0" encoding="utf-8"?>
<androidx.coordinatorlayout.widget.CoordinatorLayout xmlns:android="http://schemas.android.com/apk/res/android"
    android:layout_width="match_parent"
    android:layout_height="match_parent"
    android:background="#ff66ff"
    android:fitsSystemWindows="true">

    <com.google.android.material.appbar.CollapsingToolbarLayout
        android:layout_width="match_parent"
        android:layout_height="match_parent"
        android:fitsSystemWindows="true">

        <ImageView
            android:layout_width="match_parent"
            android:layout_height="match_parent"
            android:scaleType="centerCrop"
            android:src="@drawable/bg"
            android:fitsSystemWindows="true"
            />

    </com.google.android.material.appbar.CollapsingToolbarLayout>

    <Button
        android:layout_width="wrap_content"
        android:layout_height="wrap_content"
        android:text="Button"
        />

</androidx.coordinatorlayout.widget.CoordinatorLayout>可以看到,这里我们在ImageView的外面又包裹了一层CollapsingToolbarLayout,并且给CollapsingToolbarLayout也设置了android:fitsSystemWindows属性,这样CollapsingToolbarLayout就可以将内容延申到状态栏区域了。
接着我们给ImageView同样设置了android:fitsSystemWindows属性,如此一来,就可以让图片显示在状态栏的背后了。
重新运行一下程序,效果如下图所示:
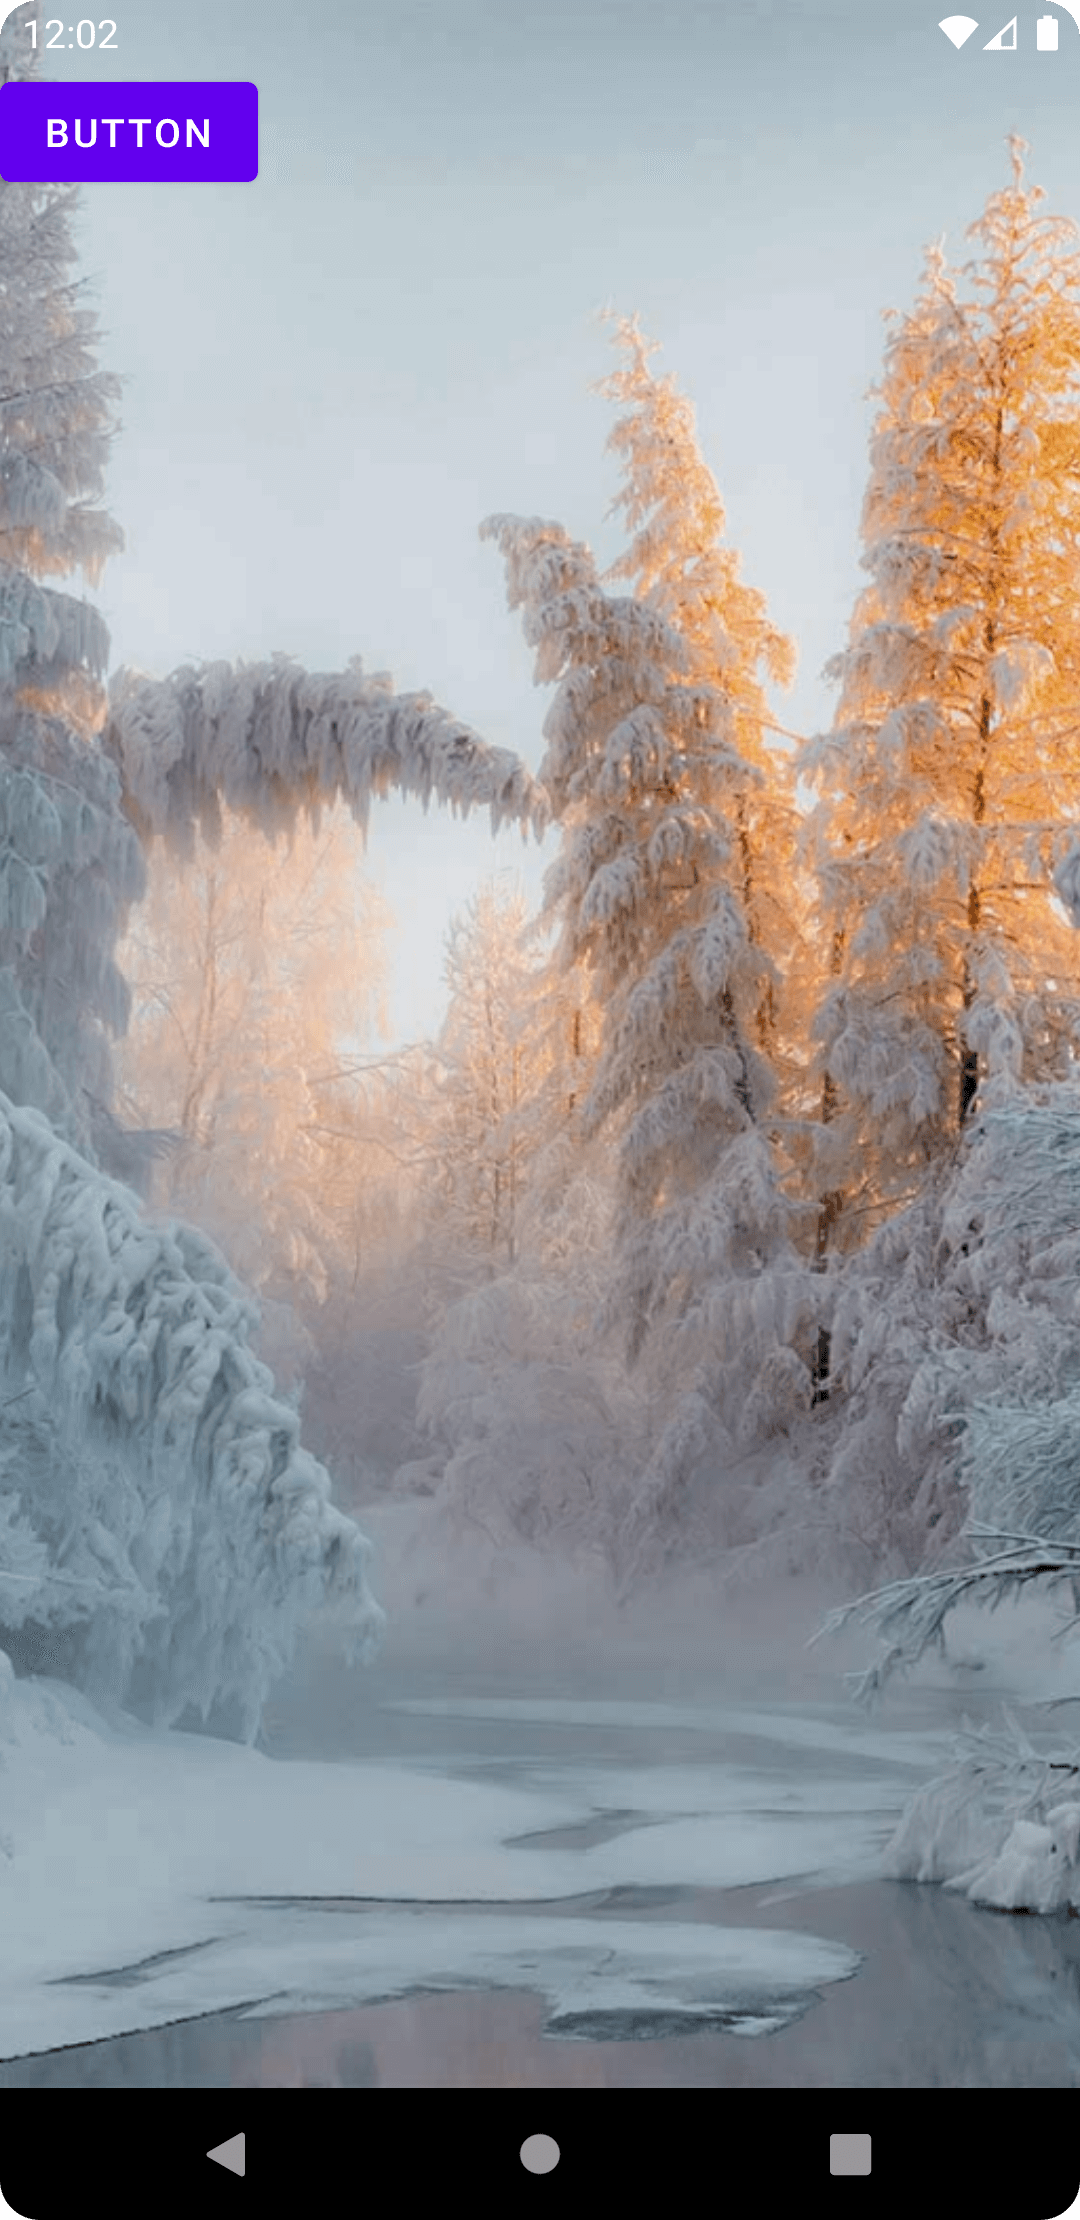
需要注意的是,CollapsingToolbarLayout一定要结合着CoordinatorLayout一起使用,而不能单独使用。因为CollapsingToolbarLayout只会对内部控件的偏移距离做出调整,而不会像CoordinatorLayout那样调用setSystemUiVisibility()函数来开启沉浸式状态栏。
看到这里,相信大家都已经知道应该如何去实现沉浸式状态栏效果了。但是可能有的朋友会说,由于项目限制的原因,他们无法使用CoordinatorLayout或CollapsingToolbarLayout,而是只能使用像FrameLayout或LinearLayout这样的传统布局,这种情况怎么办呢?
其实我们知道CoordinatorLayout实现沉浸式状态栏的原理之后,自然也就知道如何自己手动实现了,因为本质就是调用setSystemUiVisibility()函数。
现在我们将activity_main.xml改成用传统FrameLayout布局的写法:
<?xml version="1.0" encoding="utf-8"?>
<FrameLayout xmlns:android="http://schemas.android.com/apk/res/android"
    android:id="@+id/root_layout"
    android:layout_width="match_parent"
    android:layout_height="match_parent"
    android:background="#ff66ff">

    <ImageView
        android:layout_width="match_parent"
        android:layout_height="match_parent"
        android:scaleType="centerCrop"
        android:src="@drawable/bg"
        />

    <Button
        android:id="@+id/button"
        android:layout_width="wrap_content"
        android:layout_height="wrap_content"
        android:text="Button"
        />

</FrameLayout>为了实现沉浸式状态栏的效果,我们手动在MainActivity当中调用setSystemUiVisibility()函数,来将FrameLayout的内容延伸到状态栏区域:
class MainActivity : AppCompatActivity() {

    override fun onCreate(savedInstanceState: Bundle?) {
        super.onCreate(savedInstanceState)
        setContentView(R.layout.activity_main)
        window.statusBarColor = Color.TRANSPARENT
        val frameLayout = findViewById<FrameLayout>(R.id.root_layout)
        frameLayout.systemUiVisibility = (SYSTEM_UI_FLAG_LAYOUT_STABLE
                or SYSTEM_UI_FLAG_LAYOUT_FULLSCREEN)
    }

}这里提醒一点,setSystemUiVisibility()函数其实已经被废弃了。从Android 11开始,Google提供了一个新的API WindowInsetsController来实现同样的功能,不过本篇文章就不往这方面展开了。
现在重新运行一下程序,效果如下图所示:
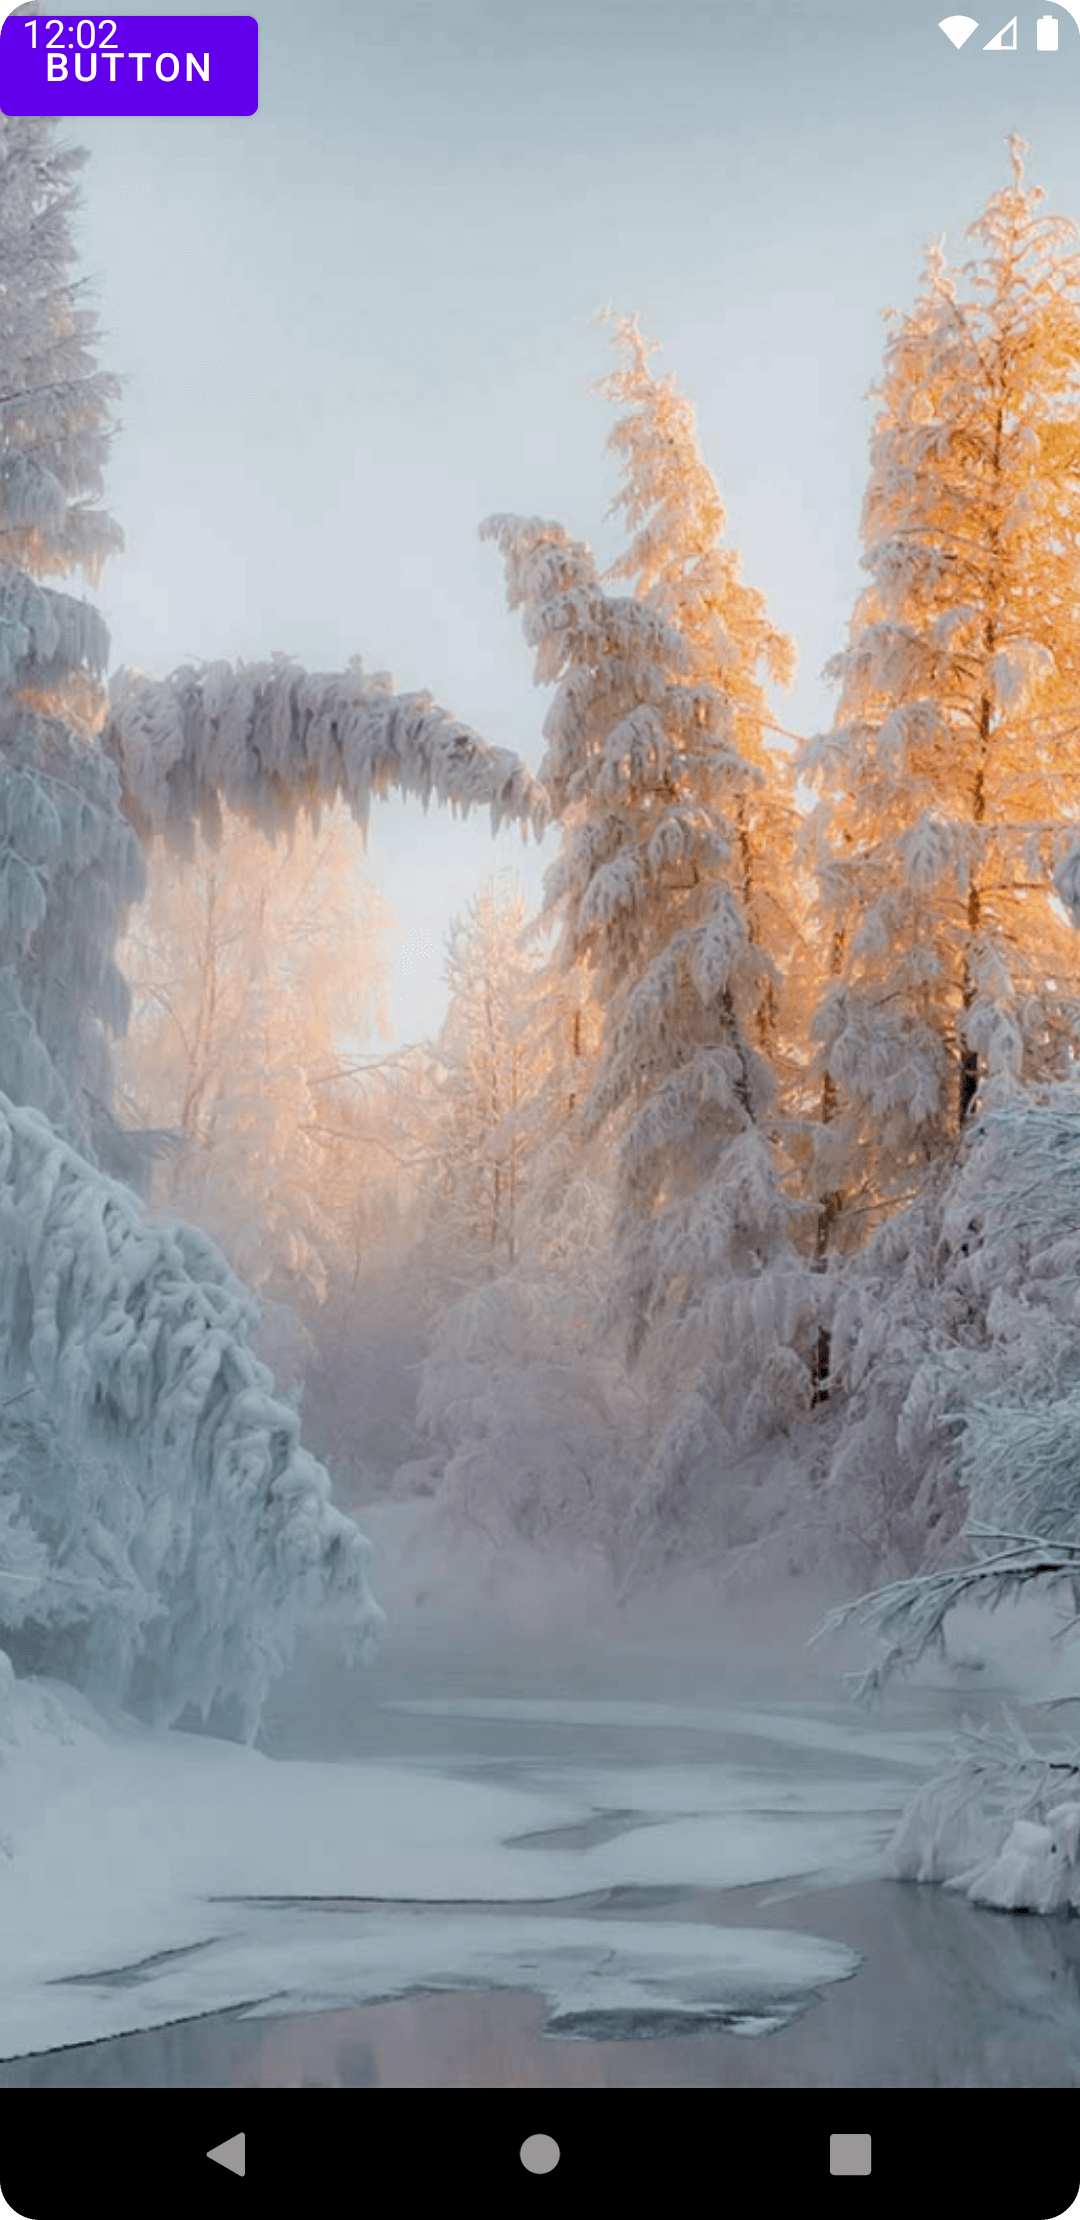
可以看到,现在我们仍然实现了沉浸式状态栏的效果,但问题是FrameLayout中的按钮也延伸到状态栏区域了,这就是前面所说的可交互控件被状态栏遮挡的问题。
出现这个问题的原因也很好理解,因为之前我们是使用的CoordinatorLayout嘛,它已经帮我们考虑好到这些事情,自动会将内部的控件进行偏移。而现在FrameLayout显然是不会帮我们做这些事情的,所以我们得想办法自己解决。
这里其实可以借助setOnApplyWindowInsetsListener()函数去监听WindowInsets发生变化的事件,当有监听到发生变化时,我们可以读取顶部Insets的大小,然后对控件进行相应距离的偏移。
修改MainActivity中的代码,如下所示:
class MainActivity : AppCompatActivity() {

    override fun onCreate(savedInstanceState: Bundle?) {
        super.onCreate(savedInstanceState)
        setContentView(R.layout.activity_main)
        window.statusBarColor = Color.TRANSPARENT
        val frameLayout = findViewById<FrameLayout>(R.id.root_layout)
        frameLayout.systemUiVisibility = (SYSTEM_UI_FLAG_LAYOUT_STABLE
                or SYSTEM_UI_FLAG_LAYOUT_FULLSCREEN)

        val button = findViewById<Button>(R.id.button)
        ViewCompat.setOnApplyWindowInsetsListener(button) { view, insets ->
            val params = view.layoutParams as FrameLayout.LayoutParams
            params.topMargin = insets.systemWindowInsetTop
            insets
        }
    }

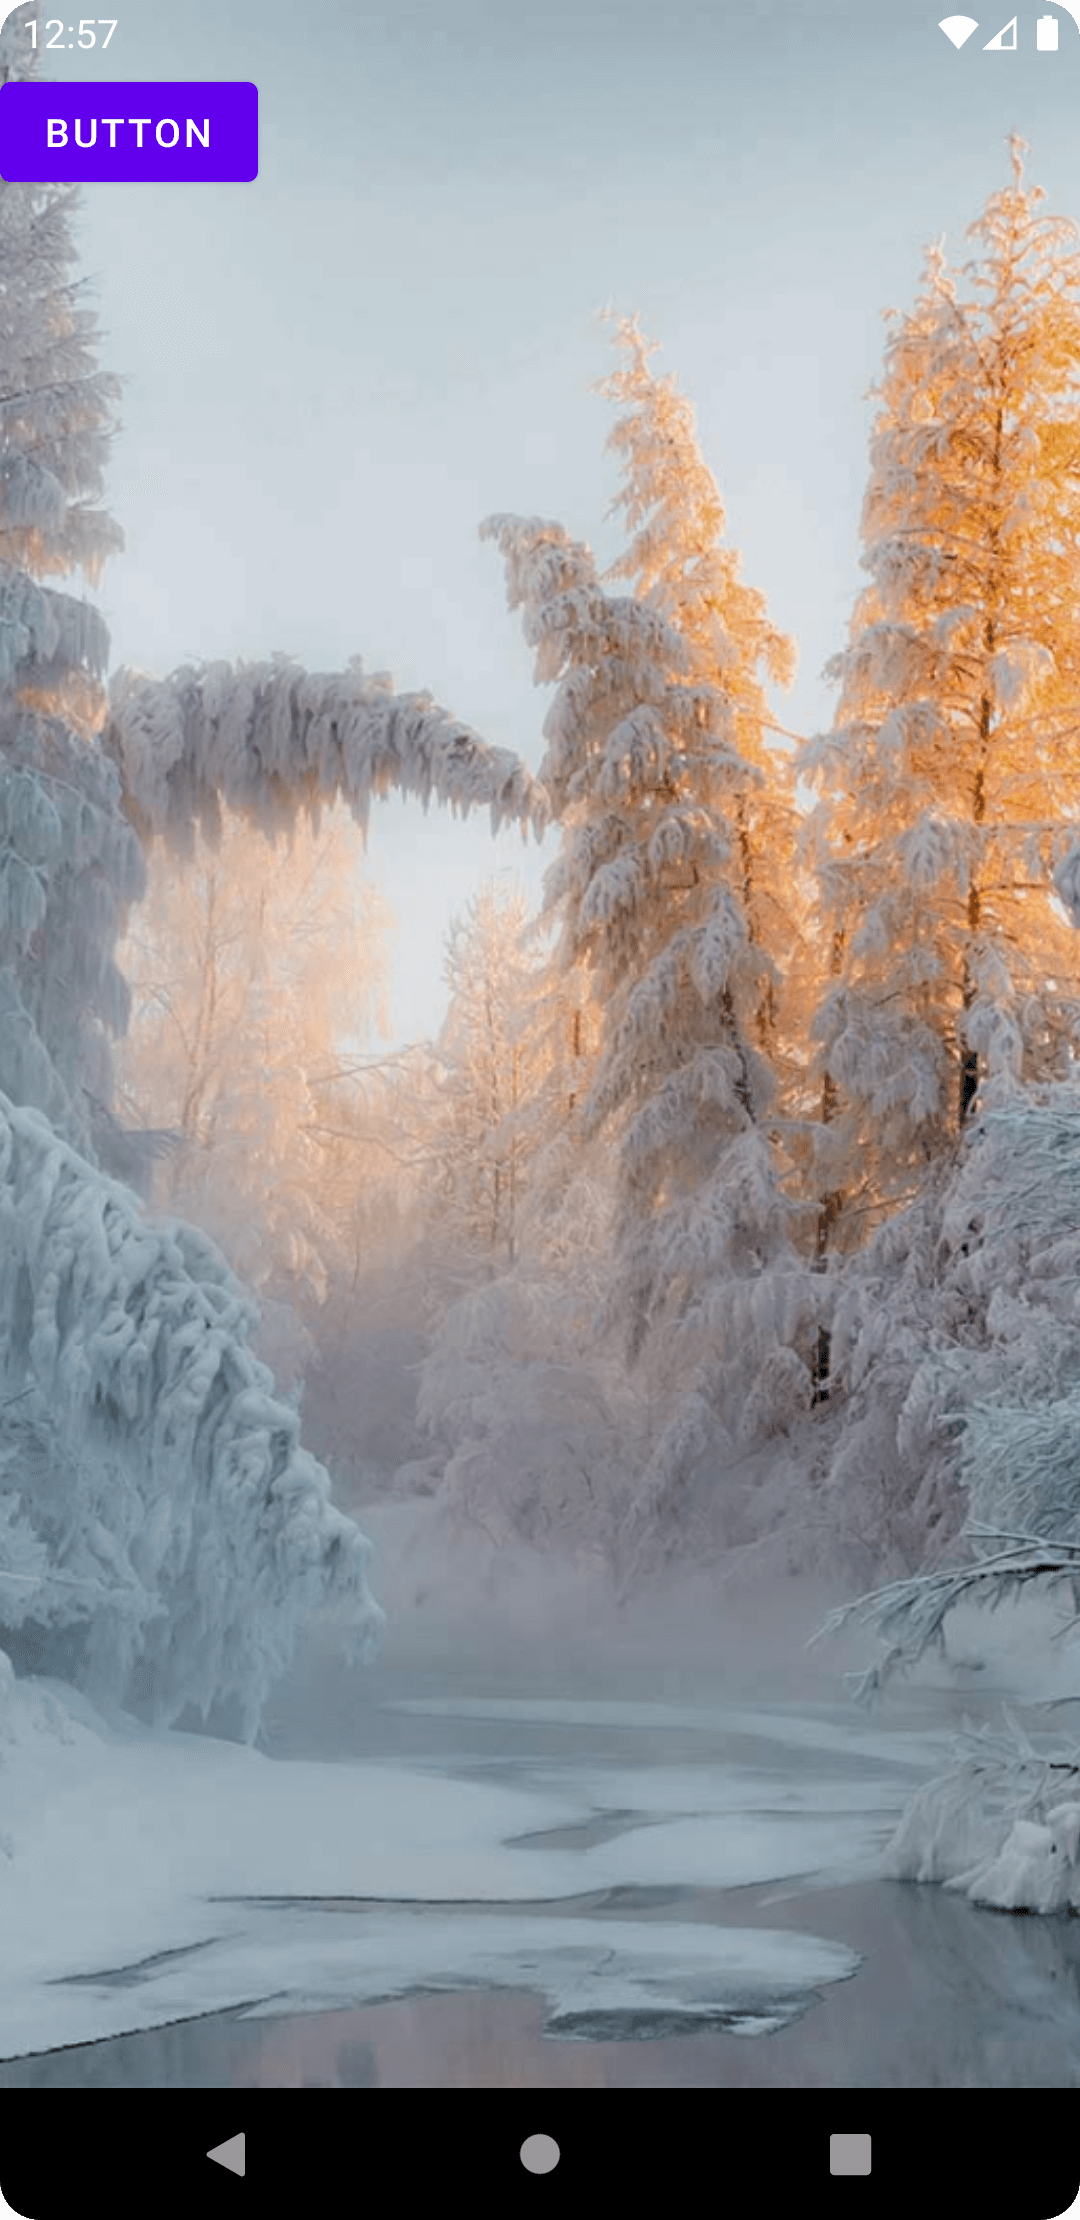
}可以看到,当监听到WindowInsets发生变化时,我们调用systemWindowInsetTop即可获取到状态栏的高度,然后对不需要延伸到状态栏区域的控件进行相应的偏移即可。
重新运行程序,效果如下图所示:
感谢各位的阅读,以上就是“Android的fitsSystemWindows属性如何使用”的内容了,经过本文的学习后,相信大家对Android的fitsSystemWindows属性如何使用这一问题有了更深刻的体会,具体使用情况还需要大家实践验证。这里是亿速云,小编将为大家推送更多相关知识点的文章,欢迎关注!
亿速云「云服务器」,即开即用、新一代英特尔至强铂金CPU、三副本存储NVMe SSD云盘,价格低至29元/月。点击查看>>
免责声明:本站发布的内容(图片、视频和文字)以原创、转载和分享为主,文章观点不代表本网站立场,如果涉及侵权请联系站长邮箱:is@yisu.com进行举报,并提供相关证据,一经查实,将立刻删除涉嫌侵权内容。