这篇“微信小程序滚动、轮播图和文本怎么实现”文章的知识点大部分人都不太理解,所以小编给大家总结了以下内容,内容详细,步骤清晰,具有一定的借鉴价值,希望大家阅读完这篇文章能有所收获,下面我们一起来看看这篇“微信小程序滚动、轮播图和文本怎么实现”文章吧。
实现如图的纵向滚动效果
<scroll-view class="container_2" scroll-y>
 <view>T</view>
<view>S</view>
<view>J</view>
</scroll-view>.container_2 view{
width: 100px;
height: 100px;
text-align: center;
line-height: 100px;
}
.container_2 view:nth-child(1){
background-color: red;
}
.container_2 view:nth-child(2){
background-color: yellowgreen;
}
.container_2 view:nth-child(3){
background-color: blue;
}
.container_2{
display: flex;
justify-content: space-around
}
.container_2{
border: 1px solid yellowgreen;
height: 130px;
width: 100px;
}scroll-y 改成 scroll-x
实现如图的横向滚动效果:
<scroll-view class="container_2" scroll-x>
 <view>横           向           滑           动           演           示</view>
</scroll-view>.container_2 view{
width: 300px;
height: 100px;
text-align: center;
line-height: 100px;
}
.container_2 view:nth-child(1){
background-color: red;
}
.container_2{
display: flex;
justify-content: space-around
}
.container_2{
border: 1px solid yellowgreen;
height: 100px;
width: 100px;
}实现如图的轮播图效果:
<swiper class="container_3" indicator-dots>
<swiper-item>
<view class="item">1</view>
</swiper-item>

<swiper-item>
  <view class="item">2</view>
</swiper-item>

<swiper-item>
  <view class="item">3</view>
</swiper-item>


<swiper-item>
  <view class="item">4</view>
</swiper-item>
</swiper>.container_3{
height: 160px;
}
.item{
height: 100%;
line-height: 150px;
text-align: center;
}
swiper-item:nth-child(1) .item{
background-color: burlywood;
}
swiper-item:nth-child(2) .item{
background-color: yellow;
}
swiper-item:nth-child(3) .item{
background-color: pink;
}
swiper-item:nth-child(4) .item{
background-color: aqua;
}.swiper 组件的常用属性
属性 | 类型 | 默认值 | 说明 |
indicator-dots | boolean | false | 是否显示面板指示点 |
| indicator-color | color | rgba(0, 0, 0, .3) | 指示点颜色 |
| indicator-active-color | color | #000000 | 当前选中的指示点颜色 |
| autoplay | boolean | false | 是否自动切换 |
| interval | number | 5000 | 自动切换时间间隔 |
| circular | boolean | false | 是否采用衔接滑动 |
文本组件
类似于 HTML 中的 span 标签,是一个行内元素
通过 text 组件的 selectable 属性,实现长按选中文本内容的效果:
<view>
手机号:
<text selectable>17608777</text>
</view>富文本组件 支持把 HTML 字符串渲染为 WXML 结构
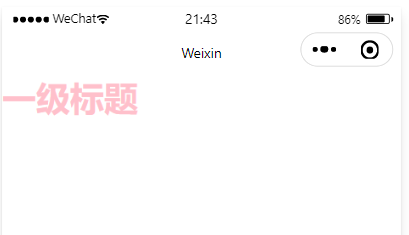
<rich-text nodes="<h2 style='color:pink;'>一级标题 <h2>"></rich-text><!--pages/swiper/swiper.wxml-->
<text>pages/swiper/swiper.wxml</text>
<!-- 滑块视图 先添加一个滑块容器 -->
<!-- 是否自动播放 ,增加提示点 ,是否衔接滑动(例如从最后一张到第一张),提示点颜色 -->
<swiper
autoplay="{{false}}"
indicator-dots
circular
indicator-color="rgba(0,0,0,1)">
<!-- 添加一个内容 更改轮播图图片 -->
<block wx:for="{{image}}" wx:key="this" wx:for-index="ind1">
<!-- 将该for的下标Index命名为ind1 可以不用block,可以直接在swiper-item使用wx:for-->
<swiper-item >
<image src="{{item}}" data-ccc="ind1" ></image>
<!-- 将下标给到本地数据库data,并且命名ccc -->
</swiper-item >
</block>
</swiper>
<button bindtap="getImg">更改轮播图的图片</button>
<button bindtap="getc">在轮播图最后面添加一个图片</button>
<!-- 单独换图片 -->
<swiper indicator-dots
indicator-color="rgba(20,0,225,1)"
next-margin="20px"
previous-margin="20px"
autoplay
bindchange="pdd">
<swiper-item wx:for="{{imgArr}}" wx:key="this" > <!-- 循环imgArr里的内容 -->
<image src="{{item}}" bindtap="getima" data-cc="{{index}}" >
<!--image src="{{item}}含义: imgArr变量里的内容,如本文定义的图片地址 -->
<!-- 将下标给到本地数据库data,并且命名cc -->
</image>
</swiper-item >
</swiper>Page({
/**
* 页面的初始数据
*/
data: {
image: ["/images/0.jpg", "/images/1.jpg", "/images/2.jpeg"],
imgArr:["/images/0.jpg", "/images/1.jpg", "/images/2.jpeg"],
pdd:0,
},
getImg() {
var _this = this;
wx.chooseImage({
count: 3, //选择1张,最多选择9张
sizeType: ['original', 'compressed'], //是否原图
sourceType: ['album', 'camera'], //是否用相机还是相册
success(res) {
// tempFilePath可以作为img标签的src属性显示图片
const tempFilePaths = res.tempFilePaths
_this.setData({
image: res.tempFilePaths,
})
}
})
},
getc() {
var acc=this;
wx.chooseImage({
count: 1, //选择1张,最多选择9张
sizeType: ['original', 'compressed'], //是否原图
sourceType: ['album', 'camera'], //是否用相机还是相册
success(res) {
// tempFilePath可以作为img标签的src属性显示图片
const tempFilePaths = res.tempFilePaths
console.log(tempFilePaths);
acc.data.image.push([tempFilePaths.toString()])
// 在数组image后面增加图片
console.log(acc.data.image);
acc.setData({
image:acc.data.image
})
}
})
},
getima(e){
var _this=this;
//1.拿到我点击的图片下标
console.log(e);
// //2.把下标赋值给ac
var ac=parseInt(e.currentTarget.dataset.cc);
// console.log(ac);
// console.log(this.data.pdd);
wx.chooseImage({
count: 3, //选择1张,最多选择9张
sizeType: ['original', 'compressed'], //是否原图
sourceType: ['album', 'camera'], //是否用相机还是相册
success(res) {
// tempFilePath可以作为img标签的src属性显示图片
const tempFilePaths = res.tempFilePaths
// 3.将选择的图片的路径,赋值给imgArr
_this.data.imgArr[ac]=res.tempFilePaths[0]
// _this.data.imgArr[_this.data.pdd]=res.tempFilePaths[0]
_this.setData({
//4.将存在_this.data.imgArr的路径,赋值到imgArr
imgArr: _this.data.imgArr,
})
}
})
},
pdd(e){
// console.log(e.detail.current);
this.setData({
pdd:e.detail.current
})
}
})这里pdd(e)使用的是第二种方法(不需要可以删除),将所要修改的图片信息赋值给data:{}定义的pdd,此时_this.data.imgArr[_this.data.pdd]=res.tempFilePaths[0]这行里的_this.data.pdd为轮播图里的第几个图片,将要替换的图片的数据,替换近imArr[]里的第几个(_this.data.pdd)图片,最后_this.setData进行替换
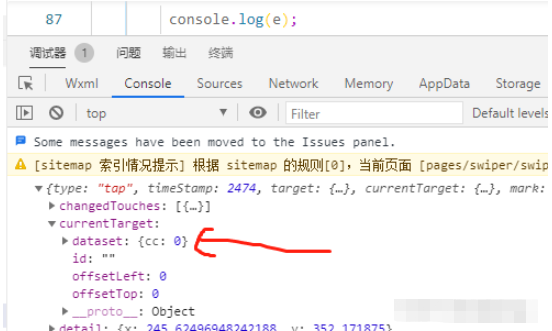
通过console.log输出的数据,看到将下标写入了本地数据,并且命名为cc
以上就是关于“微信小程序滚动、轮播图和文本怎么实现”这篇文章的内容,相信大家都有了一定的了解,希望小编分享的内容对大家有帮助,若想了解更多相关的知识内容,请关注亿速云行业资讯频道。
亿速云「云服务器」,即开即用、新一代英特尔至强铂金CPU、三副本存储NVMe SSD云盘,价格低至29元/月。点击查看>>
免责声明:本站发布的内容(图片、视频和文字)以原创、转载和分享为主,文章观点不代表本网站立场,如果涉及侵权请联系站长邮箱:is@yisu.com进行举报,并提供相关证据,一经查实,将立刻删除涉嫌侵权内容。


 计算
计算 安全
安全 数据库
数据库 网络和加速
网络和加速 企业服务
企业服务


