这篇文章主要介绍了怎么用Springboot+Vue+axios实现文章收藏功能的相关知识,内容详细易懂,操作简单快捷,具有一定借鉴价值,相信大家阅读完这篇怎么用Springboot+Vue+axios实现文章收藏功能文章都会有所收获,下面我们一起来看看吧。
先从数据库出发

id_blog主要就是关联对应的文章,id_user就是是谁对这个文章收藏了,这样后续利于用户查询自己收藏的文章列表,create_time可以加上添加时间,这个字段后续可进行按照时间排序。
数据库创建好后,就写实体类
@Data
@EqualsAndHashCode(callSuper = false)
@Accessors(chain = true)
public class BlogCollection implements Serializable {

    private static final long serialVersionUID = 1L;

    @TableId(value = "id", type = IdType.AUTO)
    private Integer id;

    private Integer idBlog;

    private Integer idUser;

    @JsonFormat(pattern = "yyyy-MM-dd HH:mm:ss")
    @TableField(fill = FieldFill.INSERT)
    private LocalDateTime createTime;
}
Mapper
public interface BlogCollectionMapper extends BaseMapper<BlogCollection> {
    @Insert("insert into 表名  values(字段名)")
    void addCollection(BlogCollection bc);
    //可以用mybatisPlus插入数据方便
}
Service
public interface BlogCollectionService extends IService<BlogCollection> {
    void addCollection(BlogCollection bc);
}
serviceImpl
public class BlogCollectionServiceImpl extends ServiceImpl<BlogCollectionMapper, BlogCollection> implements BlogCollectionService {

    @Autowired
    BlogCollectionMapper blogCollectionMapper;
    @Override
    public void addCollection(BlogCollection bc) {
        blogCollectionMapper.addCollection(bc);
    }
}
Controller
@RestController
@RequestMapping("/BlogCollection")
public class BlogCollectionController {
    @Resource
    BlogCollectionService blogCollectionService;
    @Resource
   BlogCollectionMapper BlogCollectionMapper;
    //收藏
    @PostMapping("/addBlogCollection")
    public Result<?> addBlog(@RequestBody BlogCollection blogCollection) {
        blogCollectionService.addCollection(blogCollection);
        return Result.success();
    }
}
以上就是添加收藏的部分代码,然后就是写前端调用及渲染到页面上
<div class="button_content" >
   <el-button @click="addCollection" v-if="collectionState===false" type="text" >
      <el-icon  color="#999aaa"><StarFilled /></el-icon>
       {{collectionCount }}
          </el-button>
          <el-button @click="delCollection" v-if="collectionState===true" type="text" >
            <el-icon  color="#999aaa"><StarFilled /></el-icon>
            {{collectionCount }}
          </el-button>
          <el-button type="text" @click="" >
            <el-icon  color="#999aaa"> <ChatDotRound /></el-icon>
            {{ messageCount }}
  </el-button>
</div>
Js部分
 data(){
    return{
    collectionIds:{},
    collectionState:false,//默认是false则是可收藏,true的话就是已收藏
    }
    },
    methods:{
    add(){
      this.collectionIds.idBlog=this.$route.query.id //当前文章ID
      this.collectionIds.idUser=this.user.id //当前用户ID
    request.post("/BlogCollection/addBlogCollection",this.collectionIds).then(res=>{
        if (res.code === '0') {
          this.$message({
            message: "收藏成功",
            type: "success"
          });
          this.collectionState=true
          console.log(this.collectionState)
        } else {
          this.$message({
            message: res.msg,
            type: "error"
          });
        }
      })
    }
    }
在页面加载时获取该用户判断是否收藏该文章
getState(){
let userJson=sessionStorage.getItem("user")
let userid=JSON.parse(userJson).id
request.get("/user/getState/"+userid).then(res=>{
if(res.data!=null){ //从表中查询是否有记录,不为空把collectionState设置true
this.collectionState=true
}
if(res.data.length){ //获取结果集如果存在则把collectionState设置true,防止重复收藏
this.collectionState=true
}
})
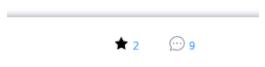
},获取用户收藏状态需要在页面加载时调用,需要在created里进行调用,其次就是取消收藏功能也是跟这个逻辑一样的,在点击取消收藏后将collectionState设置为false即可,后台的话就通过用户id对收藏表查询删除就可以啦!奉上效果图:
未收藏状态

已收藏状态
补充:request是axios封装的一个工具,大家也可以使用原axios进行对后台接口调用
关于“怎么用Springboot+Vue+axios实现文章收藏功能”这篇文章的内容就介绍到这里,感谢各位的阅读!相信大家对“怎么用Springboot+Vue+axios实现文章收藏功能”知识都有一定的了解,大家如果还想学习更多知识,欢迎关注亿速云行业资讯频道。
免责声明:本站发布的内容(图片、视频和文字)以原创、转载和分享为主,文章观点不代表本网站立场,如果涉及侵权请联系站长邮箱:is@yisu.com进行举报,并提供相关证据,一经查实,将立刻删除涉嫌侵权内容。


