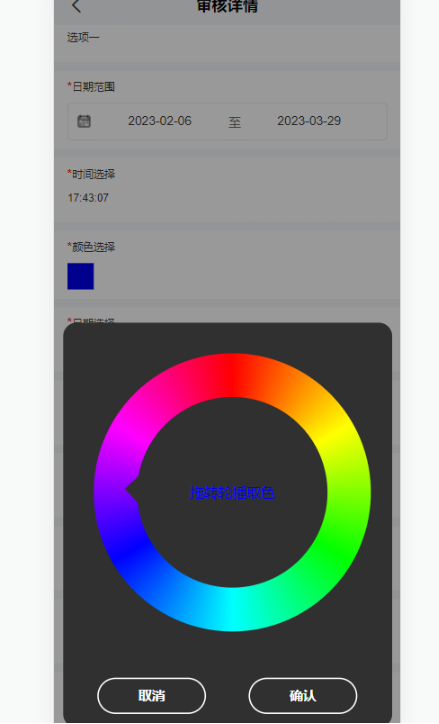
这篇文章主要介绍了uni-app如何封装一个取色器组件的相关知识,内容详细易懂,操作简单快捷,具有一定借鉴价值,相信大家阅读完这篇uni-app如何封装一个取色器组件文章都会有所收获,下面我们一起来看看吧。
那么 下面这个组件或许能解决您的烦恼
<template>
	<view class="content">
		<view class="dialog">
			<view id="colorBg" class="colorBg" @touchstart="startTouch" @touchmove="moveIng"
				@touchend="endTouch">
				<view class="roundBuff" :catchtouchmove="true" @c.stop="()=>{}" :></view>
				<view class="colorPan" :>拖转轮播取色</view>
			</view>
			<view class="flex" >
				<button class="lee_btn" @click.stop = "close" type="default">取消</button>
				<button class="lee_btn" @click.stop = "readColor" type="default">确认</button>
			</view>
		</view>
	</view>
</template>

<script>
	export default {
		data() {
			return {
				pointerShow: true,
				colorPanWidth: 20,
				colorPanRadius: 0,
				pointerBox: {},
				degrees: 0
			}
		},
		mounted() {
			uni.getSystemInfo({
				success: (res) => {
					uni.createSelectorQuery().select('#colorBg').boundingClientRect((rect) => {
						this.pointerBox = rect
					}).exec()
					this.colorPanRadius = res.screenWidth * 0.4
				}
			})
		},
		methods: {
			close(){
                this.$emit('close');
			},
			readColor(){
				let colro = this.getColorByDeg(this.degrees);
				this.$emit('change',colro);
			},
            rbg2Hex(r, g, b) {
                return '#' + ((1 << 24) + (r << 16) + (g << 8) + b).toString(16).slice(1);
            },
            calculationScheme(deg) {
              deg = 360- deg + 120
		      const r = Math.round(Math.sin((deg * 2 * Math.PI) / 360) * 255)
		      const g = Math.round(Math.sin(((deg + 120) * 2 * Math.PI) / 360) * 255)
		      const b = Math.round(Math.sin(((deg + 240) * 2 * Math.PI) / 360) * 255)
              return this.colorRgbToHex(`rgb(${r},${g},${b})`);
            },
			startTouch(e) {
				const {
					pageX,
					pageY
				} = e.touches[0]
				this.rotatePointer(pageX, pageY)
			},
			endTouch(e) {
				const {
					pageX,
					pageY
				} = e.changedTouches[0]
				this.rotatePointer(pageX, pageY)
			},
			moveIng(e) {
				const {
					pageX,
					pageY
				} = e.touches[0]
				this.rotatePointer(pageX, pageY)
			},
			rotatePointer(pageX = 0, pageY = 0) {
				const {
					pointerBox,
					colorPanWidth
				} = this
				const mouseX = pageX - colorPanWidth
				const mouseY = pageY - colorPanWidth
				var centerY = pointerBox.top + (pointerBox.height / 2) - 0,
					centerX = pointerBox.left + (pointerBox.height / 2) - 0,
					radians = Math.atan2(mouseX - centerX, mouseY - centerY)
				this.degrees = (radians * (180 / Math.PI) * -1) + 180;
			},
		     getColorByDeg(deg) {
		      deg = 360- deg + 120
		      const r = Math.round(Math.sin((deg * 2 * Math.PI) / 360) * 255)
		      const g = Math.round(Math.sin(((deg + 120) * 2 * Math.PI) / 360) * 255)
		      const b = Math.round(Math.sin(((deg + 240) * 2 * Math.PI) / 360) * 255)
		      return `rgb(${r},${g},${b})`
		    },
			colorRgbToHex(rgbStr) {
				const reg = /^#([0-9a-fA-f]{3}|[0-9a-fA-f]{6}|[0-9a-fA-f]{8}|[0-9a-fA-f]{6}[0-9]{2})$/;
				if (reg.test(rgbStr)) {
					return rgbStr
				} else {
					const rgbArray = rgbStr.replace(/(?:\(|\)|rgba|rgb|RGBA|RGB)*/g, "").split(",");
					let strHex = "#";
					for (let i = 0; i < rgbArray.length; i++) {
					if (i !== 3) {
						if (rgbArray[i] == "0") {
						    strHex += "00"
						} else {
						    let newItem =Number(rgbArray[i]).toString(16)
						if (newItem.length < 2){
							newItem = "0" + newItem
						}
						    strHex += newItem
						}
							} else {
						strHex += rgbArray[i] == "0" ? "" : Number(rgbArray[i]) * 100
					}
					}
					return strHex;
				}
			}
		}
	}
</script>

<style>


	.dialog {
		display: block;
		border-radius: 30rpx;
		background-color: #303030;
		margin: 20rpx;
		padding: 30rpx;
	}

	.flex {
		display: flex;
		justify-content: space-between;
	}

	.colorBg {
		width: 80vw;
		height: 80vw;
		margin: 5vw;
		background: conic-gradient(red,
				yellow,
				lime,
				aqua,
				blue,
				fuchsia,
				red);
		border-radius: 50%;
		position: relative;
		display: flex;
		justify-content: center;
		align-items: center;
	}

	.roundBuff {
		width: 55vw;
		height: 55vw;
		-webkit-transform-origin: center 50%;
		transform-origin: center 50%;
		background: #303030;
		border-radius: 50%;
	}
	.roundBuff::before {
      content: "";
      width: 15px;
      height: 15px;
	  background: #303030;
      border: solid #303030;
      border-width: 10px 10px 0 0;
      transform: translate(-50%, -50%) rotate(-45deg);
      position: absolute;
      left: 50%;
      top: 2%;
}

	.lee_btn {
		background: #00000000;
		color: #FFFFFF;
		width: 36%;
		height: 80rpx;
		line-height: 70rpx;
		text-align: center;
		justify-content: center;
		font-size: 30rpx;
		border-radius: 50rpx;
		border: 5rpx #FFFFFF solid;
		font-weight: bold;
		padding: 1px 20px;
	}

	.colorPan {
		position: absolute;
		color: #FFFFFF;
	}
</style>
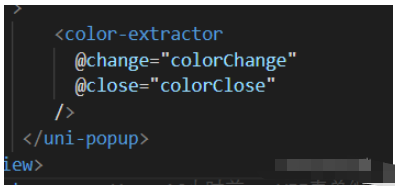
直接将整个组件复制过去 接口使用

组件有两个方法
change 当你点击确定时触发 返回 RGB 色码
close 当你点击取消时触发

关于“uni-app如何封装一个取色器组件”这篇文章的内容就介绍到这里,感谢各位的阅读!相信大家对“uni-app如何封装一个取色器组件”知识都有一定的了解,大家如果还想学习更多知识,欢迎关注亿速云行业资讯频道。
免责声明:本站发布的内容(图片、视频和文字)以原创、转载和分享为主,文章观点不代表本网站立场,如果涉及侵权请联系站长邮箱:is@yisu.com进行举报,并提供相关证据,一经查实,将立刻删除涉嫌侵权内容。