这篇文章主要介绍了Vue中的高德轨迹回放怎么实现的相关知识,内容详细易懂,操作简单快捷,具有一定借鉴价值,相信大家阅读完这篇Vue中的高德轨迹回放怎么实现文章都会有所收获,下面我们一起来看看吧。
进入页面后点击开发支持→地图JS API
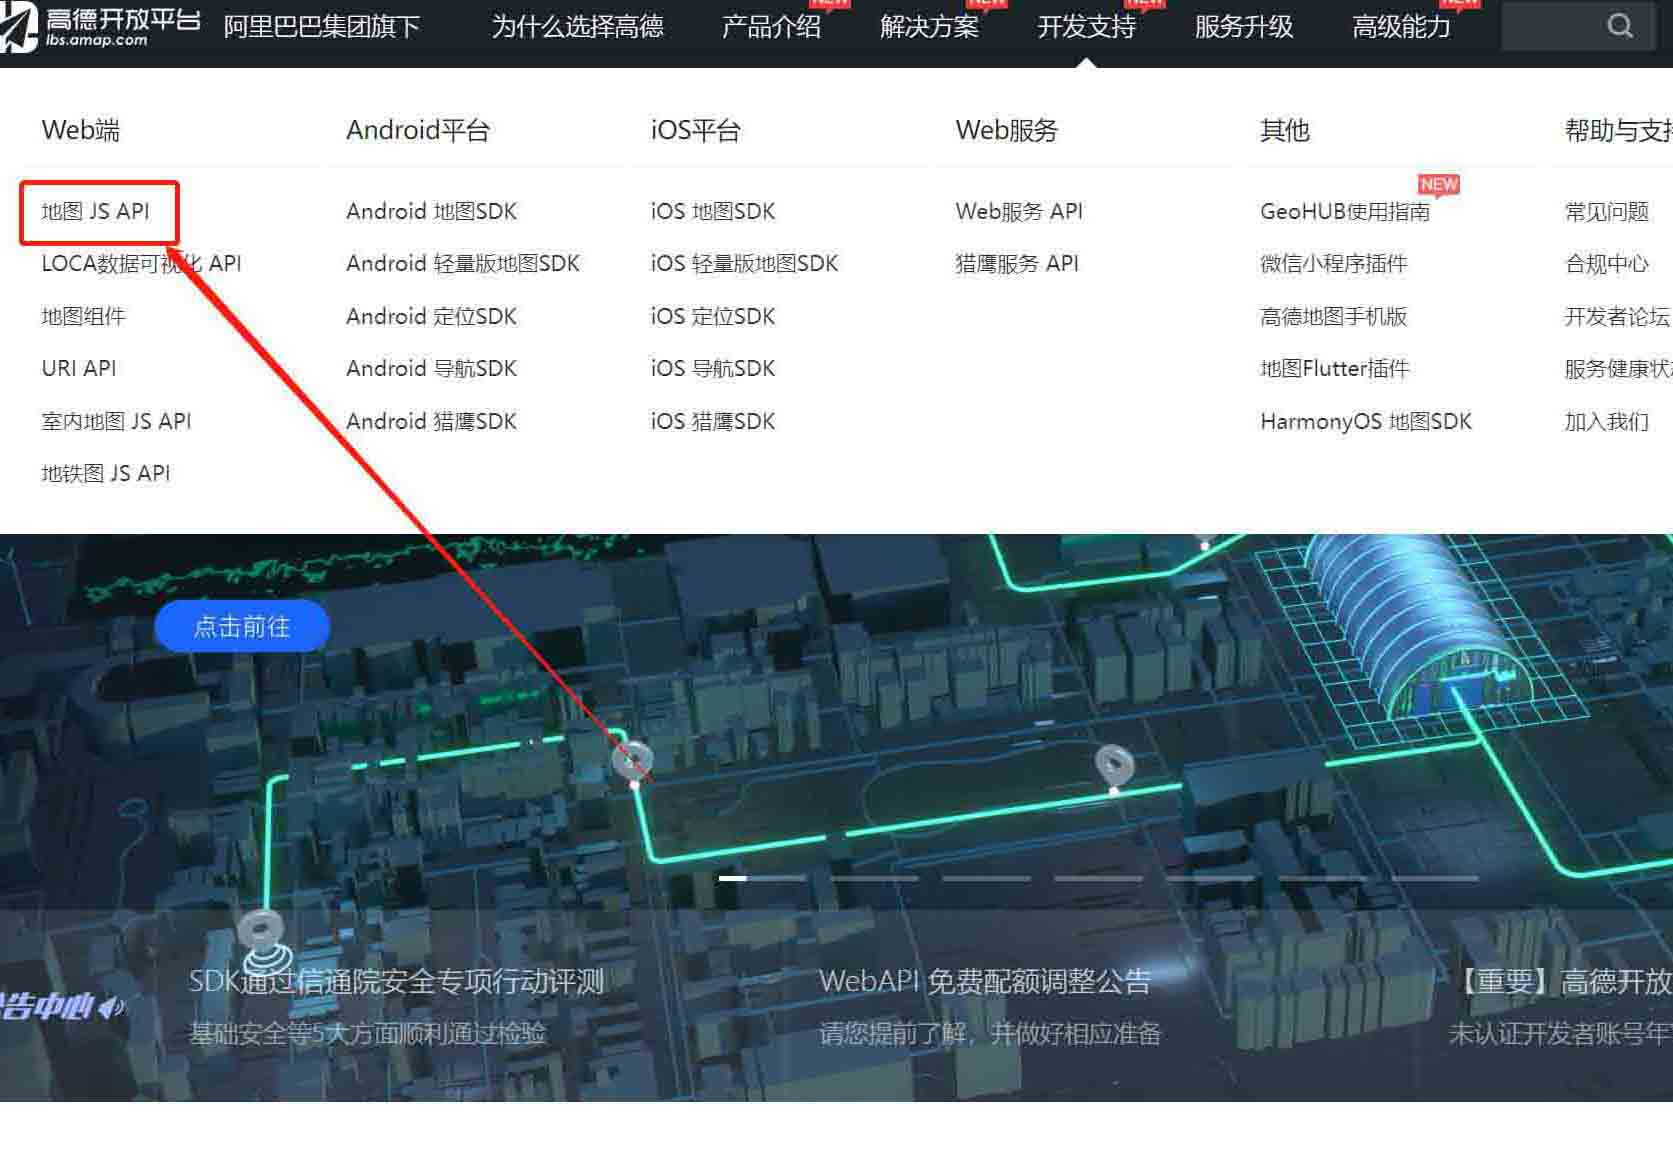
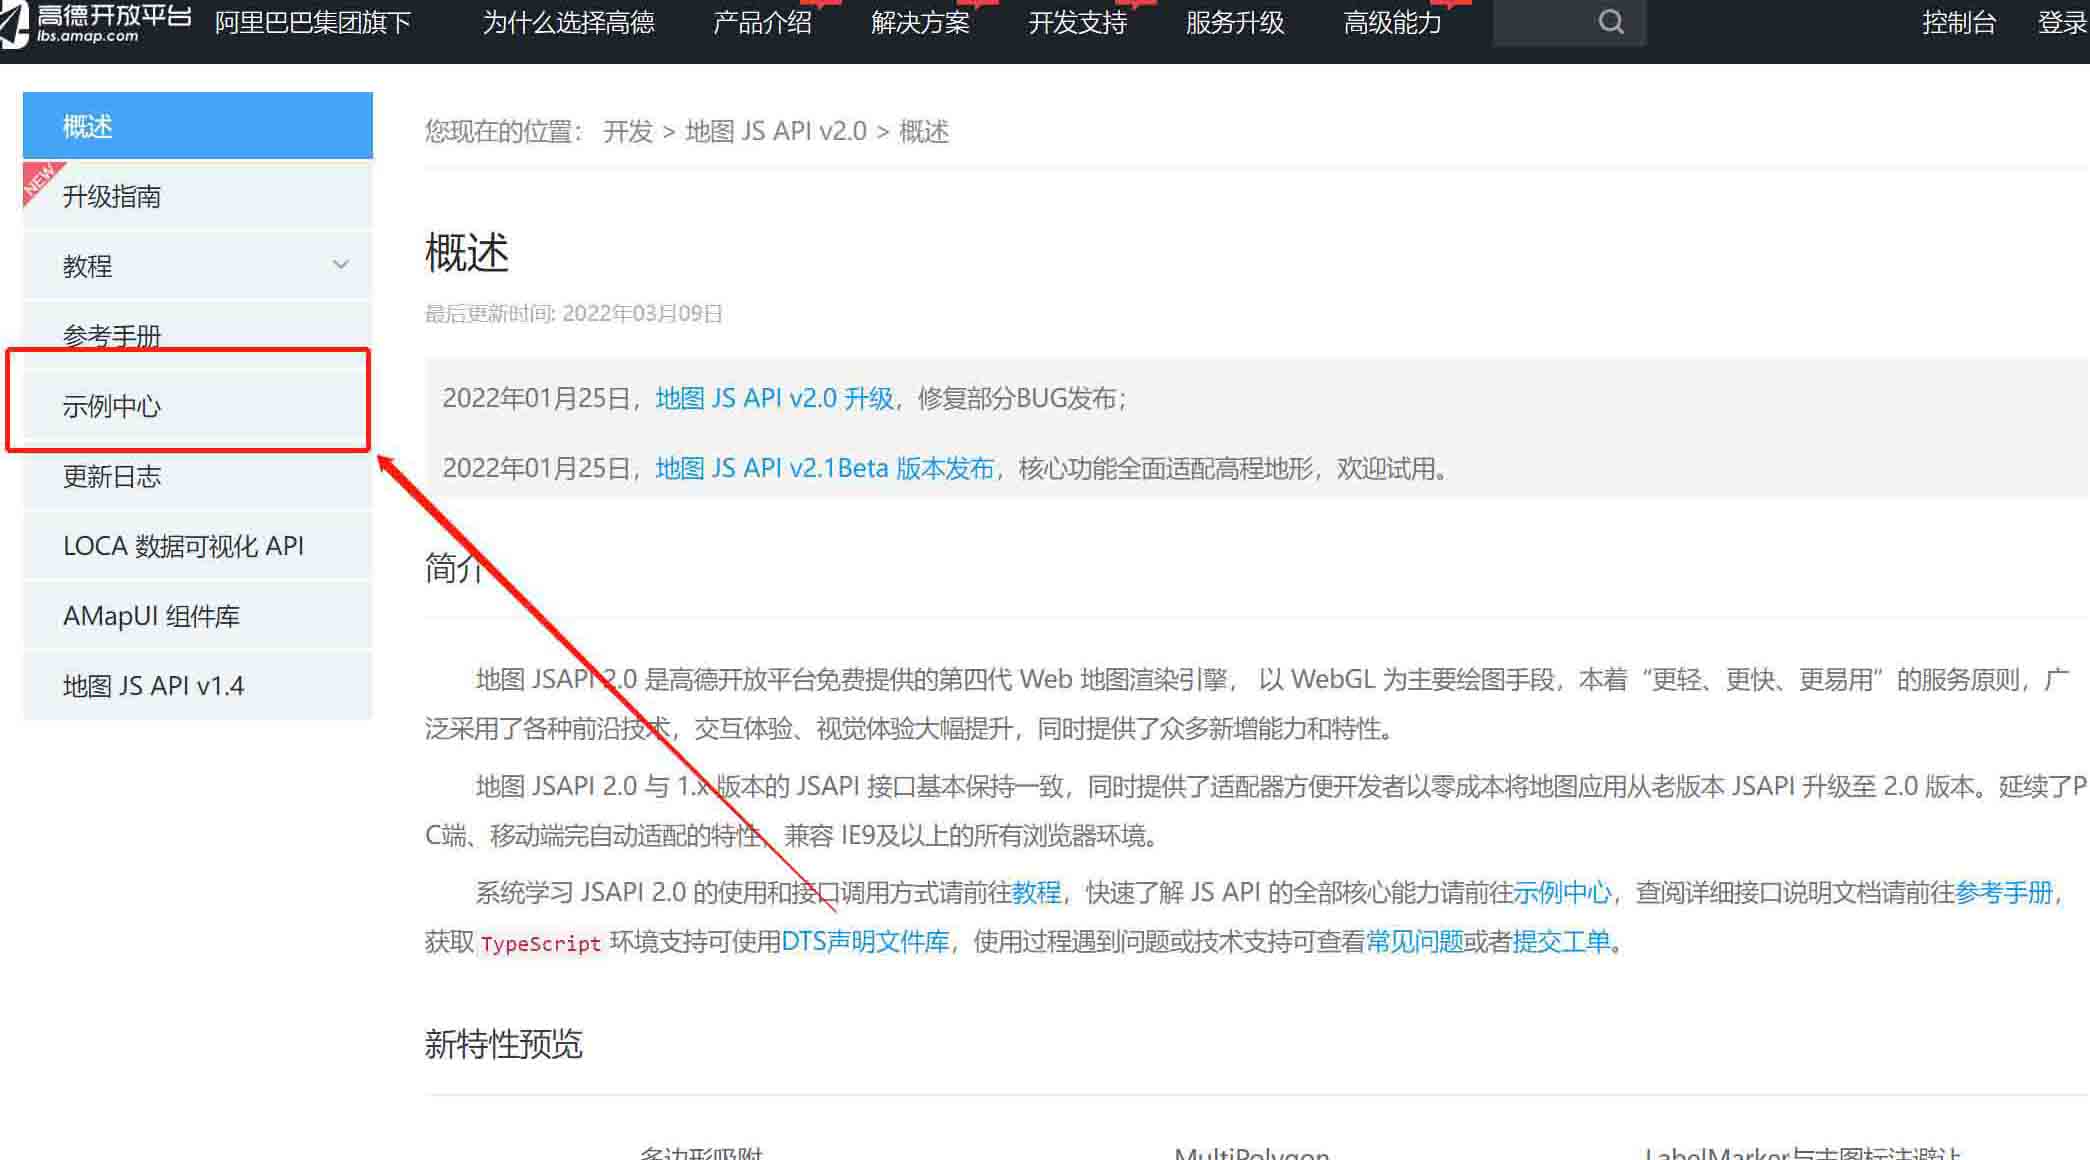
进入地图JS API后点击示例中心,进入界面后拉到底下找到轨迹回放
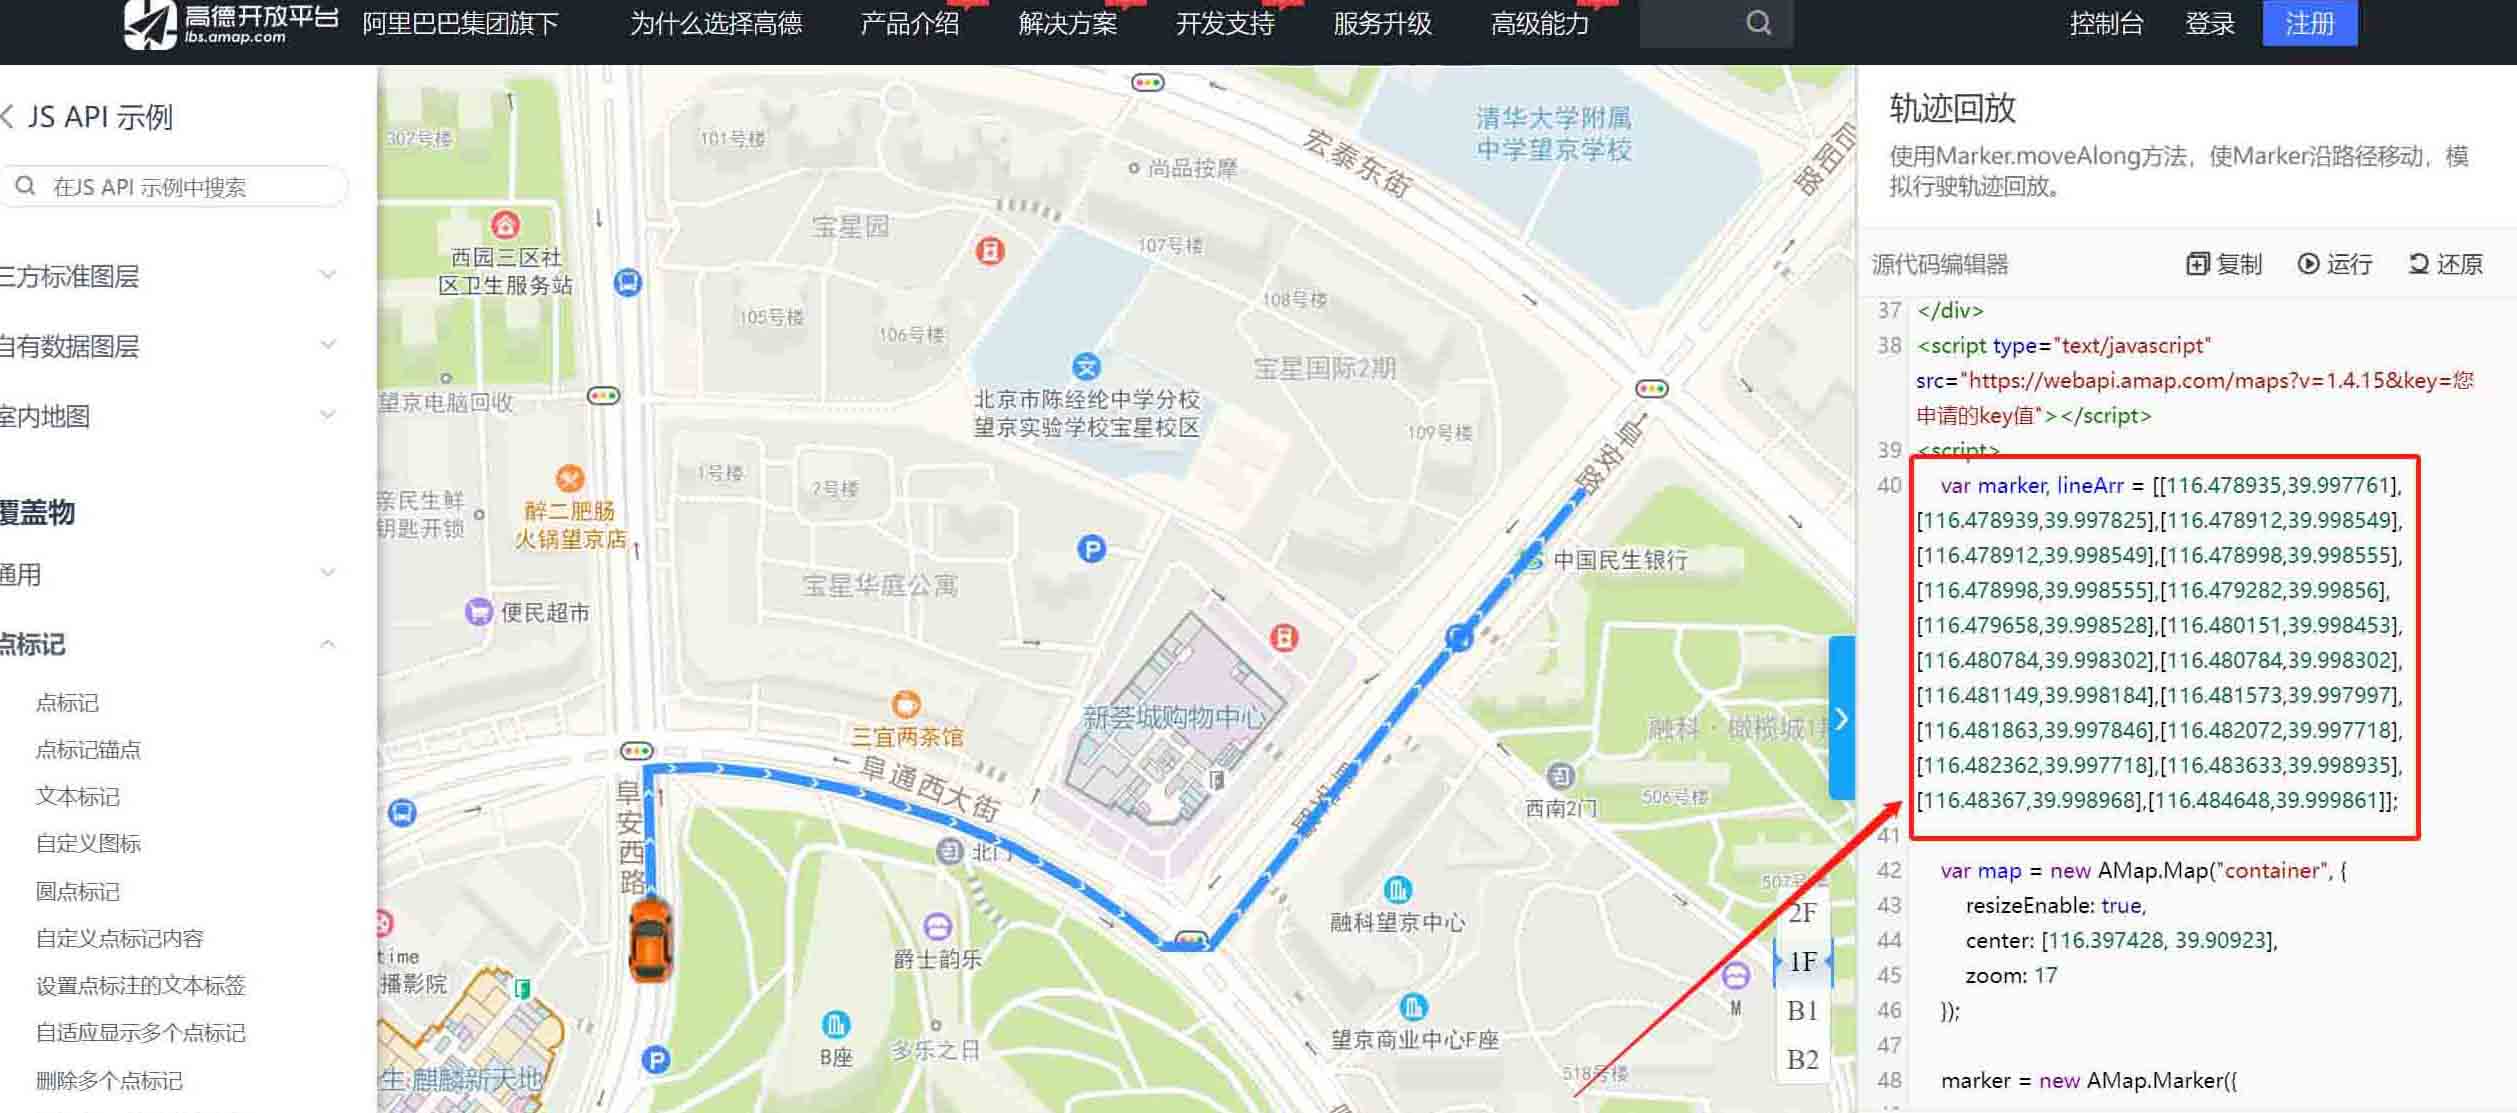
进入后打开轨迹回放如下图中已有示例,模拟小车的行驶轨迹。其模拟的轨迹为右侧框图的小车模拟位置点, 将自己获取的经纬度点替代上面提到的小车模拟位置点即可验证自己设备输出的GPS位置的准确性。(注意:此页面代码为HTML格式)
<template>
	<div>
	    <div id="container"></div>
	    <div class="input-card">
	      <h5>轨迹回放控制</h5>
	      <div class="input-item">
	        <input type="button" class="btn" value="开始动画" id="start" @click="startAnimation()" />
	        <input type="button" class="btn" value="暂停动画" id="pause" @click="pauseAnimation()" />
	      </div>
	      <div class="input-item">
	        <input type="button" class="btn" value="继续动画" id="resume" @click="resumeAnimation()" />
	        <input type="button" class="btn" value="停止动画" id="stop" @click="stopAnimation()" />
	      </div>
	    </div>
	  </div>
</template><script type="text/javascript" src="https://webapi.amap.com/maps?v=1.4.15&key=您申请的key值"></script>
<script>
//请求路径
//import {
//playbacklist,
//} from "@/api/obd/playback";
export default {
mounted() {
this.initMap();
},
beforeDestroy() {
this.map && this.map.destroy();
},
data() {
return {
map: null,
marker: null,
lineArr: [
[116.478935, 39.997761],
[116.478939, 39.997825],
[116.478912, 39.998549],
[116.478912, 39.998549],
[116.478998, 39.998555],
[116.478998, 39.998555],
[116.479282, 39.99856],
[116.479658, 39.998528],
[116.480151, 39.998453],
[116.480784, 39.998302],
[116.480784, 39.998302],
[116.481149, 39.998184],
[116.481573, 39.997997],
[116.481863, 39.997846],
[116.482072, 39.997718],
[116.482362, 39.997718],
[116.483633, 39.998935],
[116.48367, 39.998968],
[116.484648, 39.999861]
]
};
},
methods: {
initMap() {
this.map = new AMap.Map("container", {
resizeEnable: true,
center: [116.397428, 39.90923],
zoom: 17
});
this.marker = new AMap.Marker({
map: this.map,
position: [116.478935, 39.997761],
icon: "https://webapi.amap.com/images/car.png",
offset: new AMap.Pixel(-26, -15),
autoRotation: true,
angle: -90
});
// 绘制轨迹
let polyline = new AMap.Polyline({
map: this.map,
path: this.lineArr,
showDir: true,
strokeColor: "#28F", //线颜色
// strokeOpacity: 1, //线透明度
strokeWeight: 6 //线宽
// strokeStyle: "solid" //线样式
});
let passedPolyline = new AMap.Polyline({
map: this.map,
// path: this.lineArr,
strokeColor: "#AF5", //线颜色
// strokeOpacity: 1, //线透明度
strokeWeight: 6 //线宽
// strokeStyle: "solid" //线样式
});
this.marker.on("moving", function (e) {
passedPolyline.setPath(e.passedPath);
});
this.map.setFitView();
},
startAnimation() {
this.marker.moveAlong(this.lineArr, 200);
},
pauseAnimation() {
this.marker.pauseMove();
},
resumeAnimation() {
this.marker.resumeMove();
},
stopAnimation() {
this.marker.stopMove();
}
}
};
</script><style lang="less" scoped>
// @import url('https://a.amap.com/jsapi_demos/static/demo-center/css/demo-center.css');
#container {
height: 1000px;
width: 100%;
}
.input-card .btn {
margin-right: 1.2rem;
width: 9rem;
}
.input-card .btn:last-child {
margin-right: 0;
}
.btn {
display: inline-block;
font-weight: 400;
text-align: center;
white-space: nowrap;
vertical-align: middle;
-webkit-user-select: none;
-moz-user-select: none;
-ms-user-select: none;
user-select: none;
border: 1px solid transparent;
transition: color .15s ease-in-out, background-color .15s ease-in-out, border-color .15s ease-in-out, box-shadow .15s ease-in-out;
background-color: transparent;
background-image: none;
color: #25A5F7;
border-color: #25A5F7;
padding: .25rem .5rem;
line-height: 1.5;
border-radius: 1rem;
-webkit-appearance: button;
cursor:pointer;
}
.input-item {
position: relative;
display: -ms-flexbox;
display: flex;
-ms-flex-wrap: wrap;
flex-wrap: wrap;
-ms-flex-align: center;
align-items: center;
width: 100%;
height: 3rem;
}
.input-card {
display: flex;
flex-direction: column;
min-width: 0;
word-wrap: break-word;
background-color: #fff;
background-clip: border-box;
border-radius: .25rem;
width: 22rem;
border-width: 0;
border-radius: 0.4rem;
box-shadow: 0 2px 6px 0 rgba(114, 124, 245, .5);
position: fixed;
bottom: 1rem;
right: 1rem;
-ms-flex: 1 1 auto;
flex: 1 1 auto;
padding: 0.75rem 1.25rem;
}
</style>启动时会遇到Module not found: Error: Can’t resolve ‘less-loader’ in '文件位置’报错
原因是因为 less 、 less-loader模块未安装,但在中进行使用
解决方法:npm install --save-dev less-loader less
直接安装可能会存在版本太高问题的报错,进行npm run dev时项目无法启动
解决方法:npm install less-loader@5.0.0 -D 可在版本位置选择合适的版本
关于“Vue中的高德轨迹回放怎么实现”这篇文章的内容就介绍到这里,感谢各位的阅读!相信大家对“Vue中的高德轨迹回放怎么实现”知识都有一定的了解,大家如果还想学习更多知识,欢迎关注亿速云行业资讯频道。
亿速云「云服务器」,即开即用、新一代英特尔至强铂金CPU、三副本存储NVMe SSD云盘,价格低至29元/月。点击查看>>
免责声明:本站发布的内容(图片、视频和文字)以原创、转载和分享为主,文章观点不代表本网站立场,如果涉及侵权请联系站长邮箱:is@yisu.com进行举报,并提供相关证据,一经查实,将立刻删除涉嫌侵权内容。
原文链接:https://blog.csdn.net/Five297/article/details/126879273


 计算
计算 安全
安全 数据库
数据库 网络和加速
网络和加速 企业服务
企业服务


