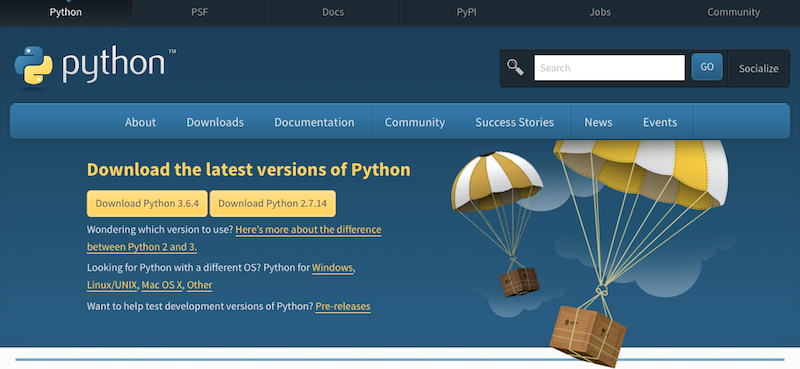
有两种安装方法:
$brewinstall python如果出错的话前面加上sudo
方法一安装的是python2.7
方法二:从官网下载安装最新版本(本次安装的内容)
官网地址:https://www.python.org/download,下载安装最新版的python ,安装简单,一路点击OK;不便之处是后续卸载维护需要手动进行。
可以用这个命令查看python3安装的位置:
$which python3安装完成后在终端中键入python3来验证安装是否成功.
打开Mac终端,输入“python3”,回车,查看是否是自己装的Python版本(如果Mac系统版本是10.8—10.11,默认自带的是Python2.7)。输入Python3后,看到显示【>>>】,说明已经在Python的交互环境中了,可以正常使用。
这里安装的是pip3。
安装了python3之后,会有pip3
注意:
1. 使用pip install XXX
新安装的库会放在这个目录下面
python2.7/site-packages
2. 使用pip3 install XXX
新安装的库会放在这个目录下面
python3.6/site-packages
如果使用python3执行程序,那么就不能import python2.7/site-packages中的库
pip3 是一个安装和管理 Python3 包的工具,pip 是一个安装和管理 Python 包的工具,python安装包的工具有easy_install, setuptools, pip,distribute等。distribute是setuptools的替代品,是对标准库disutils模块的增强,我们知道disutils主要是用来更加容易的打包和分发包,特别是对其他的包有依赖的包。distribute被创建是因为Setuptools包不再维护了。而pip/pip3是easy_install的替代品。
$wget https://bootstrap.pypa.io/get-pip.py如果没有安装wget可以去这里:https://ftp.gnu.org/gnu/wget/下载
可以输入wget www.baidu.com 测试是否安装成功

将所有内容复制下来,新建get-pip.py文件,将内容拷贝粘贴进去.
执行命令行:
$ sudo python3 get-pip.py执行出错:
The directory '/Users/xsnai/Library/Caches/pip/http' or its parent directory is not owned by the current user and the cache has been disabled. Please check the permissions and owner of that directory. If executing pip with sudo, you may want sudo's -H flag.
换成下列命令:
$sudo -H python3 get-pip.pyRequirement already up-to-date: pip in /Library/Frameworks/Python.framework/Versions/3.6/lib/python3.6/site-packages
执行成功!
终端命令行输入pip3检测。
检测结果:
Usage:

  pip <command> [options]

Commands:

  install                     Install packages.

  download                    Download packages.

  uninstall                   Uninstall packages.

  freeze                      Output installed packages in requirements format.

  list                        List installed packages.

  show                        Show information about installed packages.

  check                       Verify installed packages have compatible dependencies.

  search                      Search PyPI for packages.

  wheel                       Build wheels from your requirements.

  hash                        Compute hashes of package archives.

  completion                  A helper command used for command completion.

  help                        Show help for commands.


General Options:

  -h, --help                  Show help.

  --isolated                  Run pip in an isolated mode, ignoring

                              environment variables and user configuration.

  -v, --verbose               Give more output. Option is additive, and can be

                              used up to 3 times.

  -V, --version               Show version and exit.

  -q, --quiet                 Give less output. Option is additive, and can be

                              used up to 3 times (corresponding to WARNING,

                              ERROR, and CRITICAL logging levels).

  --log <path>                Path to a verbose appending log.

  --proxy <proxy>             Specify a proxy in the form

                              [user:passwd@]proxy.server:port.

  --retries <retries>         Maximum number of retries each connection should

                              attempt (default 5 times).

  --timeout <sec>             Set the socket timeout (default 15 seconds).

  --exists-action <action>    Default action when a path already exists:

                              (s)witch, (i)gnore, (w)ipe, (b)ackup, (a)bort.

  --trusted-host <hostname>   Mark this host as trusted, even though it does

                              not have valid or any HTTPS.

  --cert <path>               Path to alternate CA bundle.

  --client-cert <path>        Path to SSL client certificate, a single file

                              containing the private key and the certificate

                              in PEM format.

  --cache-dir <dir>           Store the cache data in <dir>.

  --no-cache-dir              Disable the cache.

  --disable-pip-version-check

                              Don't periodically check PyPI to determine

                              whether a new version of pip is available for

download. Implied with --no-index.国内由于网络原因,使用pip3或和pip安装一些模块会特别慢甚至无法下载,因此我们需要修改源到国内的一些镜像地址,特别感谢国内无私奉献的组织~
首先进入HOME路径:
cd ~创建.pip目录:
mkdir .pip创建pip.conf文件:
touch pip.conf大家可以用自己喜欢的编辑器打开pip.conf文件,我现在使用的时v2ex的源,所以添加:
[global]
index-url = http://pypi.v2ex.com/simple
大家可以把index-url的值设置为自己实际源的地址.
至此pip3源修改成功,以后使用pip安装模块时都会从这个源去下载安装,大家可以自行测试一下.
国内有如下下载源:
清华:https://pypi.tuna.tsinghua.edu.cn/simple
阿里云:http://mirrors.aliyun.com/pypi/simple/
中国科技大学 https://pypi.mirrors.ustc.edu.cn/simple/
华中理工大学:http://pypi.hustunique.com/
山东理工大学:http://pypi.sdutlinux.org/
豆瓣:http://pypi.douban.com/simple/
临时使用:
可以在使用pip/pip3的时候加参数-i https://pypi.tuna.tsinghua.edu.cn/simple
如:
pip install -i https://pypi.tuna.tsinghua.edu.cn/simple pyspider
这样就会从清华这边的镜像去安装pyspider库。
永久修改,一劳永逸:
Linux下,修改 ~/.pip/pip.conf (没有的话就创建一个文件夹及文件。文件夹要加“.”,表示是隐藏文件夹)
内容如下:
[global]
index-url = https://pypi.tuna.tsinghua.edu.cn/simple
[install]
trusted-host=mirrors.aliyun.com
windows下,直接在user目录中创建一个pip目录,如:C:\Users\xx\pip,新建文件pip.ini。内容同上。
PIL(Python Imaging Library)图像处理模块,在python3.X已经替换为pillow模块(文档:http://pillow.readthedocs.org/en/latest/)。
直接使用pip3 install pillow即可安装模块,导入时使用from PIL import Image.
命令行如下:
$pip3 install pillow执行过程如下:
Collecting pillow

 Downloading Pillow-4.3.0-cp36-cp36m-macosx_10_6_intel.macosx_10_9_intel.macosx_10_9_x86_64.macosx_10_10_intel.macosx_10_10_x86_64.whl (3.5MB)

  100% |████████████████████████████████| 3.6MB 19kB/s

Collecting olefile (from pillow)

 Downloading olefile-0.44.zip (74kB)

  100% |████████████████████████████████| 81kB 13kB/s

Building wheels for collected packages: olefile

 Running setup.py bdist_wheel for olefile ... done

 Stored in directory: /Users/xsnai/Library/Caches/pip/wheels/20/58/49/cc7bd00345397059149a10b0259ef38b867935ea2ecff99a9b

Successfully built olefile

Installing collected packages: olefile, pillow

Successfully installed olefile-0.44 pillow-4.3.04句代码实现汉字识别
from PIL import Image
import pytesseract
text=pytesseract.image_to_string(Image.open('denggao.jpeg'),lang='chi_sim')
print(text)需要先安装两个包,如果没有安装的话。
pip3 install PIL
pip3 install pytesseract
还需要下载中文语言包tesseract-ocr
更多关于Mabook安装Python最新版本(3.6.4)、GUI开发环境、图像处理、视频处理环境请查看下面的相关链接
亿速云「云服务器」,即开即用、新一代英特尔至强铂金CPU、三副本存储NVMe SSD云盘,价格低至29元/月。点击查看>>
免责声明:本站发布的内容(图片、视频和文字)以原创、转载和分享为主,文章观点不代表本网站立场,如果涉及侵权请联系站长邮箱:is@yisu.com进行举报,并提供相关证据,一经查实,将立刻删除涉嫌侵权内容。