本篇文章为大家展示了微信小程序中怎么自定义一个components组件,内容简明扼要并且容易理解,绝对能使你眼前一亮,通过这篇文章的详细介绍希望你能有所收获。
小程序自定义组件
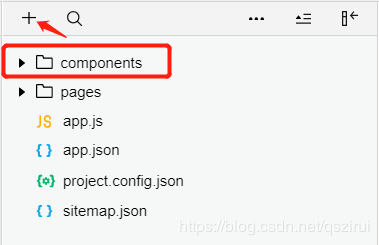
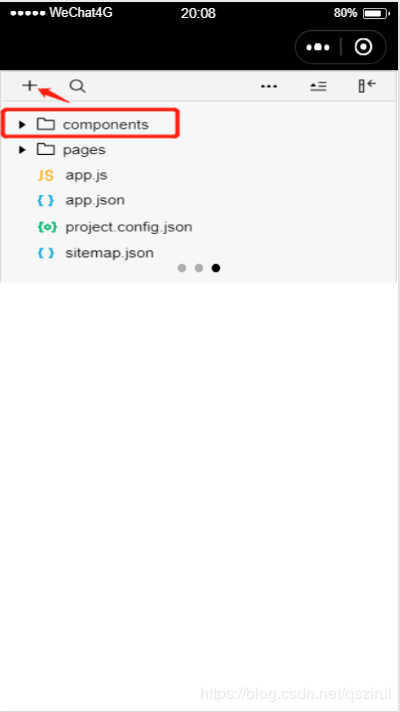
找到components目录,没有就新建

在compoents目录里新建一个用于存放代码的目录(下面用g-swiper表示)
在g-swiper目录里新建Compoent(名字自取),新建后会和新建Page时一样自动生成四个页面文件(g-swiper.wxml g-swiper.wxss g-swiper.js g-swiper.json)
轮播图实例
<g-swiper list="{{imageList}}" g-class="swiper"/>在index.wxml里只需要这简短一行代码就能实现一个轮播图组件

json声明
要想使用组件必先声明,在index.json里声明组件名称和地址
{
 "usingComponents": {
  "g-swiper":"/components/g-swiper/g-swiper"
 }
}
在组件的json也必须的声明,g-swiper.json(下面代码直接复制报错请将注释删掉)
{
 "component": true,    // 自定义组件声明
 "usingComponents": {}   // 可选项,用于引用别的组件
}
wxml和wxss
wxml和wxss里的代码跟普通页面里的代码没什么区别
g-swiper.wxml代码
<swiper class="g-class" circular autoplay interval='3000' duration='300' indicator-dots indicator-active-color='#fffff'>
 <block wx:for="{{list}}" wx:key="{{index}}">
  <swiper-item class="swiper-item">
   <image src="{{item}}"/>
  </swiper-item>
 </block>
</swiper>
g-swiper.wxss代码
.swiper-item image{
 width:100%;
 height:100%
}
js
js代码和普通页面js代码有所不同,这里是用Component包起来的而不是被Page包起来的
js代码
Component({
 externalClasses:["g-class"],
 properties: {
   list:{
    type:Array,
    value:[]
   }
 },
})
注意:这里的g-class样式和list数据我将它的定义权利交给引入它的一方,这里是index页面引入它
组件绑定外部方法
组件绑定外部方法的方式,以一自定义button为例
g-btn.wxml代码
<button bindtap="btnTest">g-btn</button>
g-btn.js代码
Component({
 methods: {
   /*
   * 公有方法
   */
  btnTest:function(){
   this.triggerEvent('action')
  }
 }
})
在index里引入并且展示出来
index.wxml代码
<g-btn bind:action="btnTest"></g-btn>
在index.js里加入方法btnTest()
btnTest:function(){
 console.log('g-btn is clicked now!')
}
可以看到Console栏里出现了“g-btn is clicked now!”字样
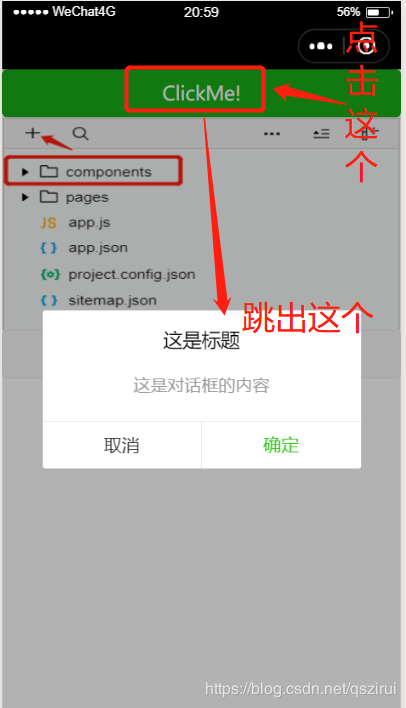
弹窗组件实例

index页面引入,直接上代码
index.wxml代码
<view class="container">
  <dialog id='dialog'
   title='这是标题'
   content='这是对话框的内容'
   cancelText='取消'
   confirmText='确定'
   bind:cancelEvent="_cancelEvent"
   bind:confirmEvent="_confirmEvent">
  </dialog>
  <button type="primary" bindtap="showDialog"> ClickMe! </button>
</view>
index.js代码
Page({
 onReady: function () {
  //获得dialog组件
  this.dialog = this.selectComponent("#dialog");
 },
 showDialog() {
  this.dialog.showDialog();
 },
 //取消事件
 _cancelEvent() {
  console.log('你点击了取消');
  this.dialog.hideDialog();
 },
 //确认事件
 _confirmEvent() {
  console.log('你点击了确定');
  this.dialog.hideDialog();
 }
})
组件dialog目录里
dialog.wxml代码
<view class='wx_dialog_container' hidden="{{!isShow}}">
  <view class='wx-mask'></view>
  <view class='wx-dialog'>
    <view class='wx-dialog-title'>{{ title }}</view>
    <view class='wx-dialog-content'>{{ content }}</view>
    <view class='wx-dialog-footer'>
     <view class='wx-dialog-btn' catchtap='_cancelEvent'>{{ cancelText }}</view>
     <view class='wx-dialog-btn' catchtap='_confirmEvent'>{{ confirmText }}</view>
    </view>
  </view>
</view>
dialog.wxss代码
.wx-mask{
position: fixed;
z-index: 1000;
top: 0;
right: 0;
left: 0;
bottom: 0;
background: rgba(0, 0, 0, 0.3);
}
.wx-dialog{
position: fixed;
z-index: 5000;
width: 80%;
max-width: 600rpx;
top: 50%;
left: 50%;
-webkit-transform: translate(-50%, -50%);
transform: translate(-50%, -50%);
background-color: #FFFFFF;
text-align: center;
border-radius: 3px;
overflow: hidden;
}
.wx-dialog-title{
font-size: 18px;
padding: 15px 15px 5px;
}
.wx-dialog-content{
padding: 15px 15px 5px;
min-height: 40px;
font-size: 16px;
line-height: 1.3;
word-wrap: break-word;
word-break: break-all;
color: #999999;
}
.wx-dialog-footer{
display: flex;
align-items: center;
position: relative;
line-height: 45px;
font-size: 17px;
}
.wx-dialog-footer::before{
content: '';
position: absolute;
left: 0;
top: 0;
right: 0;
height: 1px;
border-top: 1px solid #D5D5D6;
color: #D5D5D6;
-webkit-transform-origin: 0 0;
transform-origin: 0 0;
-webkit-transform: scaleY(0.5);
transform: scaleY(0.5);
}
.wx-dialog-btn{
display: block;
-webkit-flex: 1;
flex: 1;
-webkit-tap-highlight-color: rgba(0, 0, 0, 0);
position: relative;
}
.wx-dialog-footer .wx-dialog-btn:nth-of-type(1){
color: #353535;
}
.wx-dialog-footer .wx-dialog-btn:nth-of-type(2){
color: #3CC51F;
}
.wx-dialog-footer .wx-dialog-btn:nth-of-type(2):after{
content: " ";
position: absolute;
left: 0;
top: 0;
width: 1px;
bottom: 0;
border-left: 1px solid #D5D5D6;
color: #D5D5D6;
-webkit-transform-origin: 0 0;
transform-origin: 0 0;
-webkit-transform: scaleX(0.5);
transform: scaleX(0.5);
}
dialog.js代码
Component({
 /**
  * 组件的属性列表
  * 用于组件自定义设置
  */
 properties: {
  // 弹窗标题
  title: {      // 属性名
   type: String,   // 类型(必填),目前接受的类型包括:String, Number, Boolean, Object, Array, null(表示任意类型)
   value: '标题'   // 属性初始值(可选),如果未指定则会根据类型选择一个
  },
  // 弹窗内容
  content: {
   type: String,
   value: '弹窗内容'
  },
  // 弹窗取消按钮文字
  cancelText: {
   type: String,
   value: '取消'
  },
  // 弹窗确认按钮文字
  confirmText: {
   type: String,
   value: '确定'
  }
 },
 /**
  * 私有数据,组件的初始数据
  * 可用于模版渲染
  */
 data: {
  // 弹窗显示控制
  isShow: false
 },
 /**
  * 组件的方法列表
  * 更新属性和数据的方法与更新页面数据的方法类似
  */
 methods: {
  /*
   * 公有方法
   */
  //隐藏弹框
  hideDialog() {
   this.setData({
    isShow: !this.data.isShow
   })
  },
  //展示弹框
  showDialog() {
   this.setData({
    isShow: !this.data.isShow
   })
  },
  /*
  * 内部私有方法建议以下划线开头
  * triggerEvent 用于触发事件
  */
  _cancelEvent() {
   //触发取消回调
   this.triggerEvent("cancelEvent")
  },
  _confirmEvent() {
   //触发成功回调
   this.triggerEvent("confirmEvent");
  }
 }
})
上述内容就是微信小程序中怎么自定义一个components组件,你们学到知识或技能了吗?如果还想学到更多技能或者丰富自己的知识储备,欢迎关注亿速云行业资讯频道。
免责声明:本站发布的内容(图片、视频和文字)以原创、转载和分享为主,文章观点不代表本网站立场,如果涉及侵权请联系站长邮箱:is@yisu.com进行举报,并提供相关证据,一经查实,将立刻删除涉嫌侵权内容。