前言
现在微信小程序越来越火了,相信不少人都通过各种途径学习过微信小程序或者尝试开发,作者就是曾经由于兴趣了解开发过微信小程序,最终自己的毕业设计也是开发一个微信小程序。所以现在用这篇博客记录我之前开发的一些经验和一些心得吧。
主要内容
微信小程序项目构建
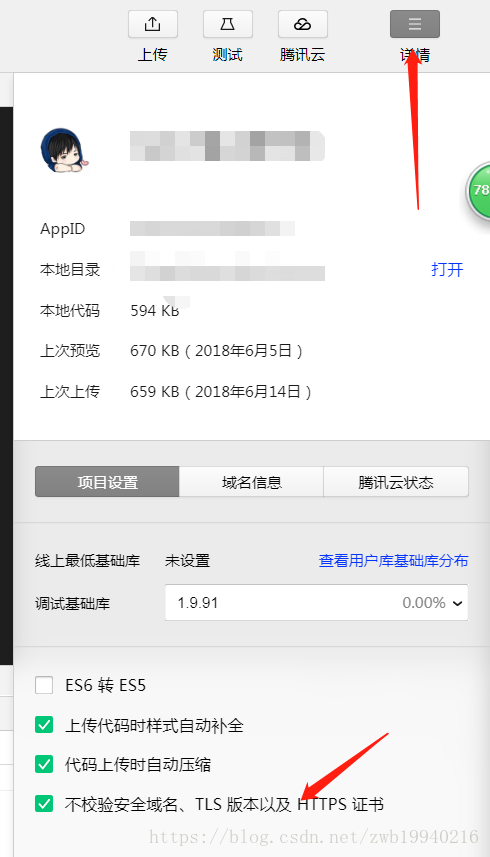
这些基础的东西我就不过多介绍,大家在刚开始开发的时候一般都没有自己的服务器及域名,所以大家在本地编写的时候,在“详细”下的“项目设置”里面将“不校验域名安全性”勾选。

至于微信小程序的组件,即前端页面的开发希望大家耐住寂寞认真在微信开发平台上,
组件:https://developers.weixin.qq.com/miniprogram/dev/component/
api:https://developers.weixin.qq.com/miniprogram/dev/api/
后端详解
我在后端编写主要是用java,当然对其他开发语言熟悉的也可以使用其他语言开发后端。现在我就java编写后端api的讲解。主要框架springboot,开发工具myeclipse,服务器阿里云服务器。
创建一个maven项目,导入相关依赖:
pom.xml依赖
 <!-- 统一版本控制 -->
	<parent>
		<groupId>org.springframework.boot</groupId>
		<artifactId>spring-boot-starter-parent</artifactId>
		<version>1.5.9.RELEASE</version>
	</parent>
	<dependencies>
		<!-- freemarker渲染页面 -->
		<!-- https://mvnrepository.com/artifact/org.springframework.boot/spring-boot-starter-freemarker -->
		<dependency>
			<groupId>org.springframework.boot</groupId>
			<artifactId>spring-boot-starter-freemarker</artifactId>
		</dependency>

		<!-- spring boot 核心 -->
		<dependency>
			<groupId>org.springframework.boot</groupId>
			<artifactId>spring-boot-starter-web</artifactId>
		</dependency>

		<!-- springboot整合jsp -->
		<!-- tomcat 的支持. -->
		<dependency>
			<groupId>org.springframework.boot</groupId>
			<artifactId>spring-boot-starter-web</artifactId>
			<exclusions>
				<exclusion>
					<groupId>org.springframework.boot</groupId>
					<artifactId>spring-boot-starter-tomcat</artifactId>
				</exclusion>
			</exclusions>
		</dependency>

		<dependency>
			<groupId>org.apache.tomcat.embed</groupId>
			<artifactId>tomcat-embed-jasper</artifactId>
		</dependency>
</dependencies>在配置文件src/main/resources/下创建application.properties文件可以修改一些配置参数等。
#jsp支持
spring.mvc.view.suffix=.jsp
spring.mvc.view.prefix=/WEB-INF/jsp/
#this is set port
#server.port=80
server.port=443
#添加ssl证书
#ssl证书文件名
server.ssl.key-store=classpath:xxxxxxx.pfx
server.ssl.key-store-password=xxxxxxxx
server.ssl.keyStoreType=xxxxxxxx在实际项目中可能涉及数据库,还要整合mybatis,在文章中,我仅仅做测试就不做使用数据库的测试。
首先创建springboot的入口程序:app.class下面贴上代码:
@ComponentScan(basePackages= "com.bin")//添加扫包@ComponentScan(basePackages= "")
@EnableAutoConfiguration
public class App{

	//启动springboot
	public static void main(String[] args) {
		SpringApplication.run(App.class, args);
	}
}启动项目时直接右击run即可。
在写一个测试的controller进行微信小程序与java后端实现通信,controller代码如下:
@RestController
@SpringBootApplication
public class ControllerText {

	@RequestMapping("getUser")
	public Map<String, Object> getUser(){
		System.out.println("微信小程序正在调用。。。");
		Map<String, Object> map = new HashMap<String, Object>();
		List<String> list = new ArrayList<String>();
 		list.add("zhangsan");
 		list.add("lisi");
 		list.add("wanger");
 		list.add("mazi");
 		map.put("list",list);
		System.out.println("微信小程序调用完成。。。");
		return map;
	}

	@RequestMapping("getWord")
	public Map<String, Object> getText(String word){
		Map<String, Object> map = new HashMap<String, Object>();
		String message = "我能力有限,不要为难我";
		if ("后来".equals(word)) {
			message="正在热映的后来的我们是刘若英的处女作。";
		}else if("微信小程序".equals(word)){
			message= "想获取更多微信小程序相关知识,请更多的阅读微信官方文档,还有其他更多微信开发相关的内容,学无止境。";
		}else if("西安工业大学".equals(word)){
			message="西安工业大学(Xi'an Technological University)简称”西安工大“,位于世界历史名城古都西安,是中国西北地区唯一一所以兵工为特色,以工为主,理、文、经、管、法协调发展的教学研究型大学。原中华人民共和国兵器工业部直属的七所本科院校之一(“兵工七子”),陕西省重点建设的高水平教学研究型大学、陕西省人民政府与中国兵器工业集团、国防科技工业局共建高校、教育部“卓越工程师教育培养计划”试点高校、陕西省大学生创新能力培养综合改革试点学校。国家二级保密资格单位,是一所以\"军民结合,寓军于民\"的国防科研高校。";
		}
		map.put("message", message);
		return map;
	}

	@RequestMapping("")
	public String getText(){
		return "hello world";
	}
}至此简易的后端框架及测试基本完成。
说明:@RestController与@Controller注解的区别@RestController相当于两个注解,它能实现将后端得到的数据在前端页面(网页)中以json串的形式传递。而微信小程序与后台之间的数据传递就是以json报文的形式传递。所以这就是选择springboot框架开发小程序后端的主要原因之一。可以方面我们进行小程序的后端开发。
小程序发起网络请求
在完成了小程序的后端开发,下面进行小程序端发起网络请求。
下面以一个简单的按钮请求数据为例:
wxml文件
<button bindtap='houduanButton1'>点击发起请求</button>
<view wx:for="{{list}}">
  姓名:{{item}}
</view>js文件
/**
  * 页面的初始数据
  */
 data: {
  list: '',
  word: '',
  message:''

 },
 houduanButton1: function () {
  var that = this;
  wx.request({
   url: 'http://localhost:443/getUser',
   method: 'GET',
   header: {
    'content-type': 'application/json' // 默认值
   },
   success: function (res) {
    console.log(res.data)//打印到控制台
    var list = res.data.list;
    if (list == null) {
     var toastText = '数据获取失败';
     wx.showToast({
      title: toastText,
      icon: '',
      duration: 2000
     });
    } else {
     that.setData({
      list: list
     })
    }
   }
  })
}主要调用的api就是wx.request,想知道将详细的介绍大家可以去微信公众平台。
接下来以搜索类型的请求为例:
wxml文件:
 <input type="text" class="houduanTab_input" placeholder="请输入你要查询的内容" bindinput='houduanTab_input'></input>
 <button bindtap='houduanButton2'>查询</button>
 <view wx:if="{{message!=''}}">
  {{message}}
</view>js文件:变量的定义见上一个js文件
//获取输入框的内容
 houduanTab_input: function (e) {
  this.setData({
   word: e.detail.value
  })
 },
 // houduanButton2的网络请求
 houduanButton2: function () {
  var that = this;
  wx.request({
   url: 'http://localhost:443/getWord',
   data:{
    word: that.data.word
   },
   method: 'GET',
   header: {
    'content-type': 'application/json' // 默认值
   },
   success: function (res) {
    console.log(res.data)//打印到控制台
    var message = res.data.message;
    if (message == null) {
     var toastText = '数据获取失败';
     wx.showToast({
      title: toastText,
      icon: '',
      duration: 2000
     });
    } else {
     that.setData({
      message: message
     })
    }
   }
  })
}至此已经完成了简易的微信小程序端与java后端进行通信。
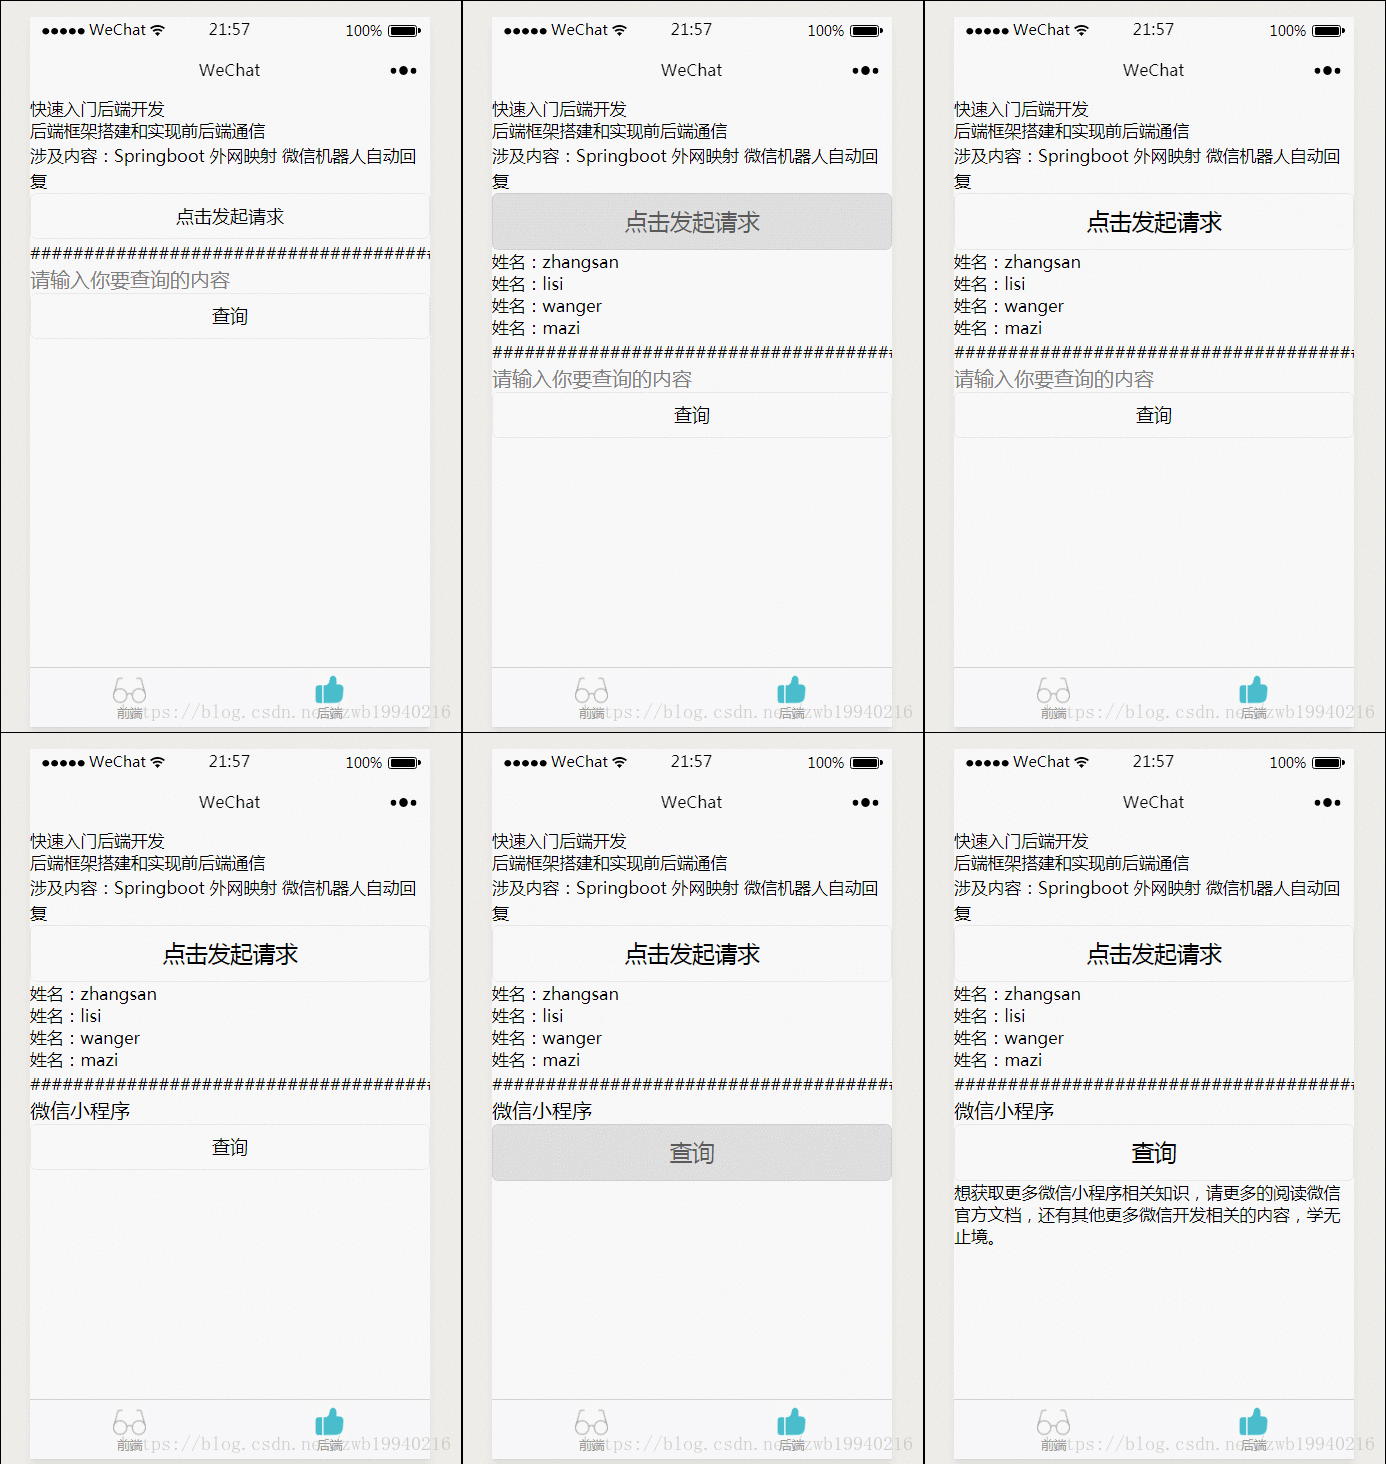
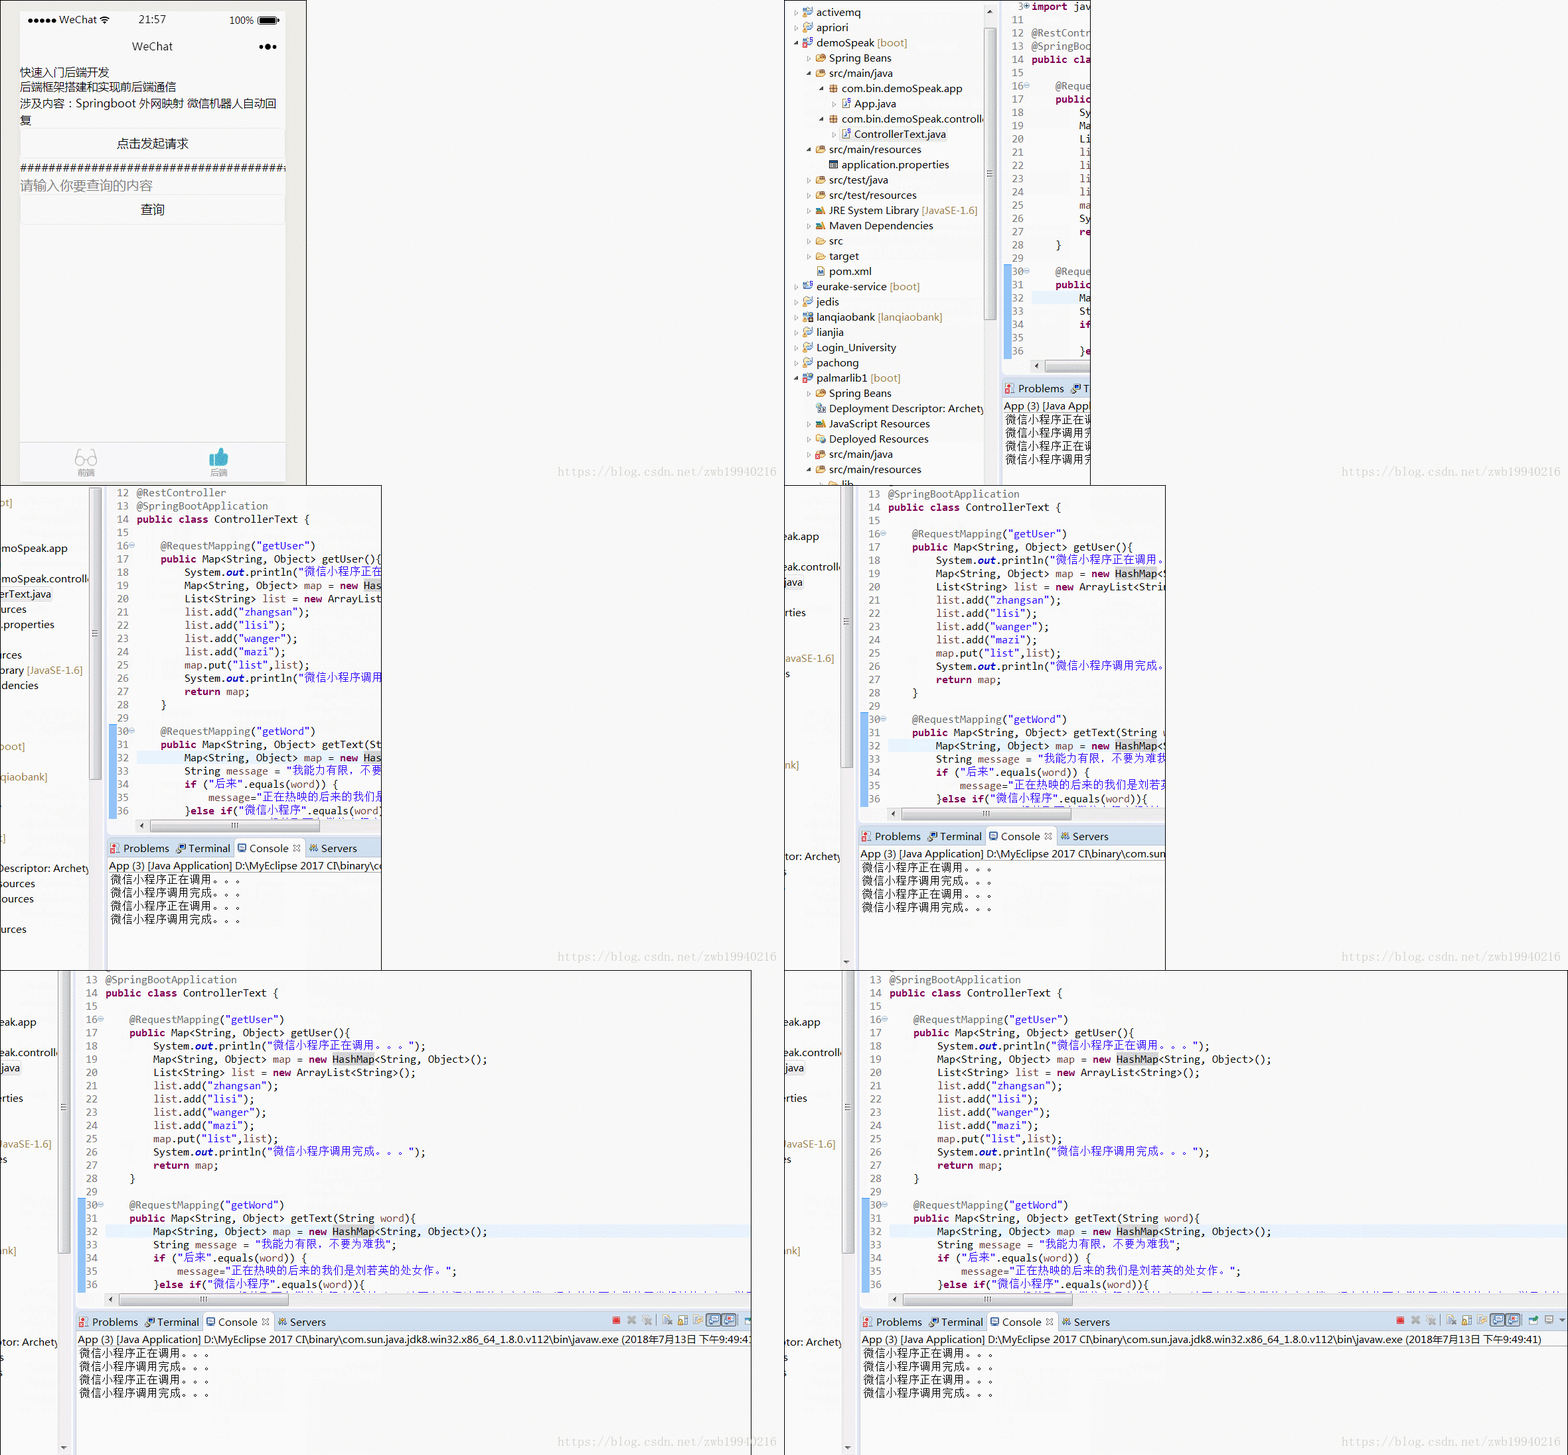
现在可以在启动后端项目在微信开发工具上进行测试。
演示效果:


所以至此已经完成了小程序的前后端通信。
https申请
其实也不算什么申请,在购买域名之后可以申请免费的ssl证书,在前面的配置文件application.properties中有证书的配置,将证书的pfx文件直接添加到后端项目下即可。
购买服务器部署后端api代码
对于springboot项目,本人建议打jar,直接在服务器上部署即可,在服务器上只需要安装对应版本的jdk即可。项目部署命令:
我购买的是阿里云的轻量级应用服务器部署的。比较划算吧。
运行命令: nohup java -jar helloworld.jar &
nohup的意思不挂服务,常驻的意思,除非云服务器重启,那就没法了;最后一个&表示执行命令后要生成日志文件nohup.out。
当然还可以使用java -jar helloworld.jar
源码:java-wechat_jb51.rar
到此这篇关于微信小程序+后端(java)实现开发的文章就介绍到这了,更多相关微信小程序java开发内容请搜索亿速云以前的文章或继续浏览下面的相关文章希望大家以后多多支持亿速云!
亿速云「云服务器」,即开即用、新一代英特尔至强铂金CPU、三副本存储NVMe SSD云盘,价格低至29元/月。点击查看>>
免责声明:本站发布的内容(图片、视频和文字)以原创、转载和分享为主,文章观点不代表本网站立场,如果涉及侵权请联系站长邮箱:is@yisu.com进行举报,并提供相关证据,一经查实,将立刻删除涉嫌侵权内容。